What Happens After BGP?
Gaining Full Path Visibility in Hybrid Cloud Networks In the modern enterprise, Border Gateway Protocol (BGP) plays a foundational role in connecting distributed networks. It is the routing protocol that...

Each icon on a Dynamic Network Map is not just a picture, but a smart object. These smart objects combine to form a mathematical data model which is created by a deep network discovery. Once network discovery is complete, you can interactively guide NetBrain to construct a custom map, for any task, with a few clicks.

Dynamic Maps powered by network discovery
Dynamic Network Maps are fundamentally differed than static network diagrams. The biggest difference is that every icon on a Dynamic Map is a digital twin of a live network device. You can interact with the icon directly to get information from the device or you can leverage NetBrainls CLI automation to extract virtually infinite detail from each device on a map to provide real time analytics.
Icons on a Static Diagram vs. Dynamic Map
A recurring network discovery called a benchmark will keep smart objects up-to-date when the live network changes. Whenever an existing map is opened, the underlying smart objects will update automatically. The historic record of these benchmarks also powers NetBrain’s change analysis engine, which can help you find recent changes in topology, routing, CLI data, and much more.
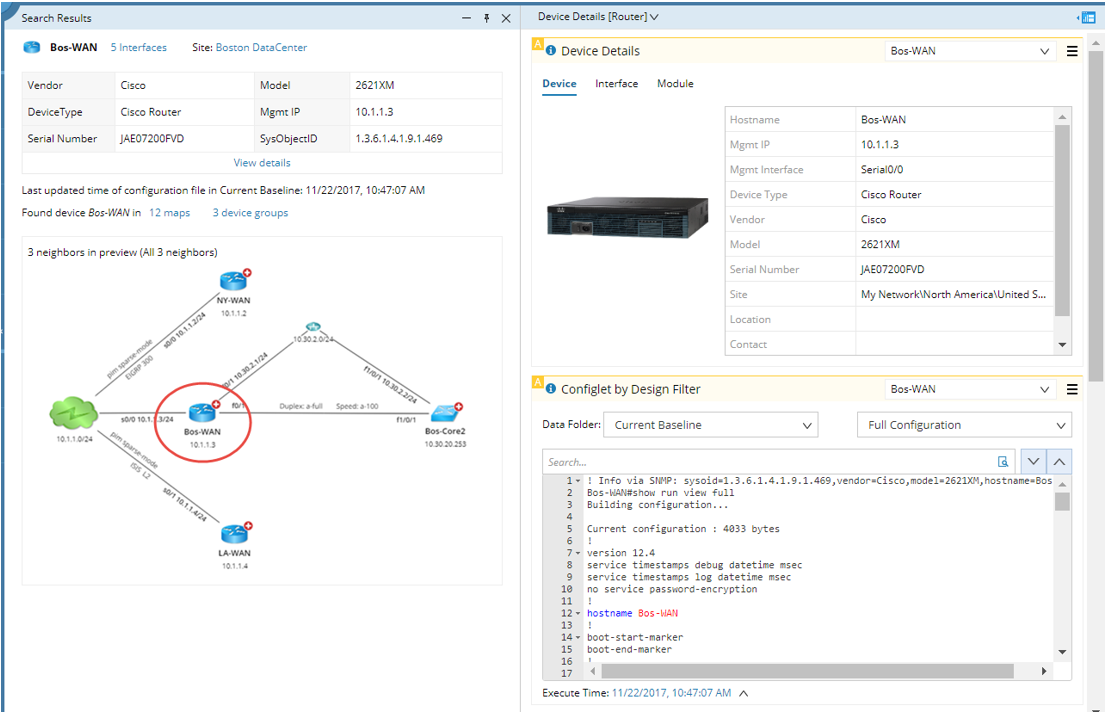
Summary View of a Single Smart Object (Router Called “Bos-Wan”)
NetBrain’s discovery engine is one of the most advanced in the industry – both in terms of its speed and depth of discovery. NetBrain discovers more than just the network’s topology, but also the underlying design and configuration.
NetBrain collects data from your network the same way you do, through the command line interface (using SSH or telnet). So you’ll need to enter your SSH and Telnet credentials. Don’t worry, NetBrain keeps these safely encrypted.
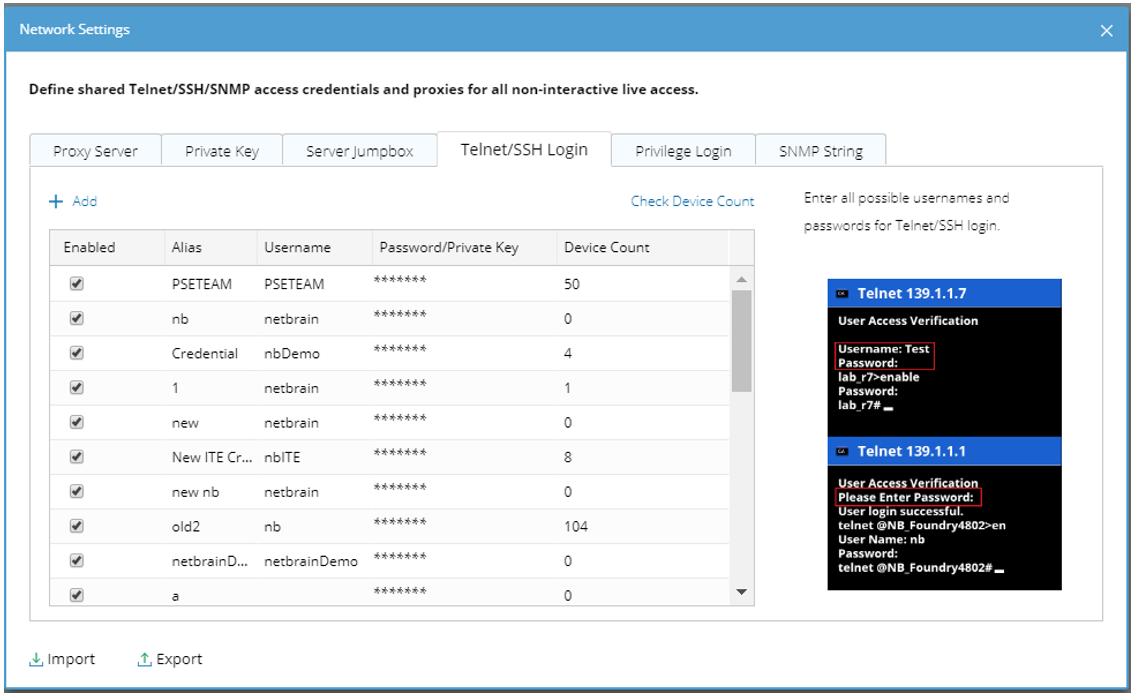
Define Device Login Credentials
Since NetBrain is a multi-vendor platform, it uses SNMP (v1, v2, or v3) to get the SysObjectID from each device it discovers. This helps to distinguish a Cisco Router vs. a Palo Alto Firewall. NetBrain needs this information so it knows the right CLI syntax to use when collecting configuration data.
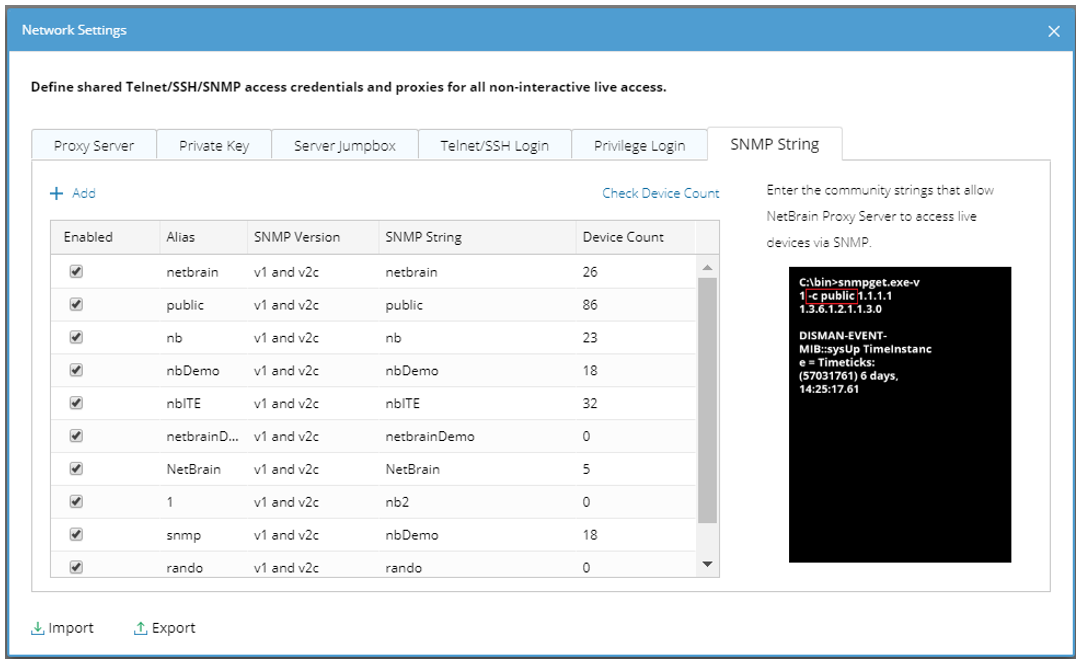
Define SNMP Read-Only Community Strings
There are several ways to discover your network, but the most simple and powerful way is to leverage the neighbor-walking discovery algorithm. Just provide the IP address of a core router or switch and NetBrain will leverage CDP/LLDP to discover and log into all connected neighbors recursively.
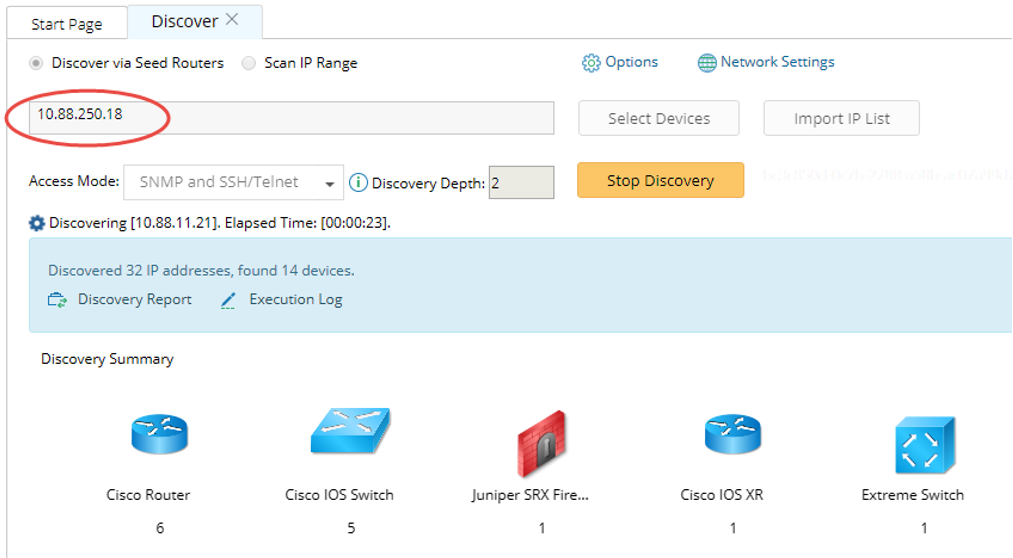
Start Discovery with a Single IP Address
NetBrain’s neighbor-walking algorithm is incredibly efficient – discovering about 2,000 network devices per hour. When the discovery is complete NetBrain will automatically create a mathematical model of the entire network. You’re ready to map and automate!
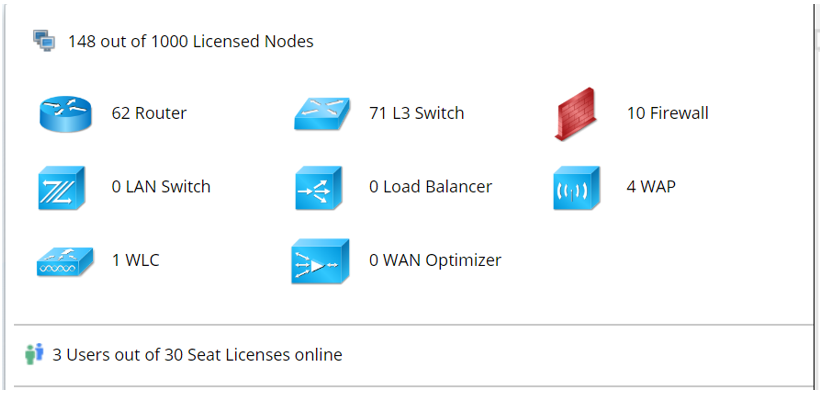
Discovered Network Devices
A benchmark can be scheduled at any frequency – daily, weekly, monthly – to ensure the data model is always up-to-date. During the benchmark, NetBrain will also collect detailed layer-2 data including MAC, ARP, CDP, STP tables and much more.
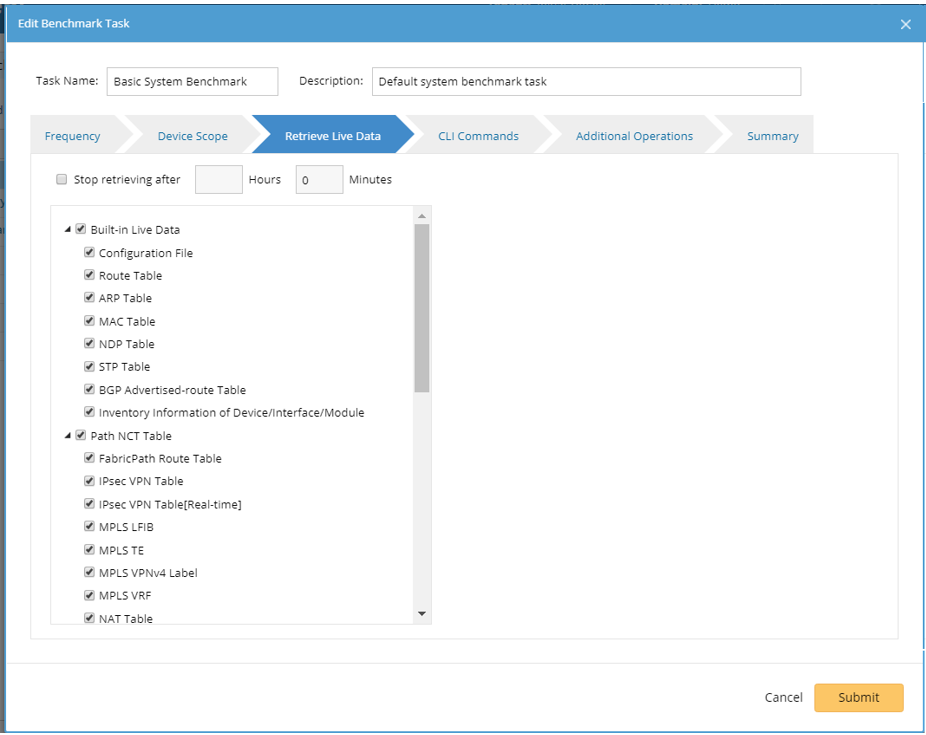
Retrieve Live Network Data via Benchmark
With the discovery behind you, you’re ready to see your network like never before!