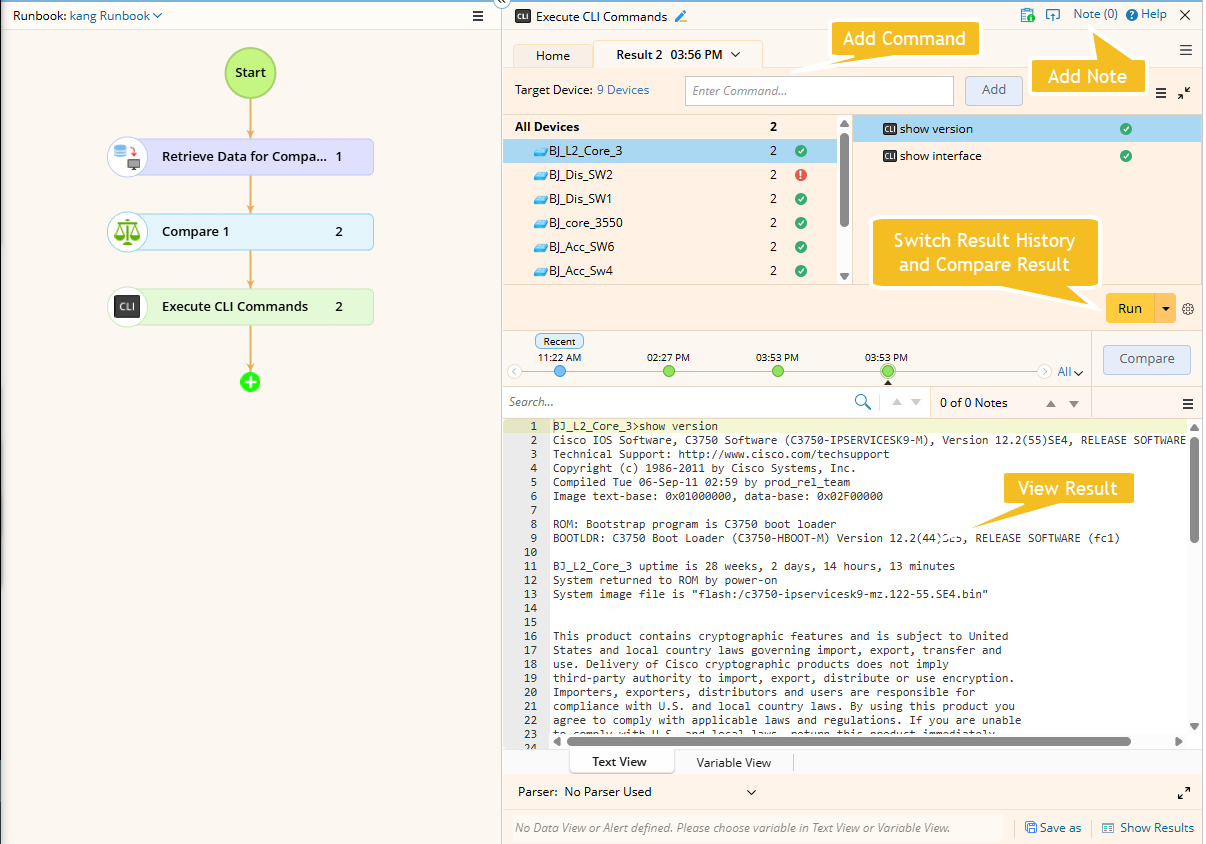
Execute CLI Commands
CLI automation is used to retrieve device data by executing specified CLI commands. This automation action is highly customizable, and you can execute different commands on different devices, including but not limited to the existing devices on a map.
In addition, you can use a parser to parse key metrics from the outputs, monitor them on a map, and see the displayed alert if the target parser variable deviates from the Golden Baseline. You can also compare CLI command outputs from different times to view their differences.
Main use flow is as follows:
- Execute CLI Commands
- Viewing and Saving CLI Output
- Storing the Results and define Target Device Qualification
-
Execute CLI Overview 1:
-
Execute CLI Overview 2:

Executing CLI Commands from a Map
You can execute CLI commands directly from a map using the Runbook feature.
-
Open the Execute CLI Commands Node:
On the map, right-click and select Execute CLI Commands from the context menu. The Runbook pane opens with the Execute CLI Commands node automatically added.

Tip: If a runbook is already open, the Execute CLI Commands node will be added to the current Runbook. Otherwise, it will be added to the personal Runbook. -
Add CLI Commands:
In the left pane, select All Devices and enter the command in the input field. Click Add to apply it to all target devices.

-
Load CLI Templates: To import the predefined commands from CLI templates, go to
 icon > Load CLI Templates. See CLI Template for more details.

- Schedule CLI Commands: Select the option to configure execution time. By default, all devices with commands from the current node will be loaded to the scheduled task.
Note: To define rules for CLI commands, navigate to System Management > Advanced Settings. -
Load CLI Templates: To import the predefined commands from CLI templates, go to
-
Execute:
Click Run to execute the commands. Also, you can set the execution frequency from
 to recur the execution. By default, Run Once is selected.

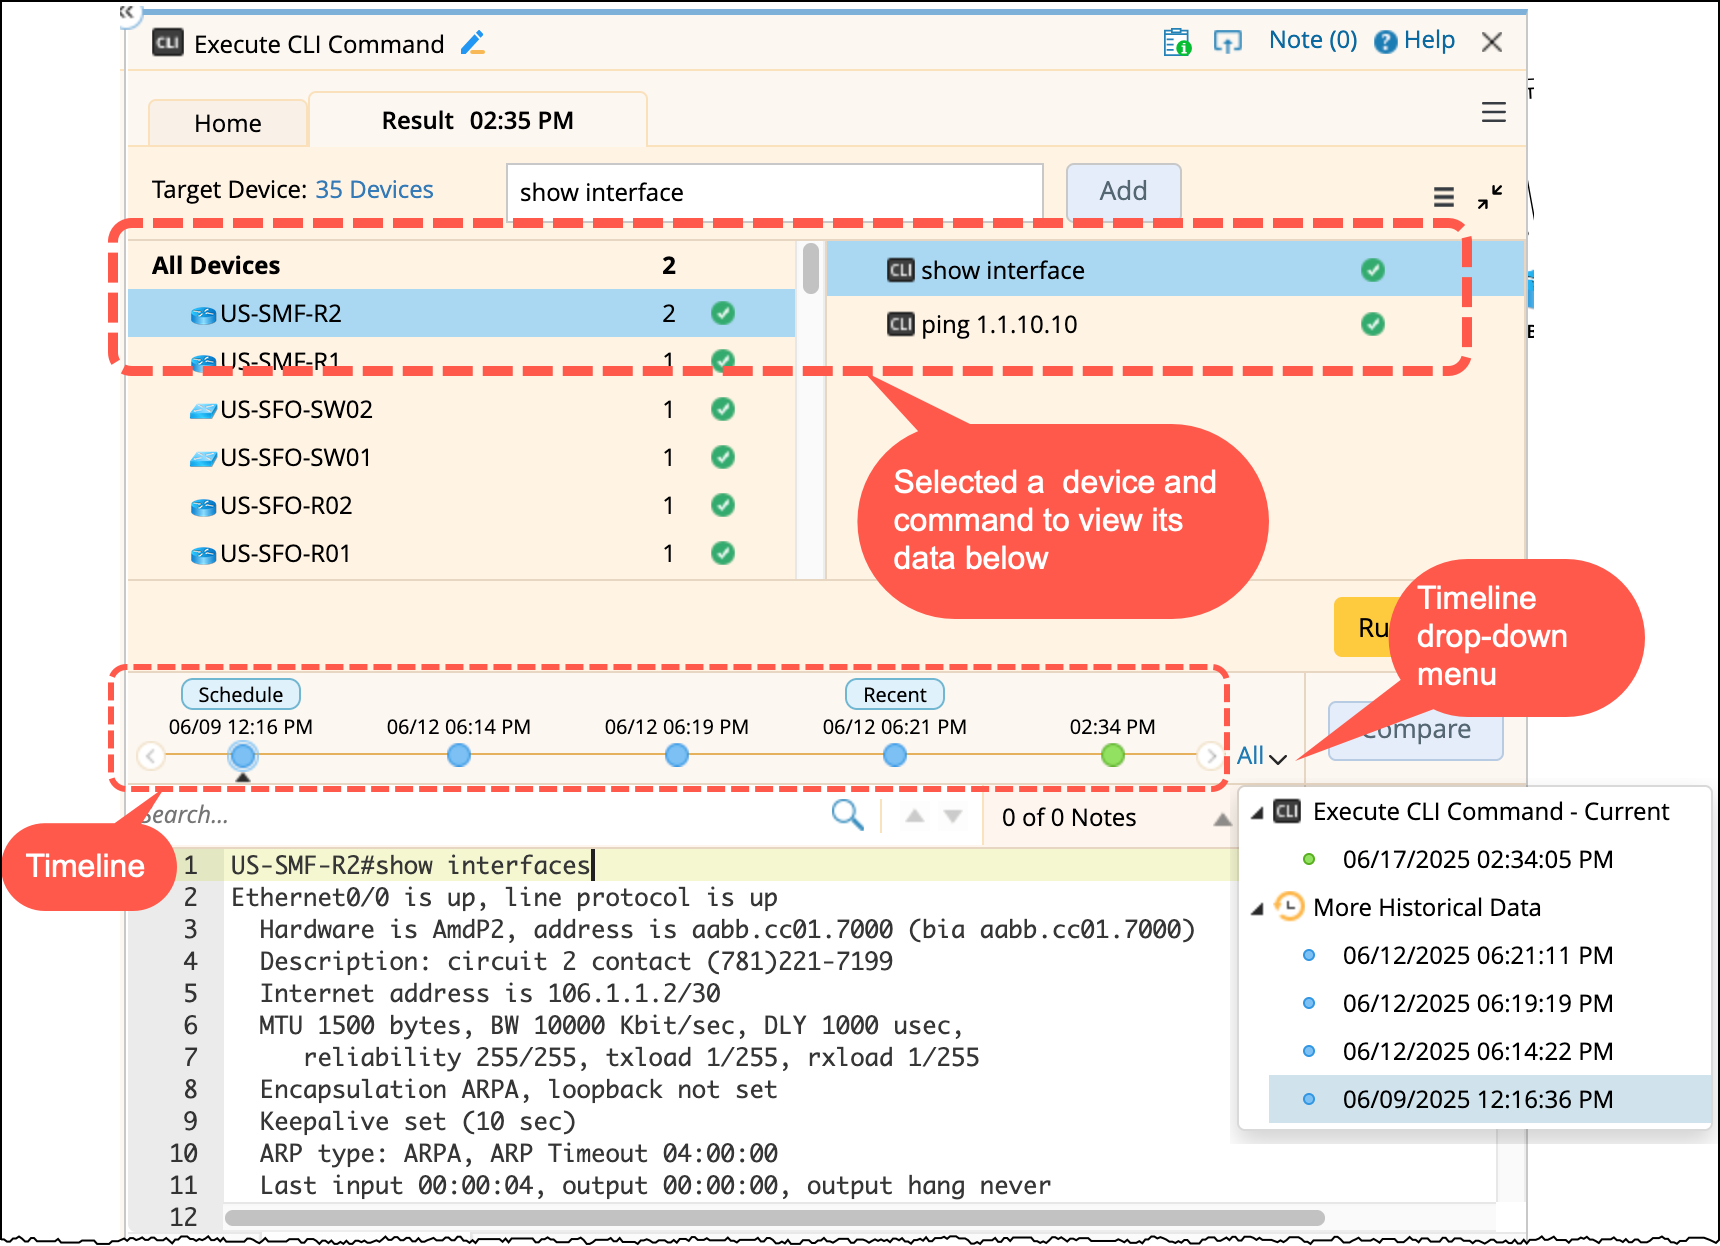
Viewing and Saving CLI Output
After execution, select a device and a CLI command to view its output. To view or compare historical data:
- Click a timestamp on the timeline, or
-
Select a timestamp from the timeline drop-down menu.
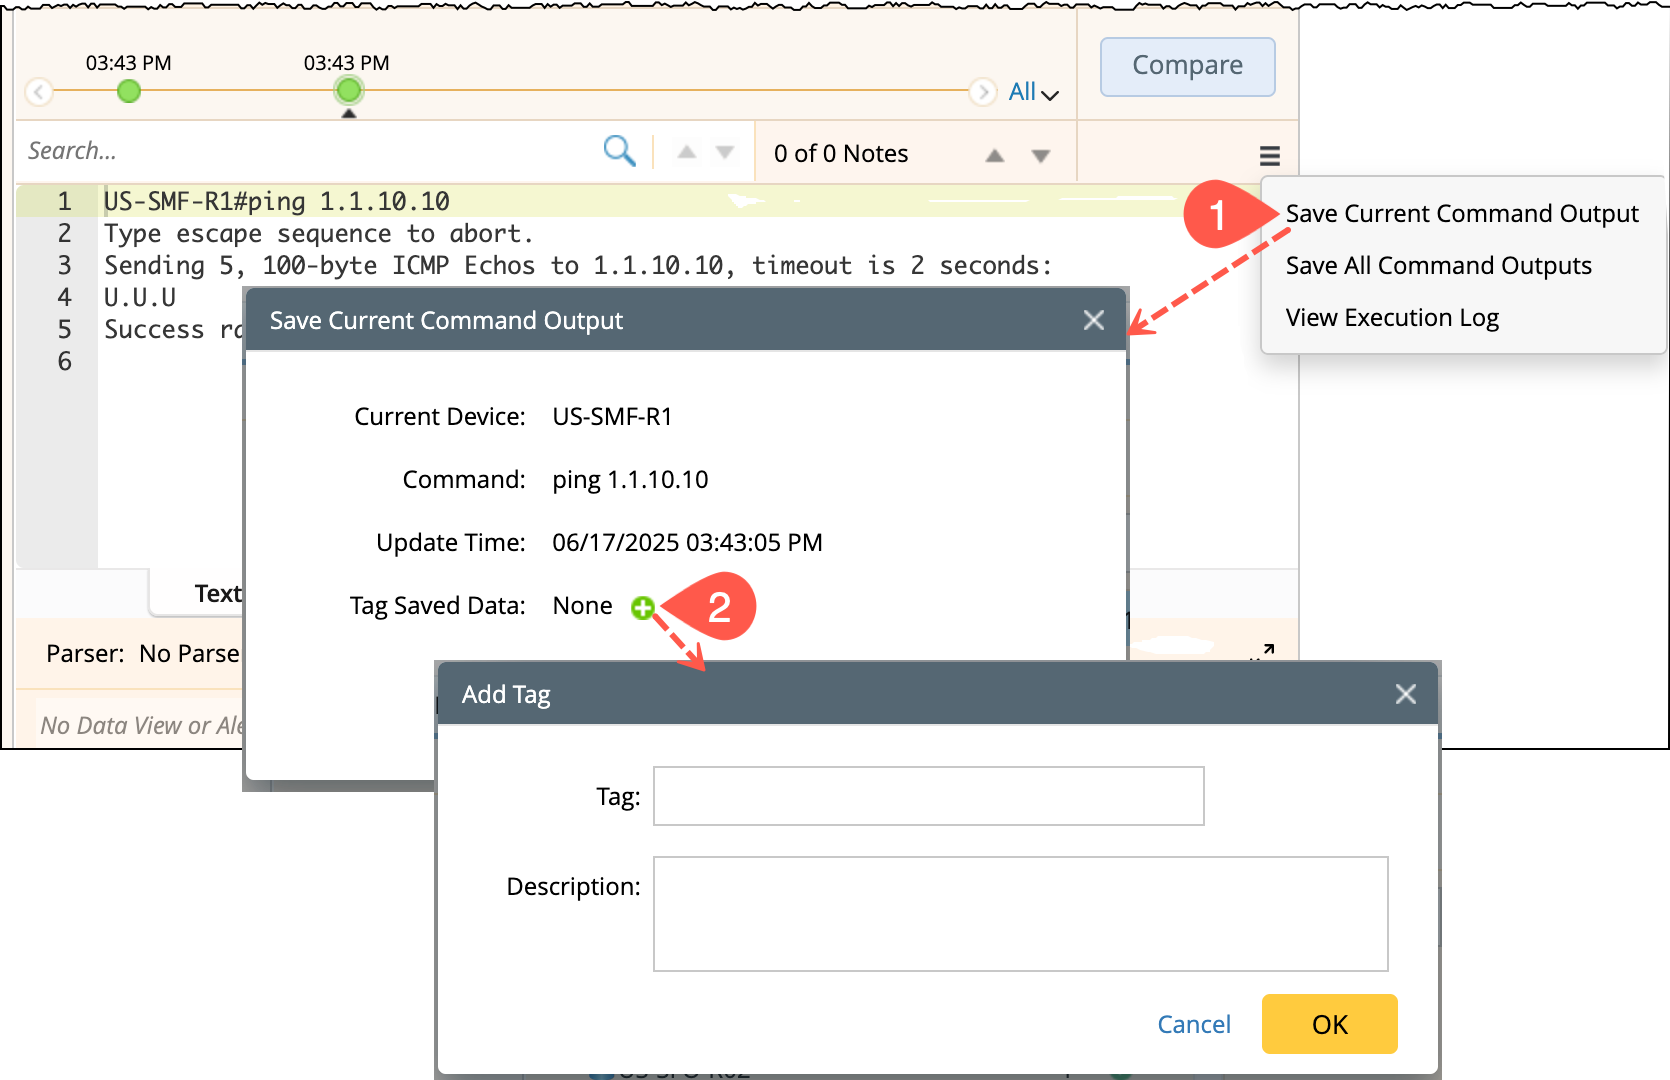
Saving CLI Command Output: To reuse command output data for quickly identifying and referencing relevant outputs in future tasks, you can save the command outputs:
-
Open the
 menu and choose Save Current Command Output for the selected device.
-
Add a tag to describe the purpose or meaning of the data.
Storing the Results and Define Target Device Qualification
You can save a node results and share the execution flow with other devices defining the target devices from the CLI command node ![]() as detailed below:
as detailed below:
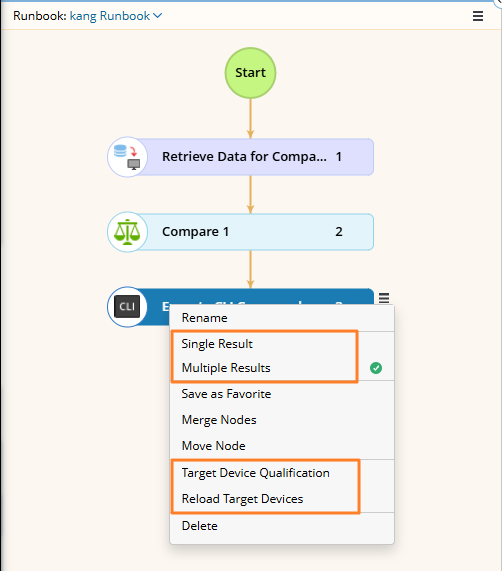
Define Target Qualification:
To share a node with other devices, you must first define the target devices. By default, the node applies to all existing devices on the current map. To customize the target devices:
-
Open the
 menu and click the Target Device Qualification. This sets a node-level qualification, meaning the selected devices apply only to this specific node.
-
Refine Target Devices:
- Use the dynamic method to filter devices based on criteria from the current map.
- Use the static method to manually add specific devices.
Note: If you select the Ignore devices on the map for input check box, you can only use the static method to manually add devices as input.
- Click Reload Target Devices to apply the qualification and update the device list accordingly.
Controlling the Number of Results:
You can specify the number of results of the node to be stored by selecting one of the following options:
-
Single Result: Only the most recent result is retained. Each new execution overwrites the previous result, ensuring the node maintains a single up-to-date result.

-
Multiple Results: Each execution generates a new result, preserving historical outputs for tracking and comparison.

See also: