R12.1-JA-2025June05
Use Network Intent Node
If you want end users to execute an intent self-containing the target devices and diagnosis logics, which doesn't require end users to provide any input data for the intent execution, then use the intent node.
Example: Define Chatbot to Execute NY_DC1 Network Check Automations
In this example, you can create a chatbot so end users can chat with the bot without accessing the NetworkBrain System and execute the pre-defined automation to ensure everything works as expected.
Pre-requisites
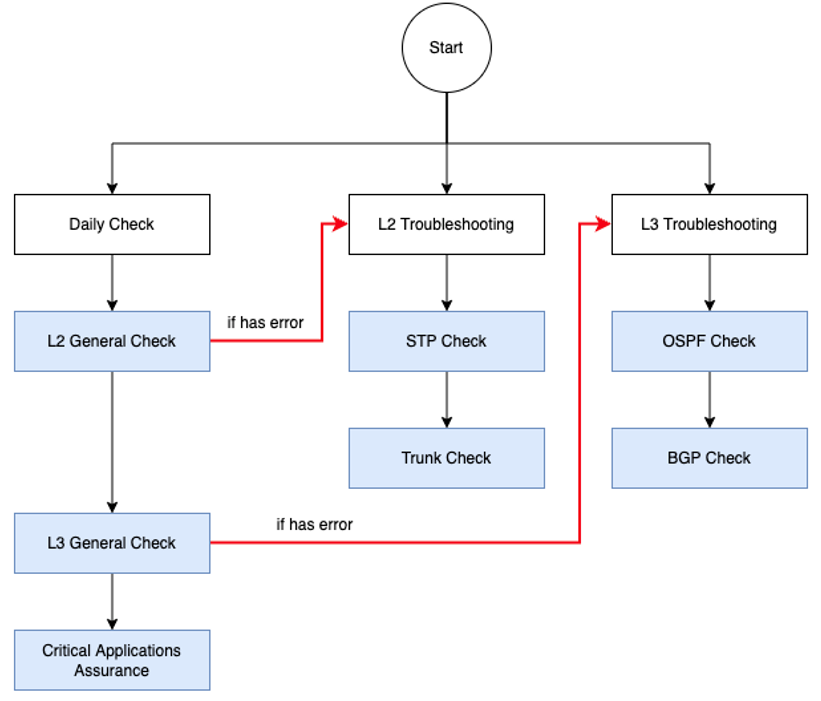
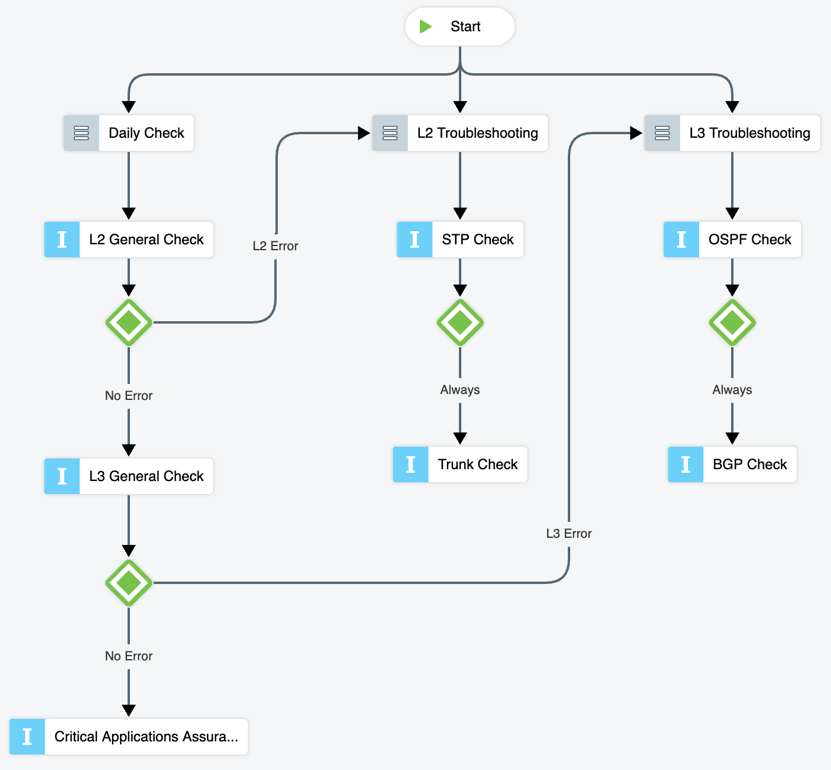
- Consider what needs to be checked for NY_DC1 network, for example, you can create some intents for the daily check, some for L2 troubleshooting, and some for L3 troubleshooting.
- For daily check:
- L2 General Check Intent
- L3 General Check Intent
- Critical Applications Assurance Intent
- When L2 General Check has errors, we need to do L2 Troubleshooting. For L2 troubleshooting:
- STP Check Intent
- Trunk Check Intent
- When L3 General Check has errors, we need to do L3 Troubleshooting. For L3 troubleshooting:
- OSPF Check Intent
- BGP Check Intent
- For daily check:
- Design the conversation flow. You can draft it on a piece of paper.
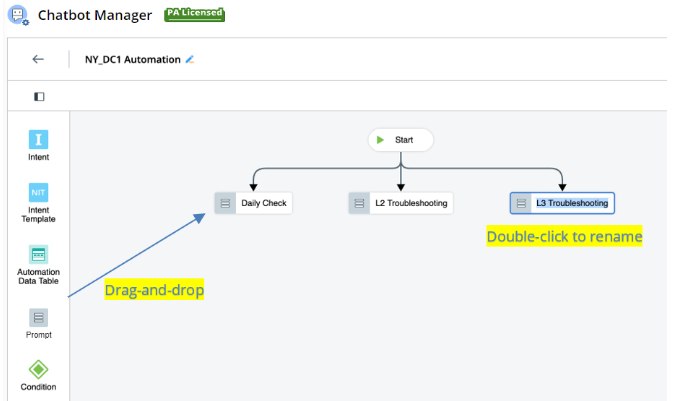
Create a Bot
- Define the basic settings.
- Drag and drop a prompt node to the flowchart as the conversation guide, and double-click the node to name it Daily Check.
- Repeat step 2 and name the prompt node as L2 Troubleshooting.
- Repeat step 2 and name the promot node as L3 Troubleshooting.
- Drag and drop an intent node to the flowchart, associate it with the L2 General Check intent, and link it with the Daily Check prompt node.

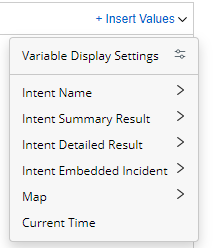
- You can customize the node output.
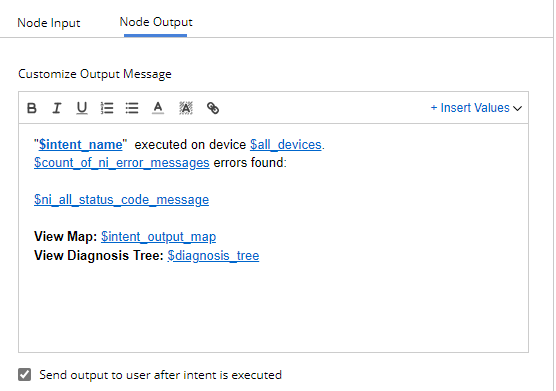
- Node output means what end users see or how to display the execution result after the intent is executed.
- Node output can be customized by inserting various variables, so the output message can be more meaningful and straightforward for end users.
- Add another intent node and associate it with L3 General Check intent.
- Link the L3 General Check intent with the L2 General Check one.
- Select Always True for the condition node that appears between two intent nodes. Always True means there is no condition, and the system will execute the next step directly.

Note: Two intent nodes must be linked via a condition node. 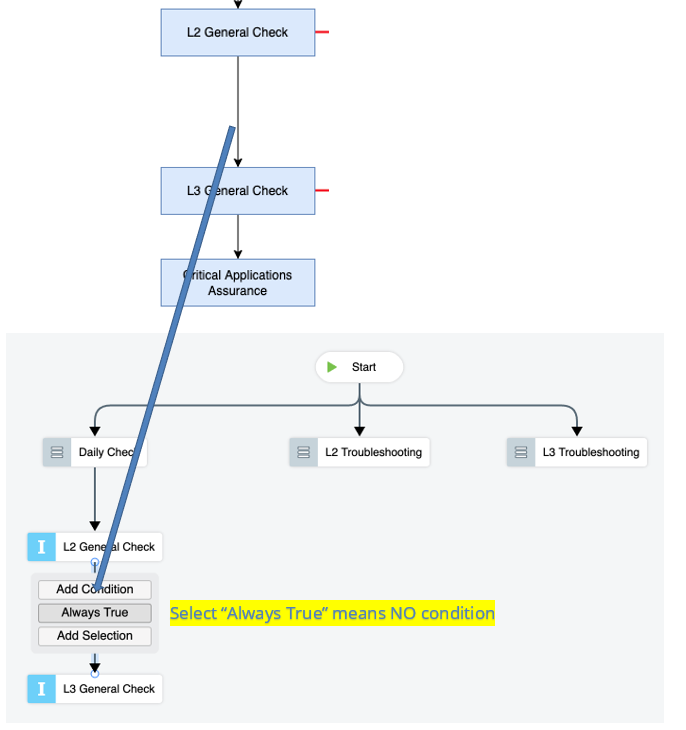
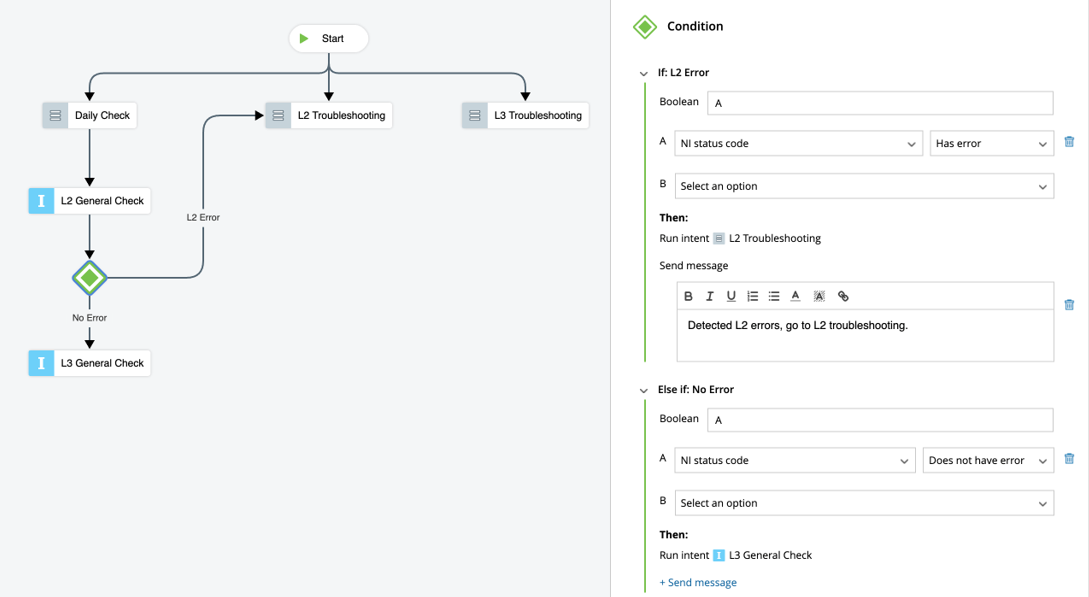
- When errors are detected in L2 General Check intent, we need to do L2 Troubleshooting. To define this flow:
- Link the condition node (added in step 9) with the L2 Troubleshooting prompt node.
- Define the condition node. If the NI status code has errors, then run the L2 Troubleshooting prompt node. If the NI status code does not have an error, then run L3 General Check intent.
- Add the Critical Applications Assurance intent node, and link it with the L3 General Check intent. Define the condition node as Always True.
- Under the L2 Troubleshooting prompt node, add and link the STP Check intent node. Add the Trunk Check intent node, and link the two intent nodes with an Always True condition node. Refer to step5-9.
- Under the L3 Troubleshooting prompt node, add and link the OSPF Check intent node. Add the BGP Check intent node, and link the two intent nodes with an Always True condition node. Refer to step5-9.
- When errors are detected in L3 General Check intent, we need to do L3 Troubleshooting. Link the condition node under the L3 General Check intent node with the L3 Troubleshooting prompt node. Refer to step 10.
You can now enable and share the chatbot.
See also: