Edit the Chatbot
If you configure the chatbot in Bot Wizard, you can navigate to the Chatbot Manager and modify it in the full editor:
- If you used the Automation Data Table method: Edit in the ADT Node
- If you used the Intent Template method: Edit in the NIT Node
- If you want to modify the automation result output: Define Output with Prompt Nodes
Edit in the ADT Node
- Navigate to the Chatbot Manager, and select the chatbot.
- Click Edit and select the ADT node.

- Edit the ADT node.
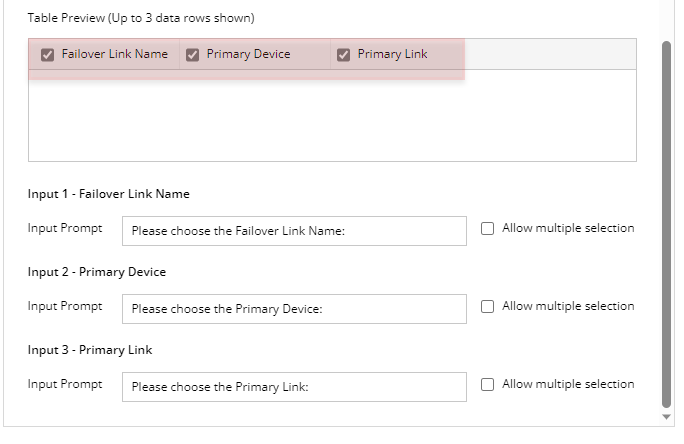
Example: When multiple input columns are selected:In Bot Wizard Where to Edit in Full Editor 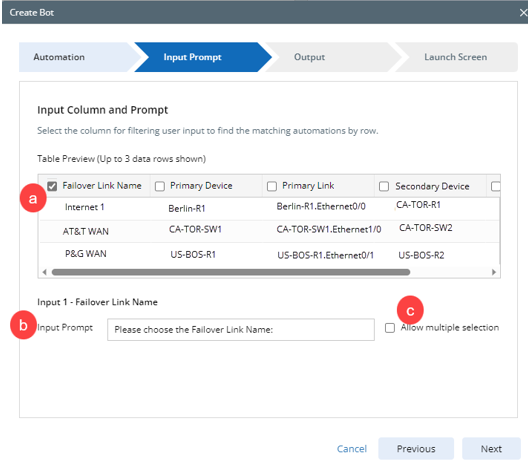
a. Input Column
b. Input Prompt
c. Whether allow multiple selection for end users

The Candidate Value Source will be generated automatically:
- Automation Data Table will be selected.
- The value candidates are from the selected column in the same ADT. In this example: From the Failover Link Name column in the Failover Links Check ADT.
Automation Actions:
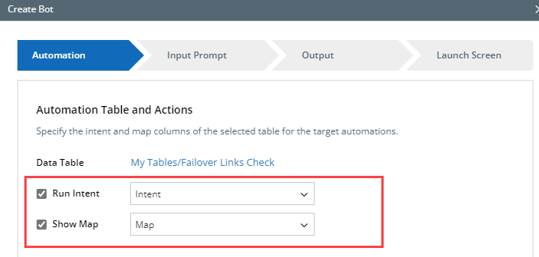
In ADT node settings:
 In Bot Wizard
Power users select Failover Link Name, Primary Device, Primary Link columns and define the input prompts.
In Full Editor In the ADT node, A, B, C use the selected columns as the conditions.
The Boolean will be A and B and C.

How ADT rows are filtered by end user’s input Example: Select Application Name and Path Name as the input columns.
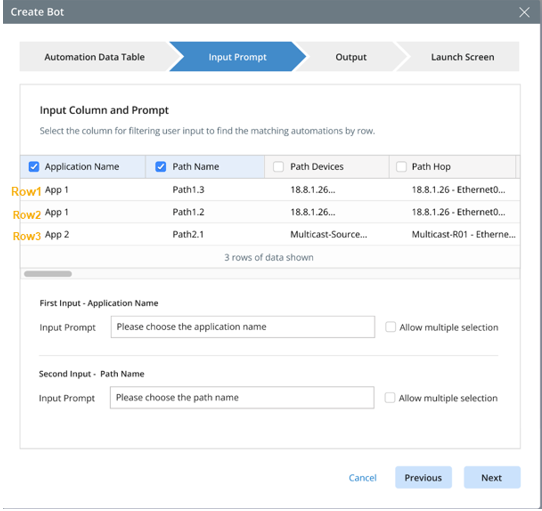
- End user selects App1 when prompted to choose the application name.
- Chatbot: Row 1 and Row 2 will be matched and passed to the second prompts as the candidate values.
- Chatbot prompts end users to choose the path name and provide Path1.3 and Path1.2 as the candidate values.
- End user selects Path1.3
Result: Row 1 will be matched, and the selected intent and map in Row1 will be executed.
Edit in the NIT Node
- Navigate to the Chatbot Manager, and select the chatbot.
- Click Edit and select the NIT node.

- Edit the NIT Node.
In Bot Wizard Where to Edit in Full Editor Power users do not need to define input devices. The bot wizard will use the decoded devices as the candidate values for end users to choose from. In NIT node settings:

Power users do not need to configure Macro Variable even if it’s defined in the NIT.
Bot Wizard can recognize how the value of Macro Variable is assigned in the selected auto intent: which ADT column is used to pass the value to which Macro Variable.
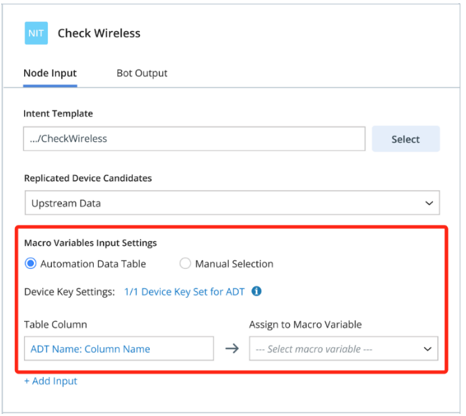
Macro Variable Input Setting:
Automation Data Table: Enabled.
Table Column: can be from the used ADT column or a different ADT column.
Define Output with Prompt Nodes
To avoid overwhelming end users with excessive result information, you can customize the main output and the sub output. The main output can include only essential result messages. For a more in-depth view of the detailed results, end users can click the sub output buttons to access the specific information they are interested in.
- Navigate to the Chatbot Manager, and select the chatbot.
- Click Edit.
Where to Edit in Full Editor 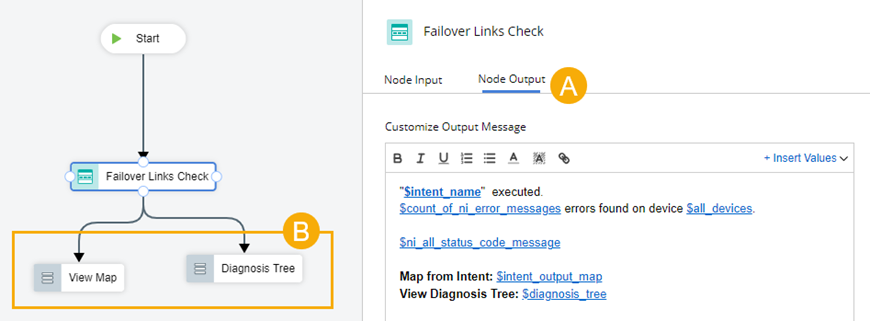
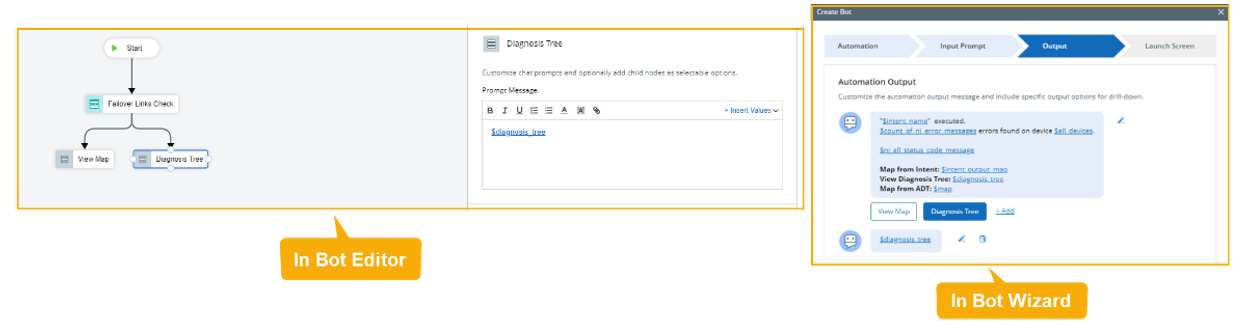
A main output in the full editor: The Node Output of the Failover Links Check ADT node.
B sub output in the full editor: The View Map and Diagnosis Tree prompt nodes.
In Bot Wizard 
A: Main Output
B: Sub Output Buttons. Click +Add to add a sub output button.- These sub output buttons can be added:
- View Map
- Diagnosis Tree
- Status Code Summary
- NI Error Message
- Device Error Message
- The message content can be adjusted in the Bot Wizard or in the full editor:
In Chat Console 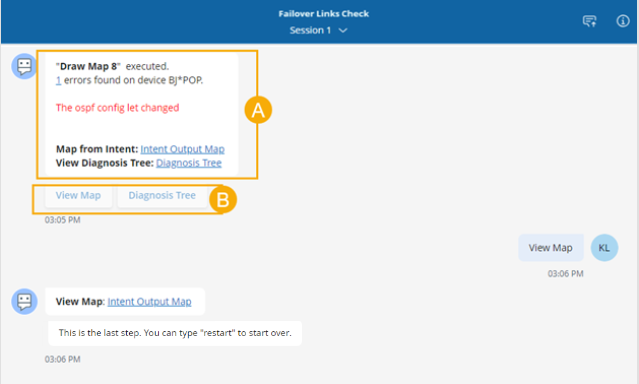
- These sub output buttons can be added:
See also: