R12.1-JA-2025June05
Create Chatbot from Intent Template
Basic steps to create a chatbot from Intent Template in Bot Wizard:
- Configure Input: Select an auto intent as an intent template and specify the prompt.
- Customize output: the automation result output message.
- Customize the launch screen.
Example: Create a chatbot to guide end users to draw the multicasting tree of the source/group that end users interactively specify and execute multicasting diagnosis.
Prerequisites
Prepared the Multicasting Map and Diagnosis intent with the macro variables source and group defined. Install it to Auto Intent and decode it at least once.
Main Steps
-
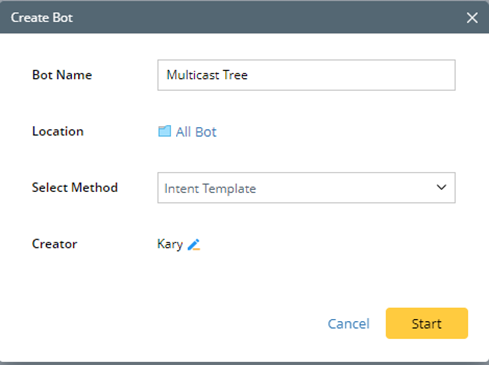
Enter the bot name, select the location to store the chatbot, and modify the creator if needed.
-
Select an auto intent and specify the input prompt.

- Select an intent template from the installed auto intent list. (Only the installed auto intent will be listed)
- Enter the message prompts end users to provide input.
- Specify whether end users provide input by making single or multiple selections.
-
Customize the output.

Tip: Mode details: Edit the Chatbot 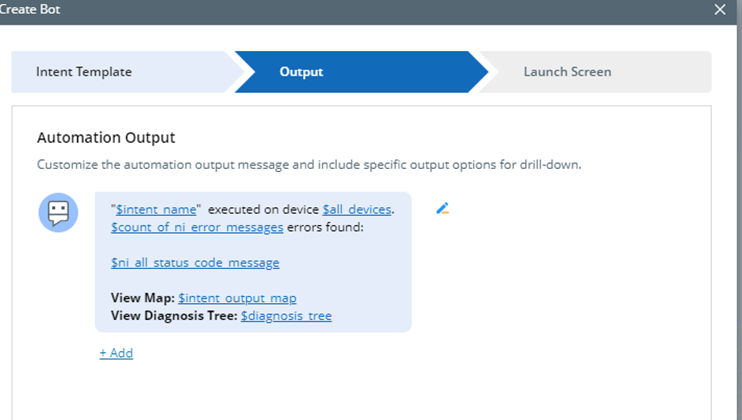
-
Customize the launch screen.
Tip: More details: Customize the launch screen in Create Chatbot from ADT
Post-tasks
-
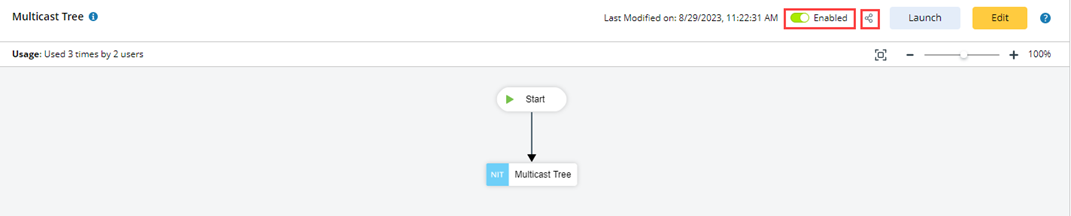
Launch the chatbot and test it.
Tip: The chatbot creator can launch the chatbot without enabling the public access, so they can test if it works accordingly before sharing it with others. -
Enable and share the chatbot with others.
-
Edit the chatbot in full editor when needed.
Tip: If you need to modify the chatbot configured in Bot Wizard, you need to navigate to the Chatbot Manager, and modify the chatbot in the full editor.