R12.1 JA-2025July15
Work on Map Stencil
To enhance map interactivity or add contextual information, use the Stencils feature. Stencils allow you to insert visual elements such as shapes, text, tables, and device icons directly onto the map. These elements can help document or organize your network layout more effectively.
Follow the steps below to add stencils to a map:
-
On the map page, select Stencils from the Map toolbar to open the stencil toolbox

-
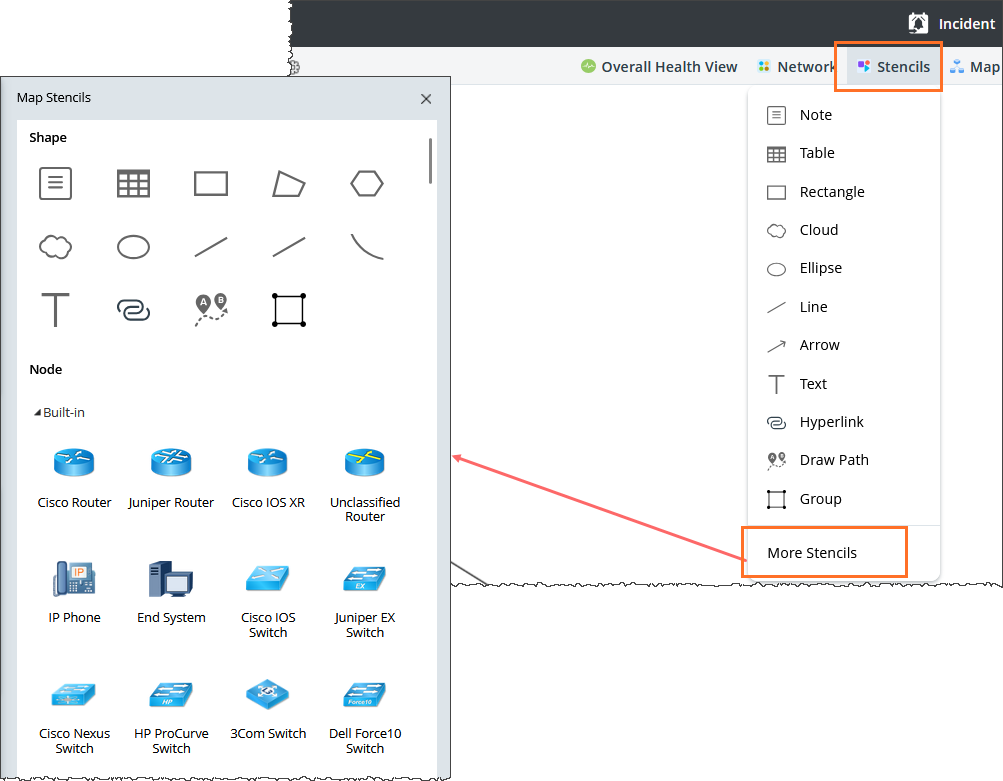
To view additional stencil options, select More Stencils. The Map Stencils pane opens and includes two types of stencils:
- Shape - Includes various geometries such as text, links, tables, and lines..
- Node - Includes device icons categorized as:

|
Note: To draw a link between two elements (for example, devices, LAN, cloud, or notes), use the Line stencil to manually connect them. The connecting link appears as a line between the selected elements. |
-
Built-in - Default device icons provided by NetworkBrain.
-
Customized - Icons you upload based on your needs. This category is empty by default.
- Select a shape to draw directly on the map, or drag a device icon from the Node category onto the map.
Using Map Stencils
You can use various stencils to enhance your map with shapes and tables. The following example demonstrate how to a stencil type.Example: Draw a rectangular shape
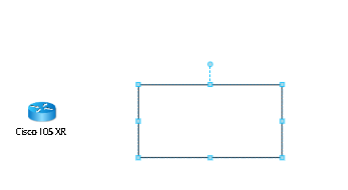
- In the Map Stencils pane, select the Rectangle shape.
-
On the map, hold and drag your mouse to draw the rectangle. Release the mouse when the desired size is reached
-
Click the rectangle to enter text inside the shape.
-
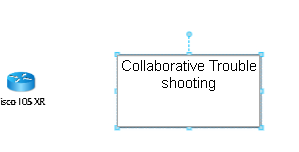
Adjust the rectangle as needed:
- To resize the shape, click and drag its edges or corners.
- To edit the text, double-click the shape.
-
For device icons, Point to the device type (for example, Cisco Router0), and then click the edit icon to rename the device.
See also: