Creating a Discovery Task

Contents
A scheduled network discovery can discover new devices from your network and then add them to your domain automatically, and enable you to check the latest status of your network devices on a regular basis. With the scheduled discovery task, you can get to know any newly added devices, decommissioned devices and more.
1.Log into Domain Management page.
2.In the Domain Management page, select Operations > Discovery/Benchmark Task from the quick access toolbar.
3.On the Discovery/Benchmark Task tab, click Add Discovery Task.
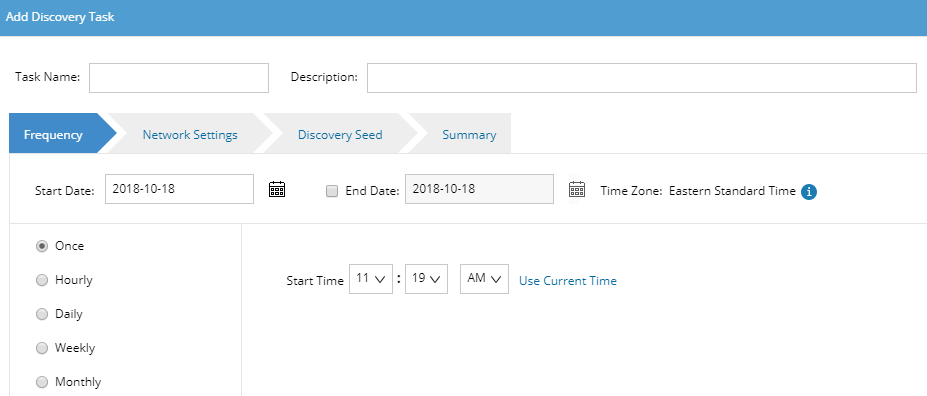
4.Enter the task name and description.
5.Follow the tabs in the wizard to configure the settings for the task.
▪Frequency — specify the execution frequency for the task. By default, it is Once.
▪Network Setting — select the proxies and credentials to be used in the discovery.
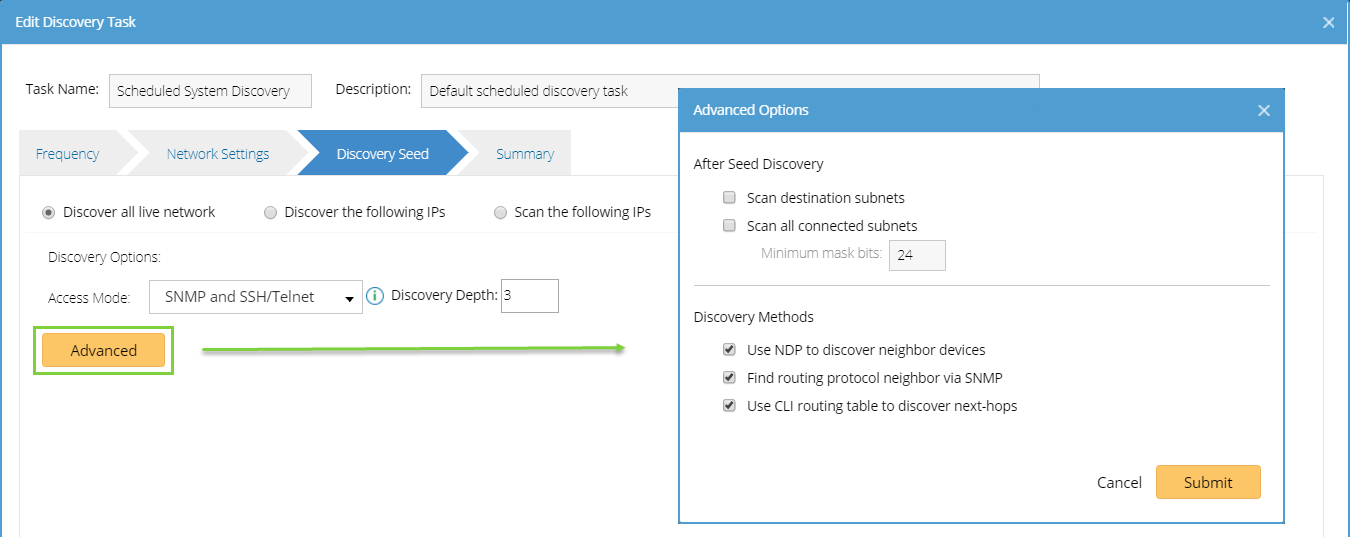
▪Discovery Seed — select a discovery method and then configure the related options.

It takes all devices in the domain as seeds to discover new devices by neighbor spreading until the discovery depth is reached. ➢Access Mode: ▪SNMP and Telnet — retrieve vendor and model information of devices via SNMP first, and then log into devices by using Telnet to retrieve live data. ▪SNMP and SSH — retrieve vendor and model information of devices via SNMP first, and then log into devices by using SSH to retrieve live data. ▪SNMP and Telnet/SSH — retrieve vendor and model information of devices via SNMP first, and then log into devices by using Telnet to retrieve live data; if Telnet doesn't work, then use SSH. ▪SNMP and SSH/Telnet — retrieve vendor and model information of devices via SNMP first, and then log into devices by using SSH to retrieve live data; if SSH doesn't work, then use Telnet. ▪SNMP Only — retrieve live data via SNMP only. Note: The data retrieved via SNMP only might be incomplete. ➢Discovery Depth — set the discovery depth by entering a value between 0 and 255. ➢Advanced Options: ▪Scan destination subnets — continue to scan all destination subnets in the route tables of the devices that are discovered in the last depth. Note: The option is only available when the option Use CLI routing table to discover next-hops is selected. ▪Scan all connected subnets — continue to scan all directly connected subnets of the devices that are discovered in the last depth. oMinimum mask bits — scan subnets with mask exceeding the threshold. The default value is 24 and can be configured between 22 and 32. ▪Use NDP to discover neighbor devices — discover neighbor devices by looking up NDP table. ▪Find routing protocol neighbor via SNMP — retrieve routing protocol (such as BGP, EIGRP, and OSPF) neighbors via SNMP. ▪Use CLI routing table to discover next-hops — discover neighbor devices from route tables retrieved by CLI commands. |
It takes the IP addresses you input as seeds to discover new devices by neighbor spreading until the discovery depth is reached. To configure the settings, see Discover all live network for more details. |
It only scans the IP addresses you added to the scanning table. 1)Select an access mode according to the configuration on your devices. ▪SNMP and Telnet — retrieve vendor and model information of devices via SNMP first, and then log into devices by using Telnet to retrieve live data. ▪SNMP and SSH — retrieve vendor and model information of devices via SNMP first, and then log into devices by using SSH to retrieve live data. ▪SNMP and Telnet/SSH — retrieve vendor and model information of devices via SNMP first, and then log into devices by using Telnet to retrieve live data; if Telnet doesn't work, then use SSH. ▪SNMP and SSH/Telnet — retrieve vendor and model information of devices via SNMP first, and then log into devices by using SSH to retrieve live data; if SSH doesn't work, then use Telnet. ▪SNMP Only — retrieve live data via SNMP only. Note: The data retrieved via SNMP only might be incomplete. 2)Click Add to input the IP address and live access credentials. ▪Use designated credentials to discover only — if selected, the system will only use the input credentials to access devices; if not selected, the system will try the access credentials in the Network Settings after failed through the input access credentials. |

▪Summary — check your configurations.
6.Click Submit. The newly added task is enabled by default.
Tip: After the Discovery task is executed, the system will automatically rebuild IPv4 Layer 3 topology and synchronize with sites.
See also: