Configure Network Settings

Contents
NetBrain Network Settings collects all the credentials used to access live devices and retrieve device data. Only the users who have the privilege to manage the domain can configure and share the Network Settings.
1.Log in to the Domain Management page.
2.In the Domain Management page, select Operations > Discover Settings > Network Settings from the quick access toolbar.
3.On the Network Settings tab, enter all available credentials of your network devices and jumpbox server information in the corresponding tabs.
Configuring Front Servers
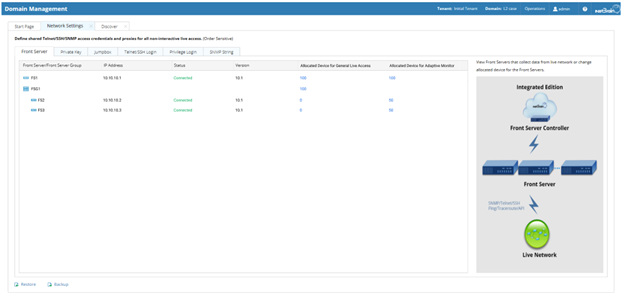
NetBrain Front Server provides Ping/SNMP/Telnet/SSH/Traceroute proxy services to access your live network and collect live data. Once a device is successfully discovered by a Front Server, it will be automatically allocated to the Front Server or the Front Server Group for future live access.
Example: Existing Front Servers and Front Server Groups are displayed. The Allocated Devices column displays the number of devices managed by the Front Server or Front Server Group for device live access, such as Discovery, Benchmark or Runbook; The Allocated Devices for Preventive Automation displays the number of devices managed by the Front Server for Preventive Automation.
To reallocate devices to a Front Server or Front Server Group, select either way of the following.

1.In the Allocated Devices or Allocated Devices for Preventive Automation column, click the number in the target entry. 2.In the pop-up dialog, click +Device. 3.Filter devices by device type, device group or site. 4.Select the target devices by pressing the Ctrl or Shift key, and then click the 5.Click OK. |
1.In the Allocated Devices column, click the number in the target Front Server Group that the devices have been allocated to. 2.In the pop-up dialog, select the devices that you want to reallocate. 3.Right-click the selected devices, and then select Move to Group. |
Tip: The Status column shows the connection status between Front Servers and their Front Server Controller.
Tip: For Preventive Automation, the collected data is stored on Front Server, so it is necessary to manually migrate the data after reallocating the Front Server for Preventive Automation.
Adding a Front Server Group for Load Balancing
If multiple Front Servers serving the same tenant can access the same devices, you can group the Front Servers for load balancing. A Front Server Group can automatically coordinate the data retrieval tasks among its Front Server members in the tenant and flexibly adjust the task assignment for device live access. It brings the following advantages:
•Avoid long waiting when a Front Server is busy.
•Improve the efficiency of data retrieval.
Tip: Front Server Group cannot provide load balancing function for Preventive Automation.
1.Log in to the System Management page.
2.In the System Management page, select the Front Server Controllers tab.
3.In the Front Server Controller Manager, select the tenant that the target Front Server serves.
4.Point to a Front Server entry under the tenant, and then click the ![]() icon to select Edit from the from-down menu.
icon to select Edit from the from-down menu.
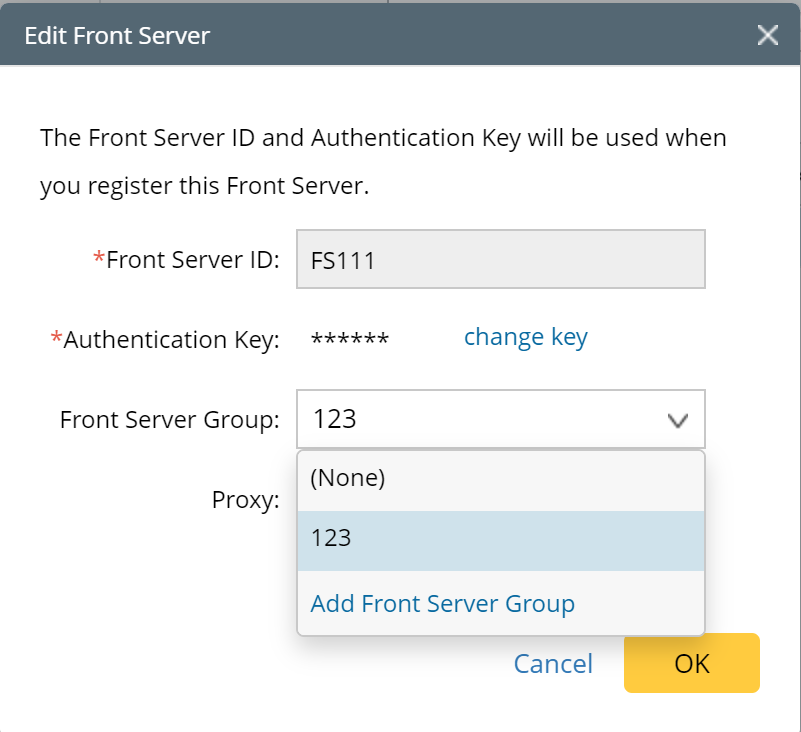
5.In the Front Server Group drop-down menu, select Add Front Server Group.
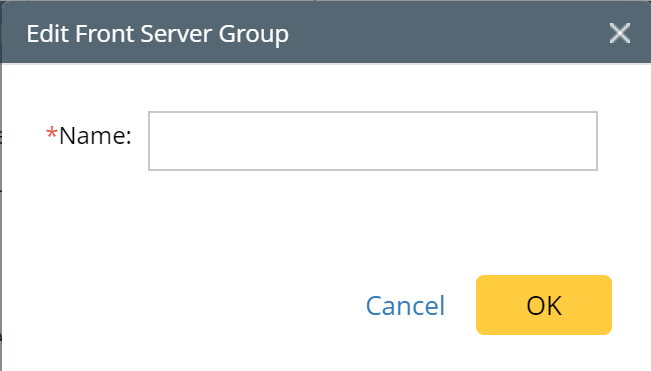
6.In the Edit Front Server Group dialog, enter the group name and click OK.
7.In the Edit Front Server dialog, select the group from the Front Server Group drop-down menu.
8.To assign another Front Server to the group, point to the Front Server entry and then click the ![]() icon to select Edit.
icon to select Edit.
Note: To move the allocated devices of the Front Servers to the Front Server Group, go to Domain Management > Network Settings. See Configuring Network Settings for more details.
Configuring Private Key
The following SSH private key types are supported in the system to access your network devices:
▪SSHv1 RSA key
▪SSHv2 RSA key
▪SSHv2 DSA key
1)Click the Private Key tab.
2)Click Add to open the Private Key Settings dialog box.
3)Enter an alias and click Browse to import your SSH private key file.
4)Enter a passphrase twice if your private key is encrypted.
5)Click OK.
Repeat step 2) ~ 5) to add more entries if required.
Configuring Jumpbox
If NetBrain Front Server cannot access your live network directly, you can configure a Jumpbox. The Front Server accesses the Jumpbox first and then retrieve live data via the Jumpbox.
1)Click the Jumpbox tab.
2)Click Add to open the following dialog box and enter the required information.
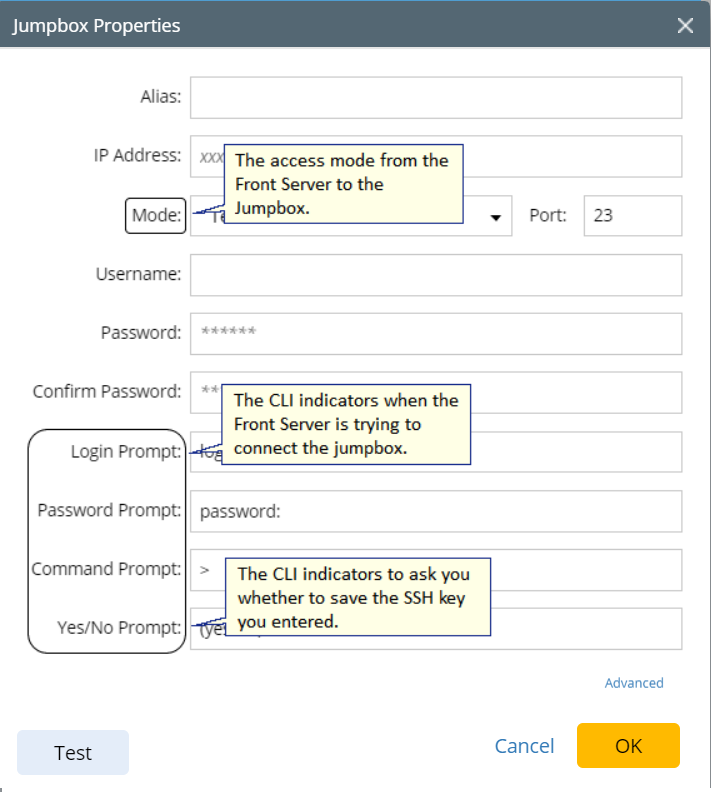
Note: When a Front Server is attempting to access the Jumpbox, you will be asked to enter the required credentials of the Jumpbox followed by the CLI indicators.
3)If your network devices require special commands to access via Telnet or SSH, or require an additional set of credentials, you can click Advanced to configure more settings.
4)Click Test to check whether the connection between the Jumpbox and the Front Server is working.
5)Click OK.
Configuring Telnet/SSH Login
1)Select the Telnet/SSH Login tab.
2)Click Add to open the Telnet/SSH Login dialog box.
3)Select the authentication method, enter or select the non-privilege login credentials, and click OK.
Repeat step 2) and step 3) to add more entries if required.
Tip: The system polls these credentials in order when discovering network devices. To sort the order, right-click the target entry and select Move To Top or Move To Bottom.
Configuring Privilege Login
The privilege login credentials refer to the passwords used to enter the enable mode. With these credentials, the system can issue CLI commands on live devices.
1)Click the Privilege Login tab.
2)Click Add to open the Privilege Login dialog box.
3)Enter the access credentials and click OK.
Repeat step 2) and step 3) to add more entries if required.
Tip: The system polls these credentials in order when discovering network devices. To sort the order, right-click the target entry and select Move To Top or Move To Bottom.
Configuring SNMP Read-Only Community String
1)Click the SNMP String tab.
2)Click Add to open the SNMP Setting dialog box.
3)Select the version of SNMP and enter the required credentials, and then click OK.
Repeat step 2) and step 3) to add more entries.
Tip: The system polls these credentials in order when discovering network devices. To sort the order, right-click the target entry and select Move To Top or Move To Bottom.
Further operations:
To back up your current network settings, you can export the setting files to your local folder. Note: The export and import functions do not support the information about Front Servers or Front Server Groups. Click Backup at the bottom of the Network Settings tab page. The default location for exported maps is C:\Users\<your username>\Downloads. The exported files include: When you want to restore these settings, you can import these files to the Network Settings tab page. |

To refresh the device count to check how many devices are using the same credentials. 1)Select a tab. 2)Click Check Device Count. |
1)Select the Telnet/SSH Login or the Privilege Login tab. 2)Right-click an entry and then select Add to Device Group from the drop-down menu. 3)Click 4)Edit the device group name and description based on your needs. 5)Click OK. |

See also:
▪Managing Live Access Settings