Intent Timer based ADT Intents Execution
Some ADTs may not be triggered by looking glass probes or primary probes. Instead, you can use the intent timer to run the intents of the ADT table periodically. Configure the ADT to be triggered by the intent timer with the following steps:
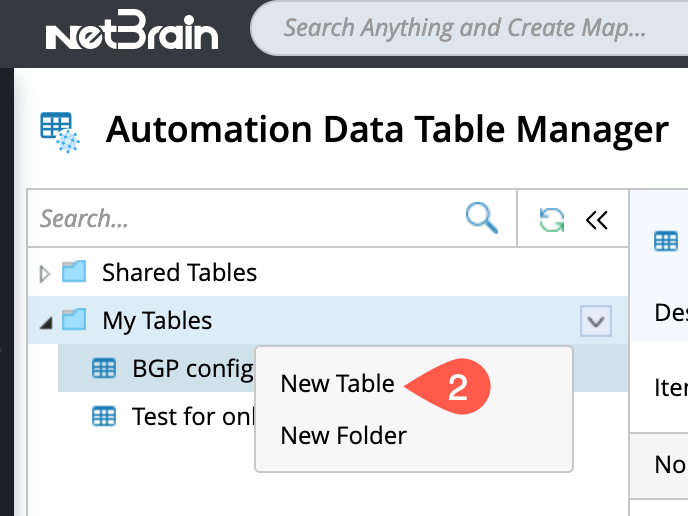
Create an ADT
- Open the Automation Data Table by searching for it in the Start menu.
-
In the My Tables folder, create a new table and give it a name that describes its purpose. For instance, named it as BGP Config Check.
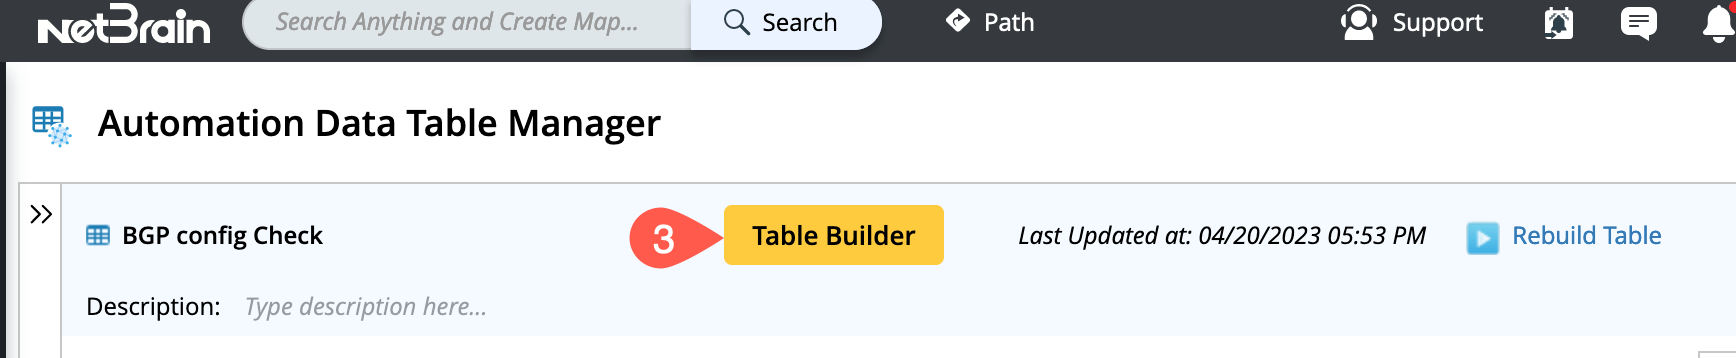
- Click on the Table Builder button to open the Automation Data Table Builder window.
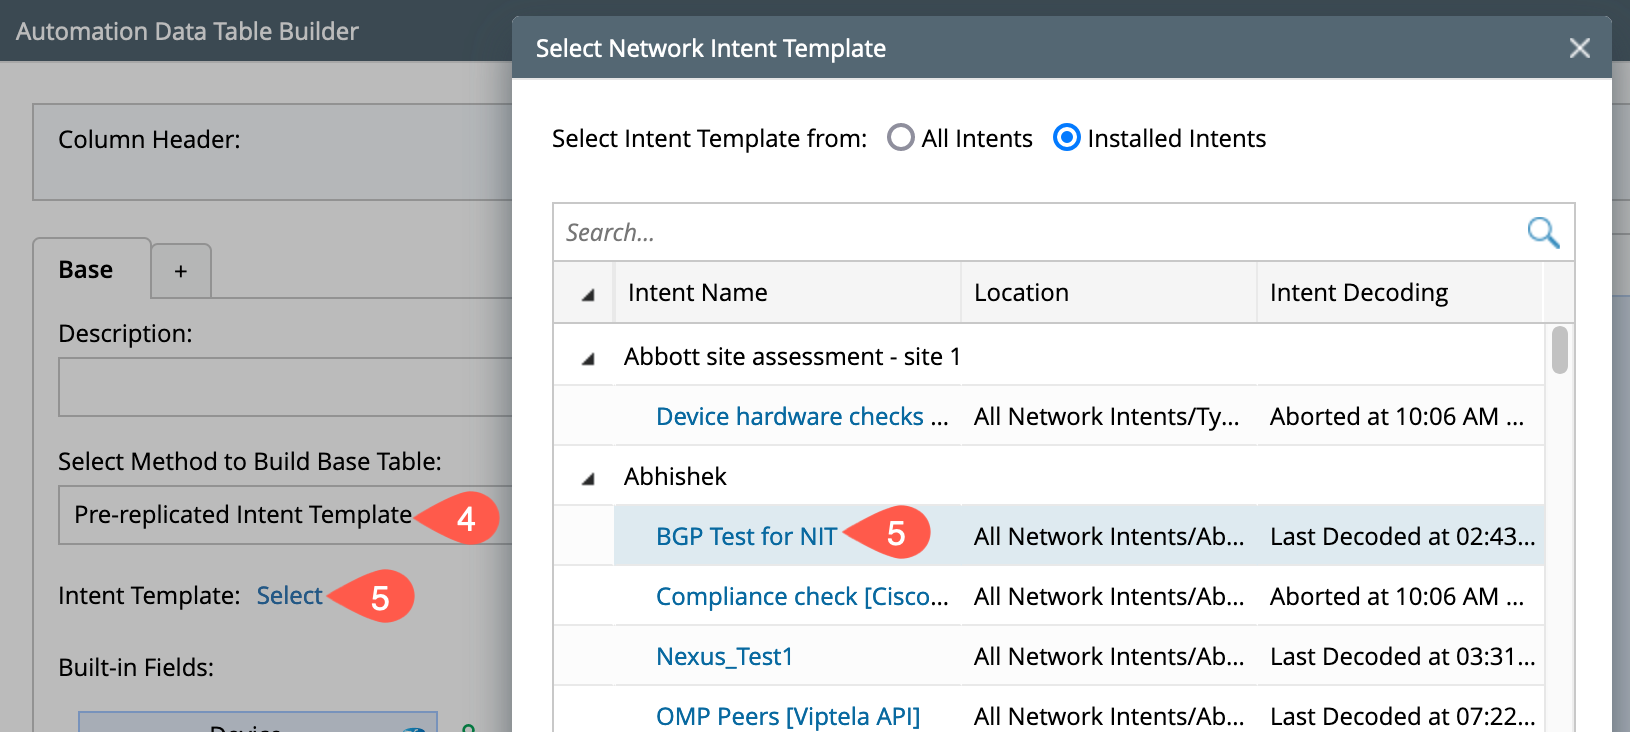
- Go to the default Base tab, select Pre-replicated Intent Template or Intent Cluster (that checks vty golden rule information for a single device) as the method to build base table data from the intent template properties.
- Click Select and browse to the location of the predefined Intent Template and add it, which is installed in Intent Based Automation Center (Intent Library) .
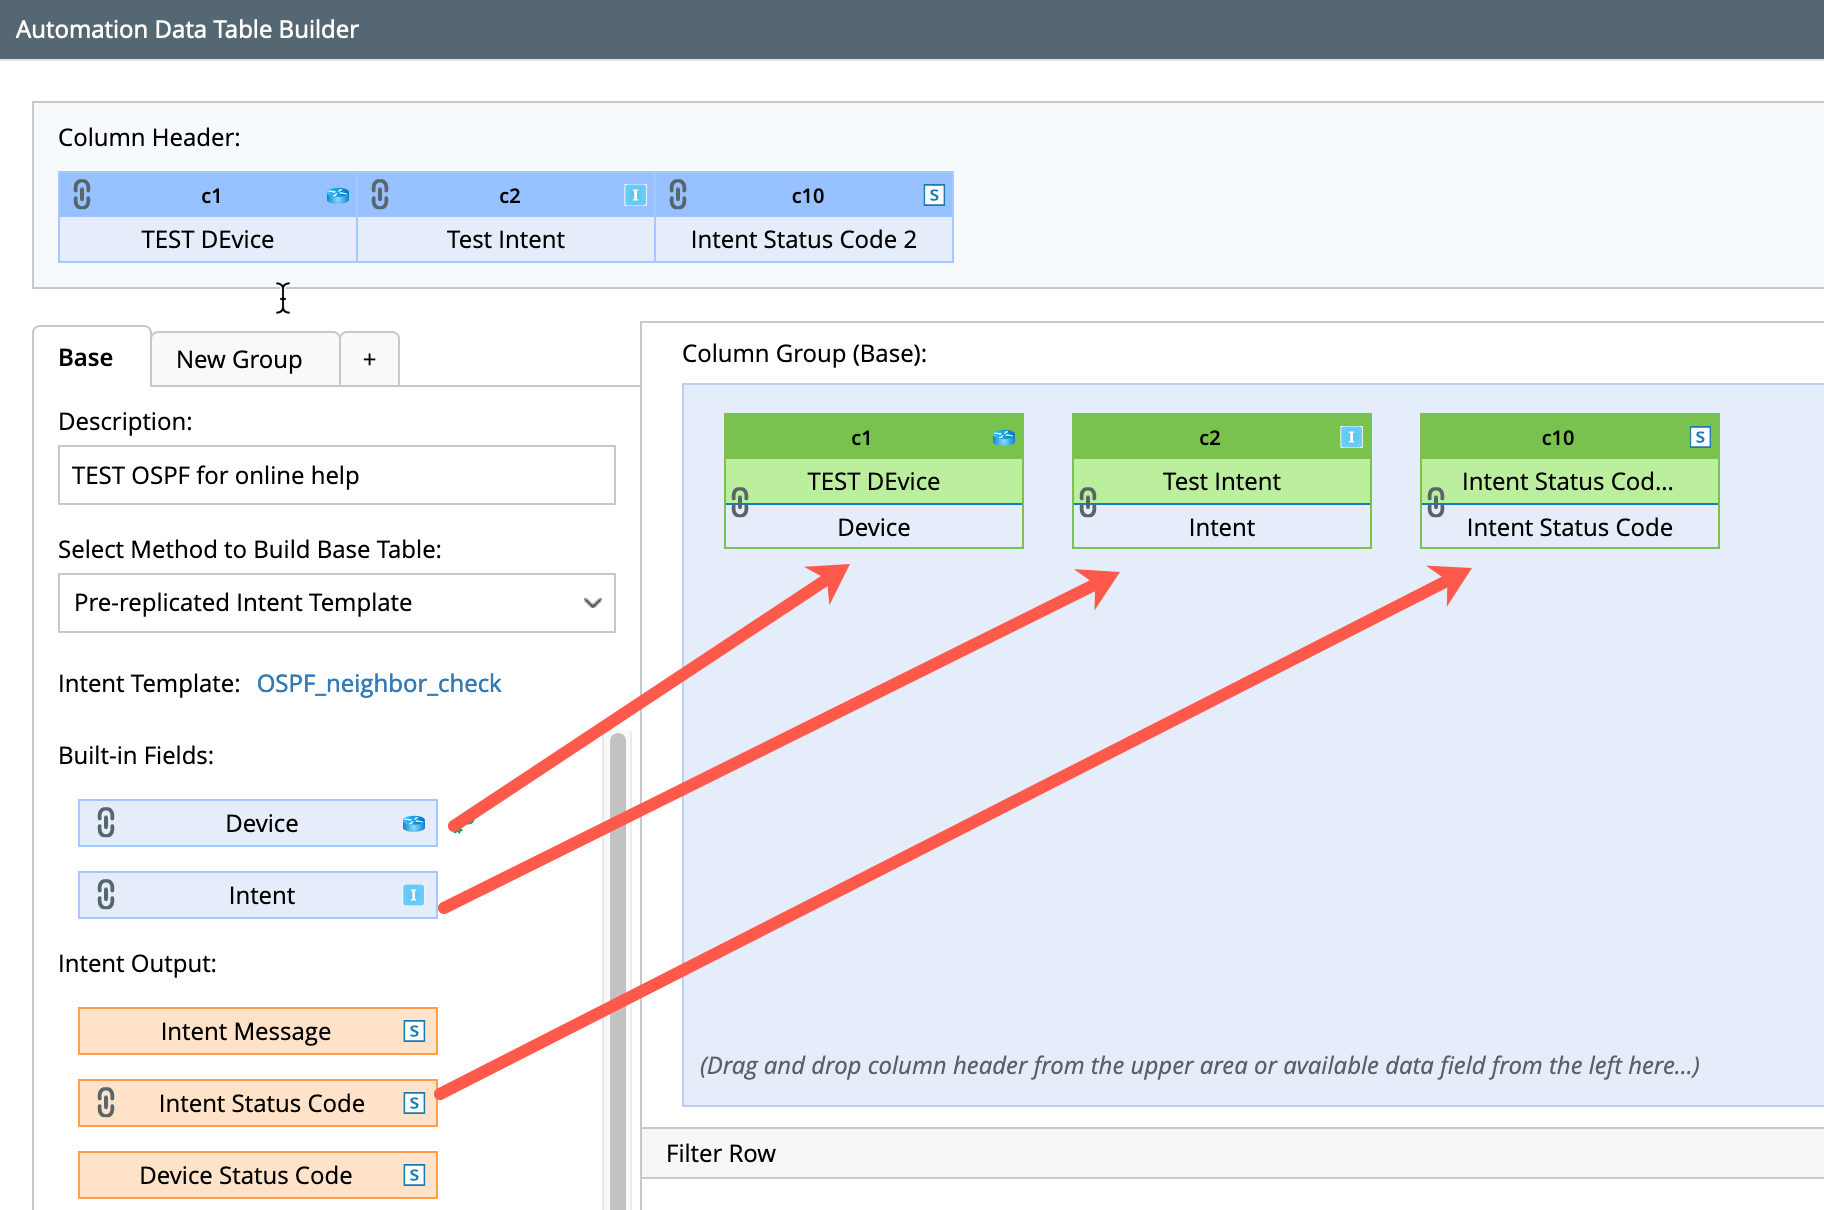
- Drag and drop the Built-in Fields and Intent Status code (as needed for your use case) to the Column Group.
- Click Save and Build, and the system will build your ADT.
Configure Intent-timer based ADT intent execution
To configure the ADT execution by the Intent timer:
-
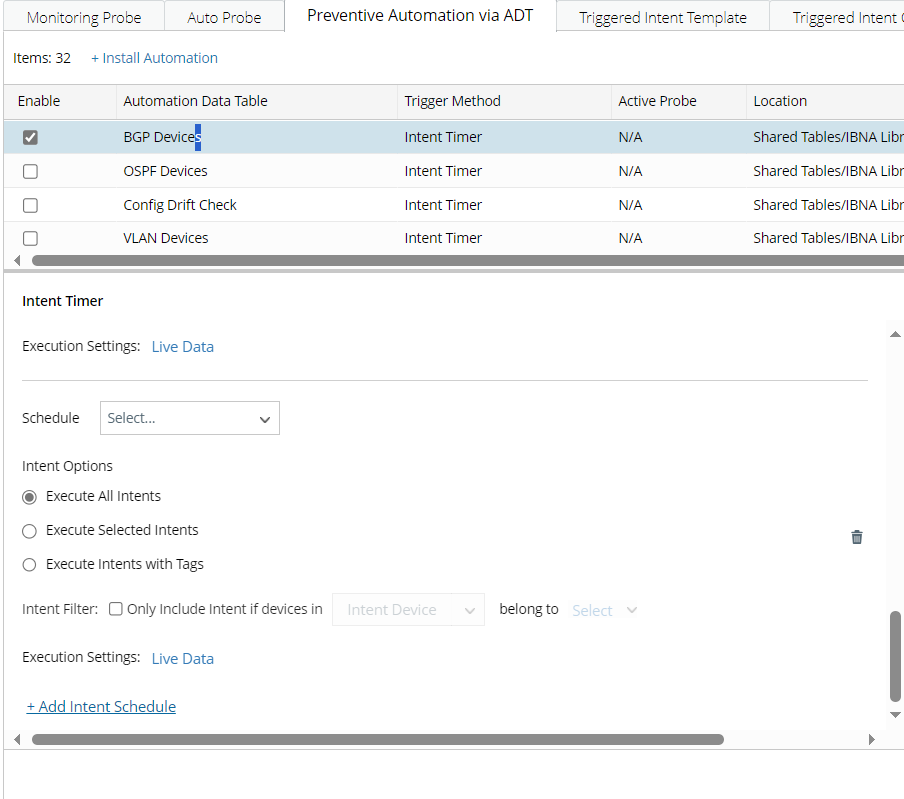
Go to Preventive Automation via ADT tab and install an automation item with trigger method (Intent Timer) as detailed in Preventive Automation via ADT.
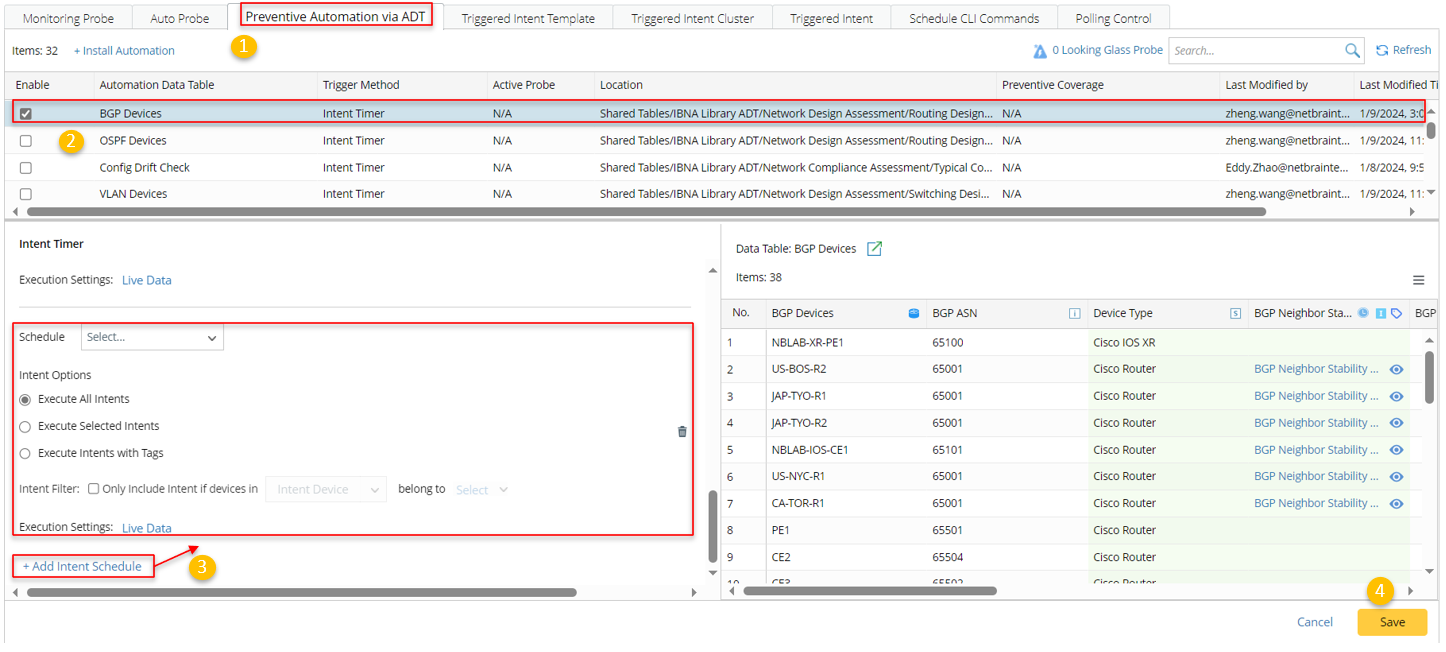
- Select the installed automation item, and its configuration pane will appear at the bottom half of the Preventive Automation via ADT tab.
-
Click +Add Intent Schedule in the configuration pane, then define the settings for running intents via timer.
-
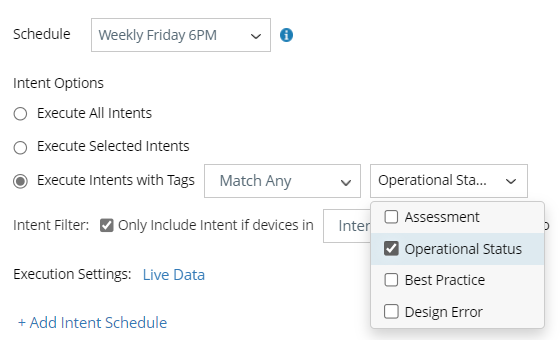
Schedule: Select a timer for running intents triggered by PAF, for example, selecting the timer "Weekly Friday 6PM".
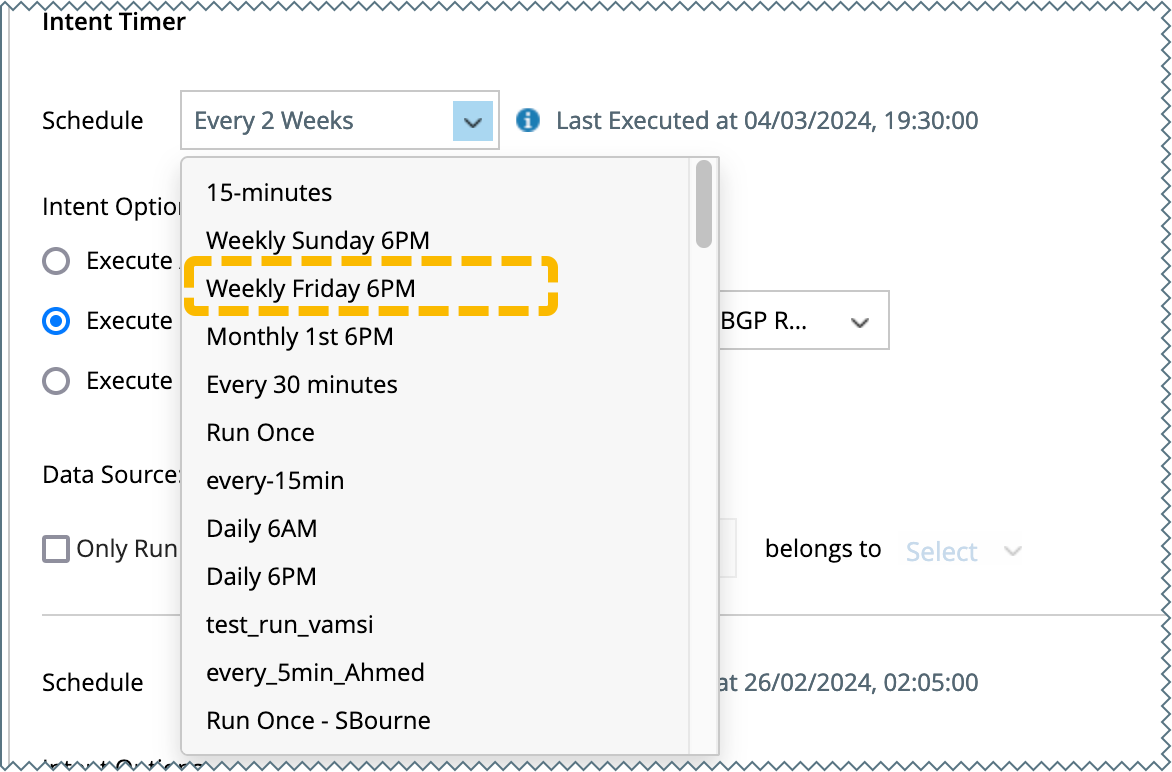

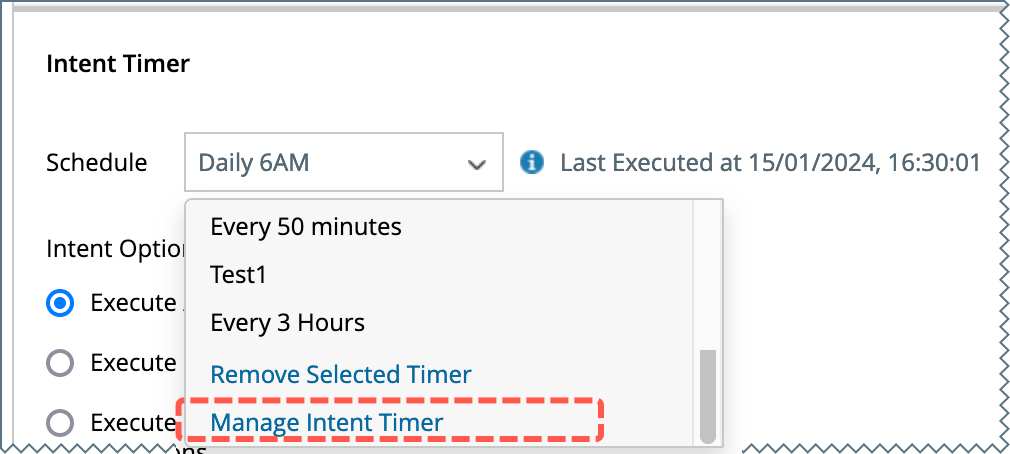
Note: Alternatively, you can add new intent timers according to your needs using the Manage Intent Timer option.
-
Intent Options: Define the scope of intents to be executed.
- Execute All Intents
-
Execute Selected Intents: Select this option, then check the checkbox of intents to be executed.

-
Execute Intents with Tags: If this option is selected, you can filter intents to be executed by tags.
Note: This ensures a seamless execution of any additional intent columns that may be incorporated in the future, provided they are appropriately tagged. This improves efficiency by automating the execution of newly added intent columns.
-
Intent Filter: Using the intent filter, multiple schedules can be created with same intents but with different device groups.
- When intent devices are selected: If any of the intent devices belongs to the selected device group or site, the related intents will be executed.
-
When ADT columns are selected: If any of the device in the selected column belongs to the selected device group or site, the related intents will be executed.

-
Execution Settings: Define the data source for intent execution. ADT dataset an be used and you can select either ADT column or ADT with certain tag. Refer to ADT Dataset for more details.

-
Schedule: Select a timer for running intents triggered by PAF, for example, selecting the timer "Weekly Friday 6PM".
- Click Save button to save all the configuration settings.
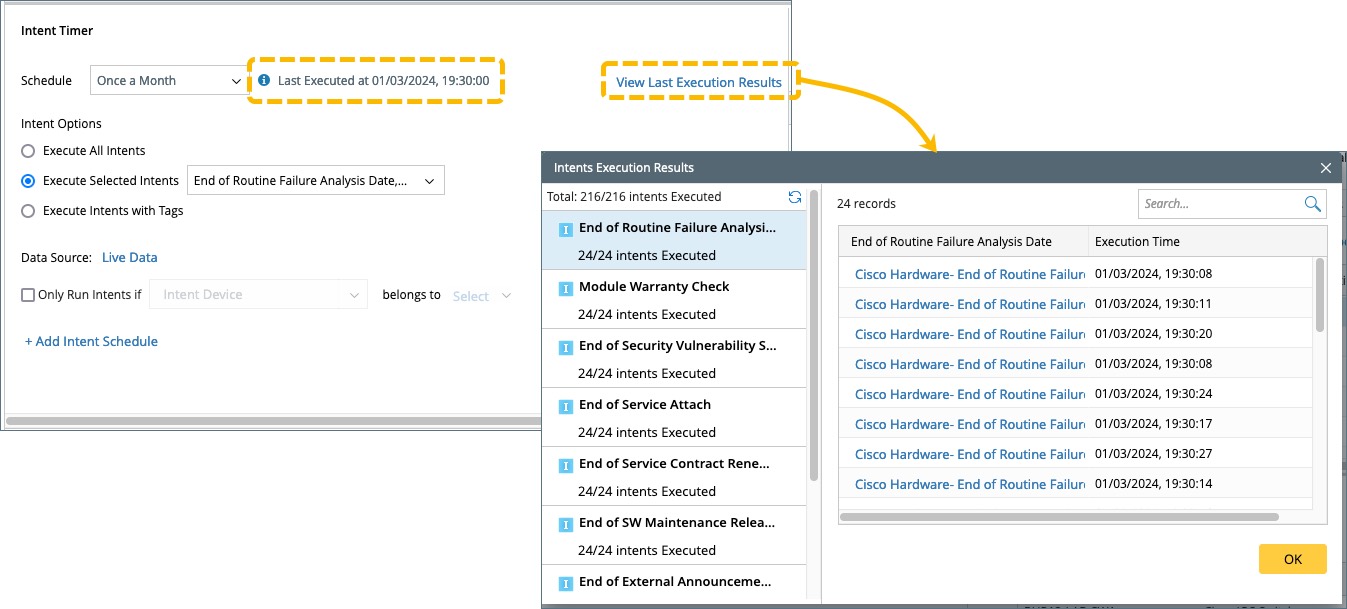
Check the Last Execution Results
Running intents once or via timer is not controlled by schedule task, therefore, the system provides the function of "View Last Execution Results" to get the record of the last execution.
-
The last execution time is shown: This is the time when the task of running ADT intents is submitted by the system or the user.
- For running intents by schedule, this is the last time of running intents by schedule
- For running intents once, if you submit this task several time, this time is the last time you submit the task.
- Click View Last Execution Results, you can view the execution result details.