Intent Replication Wizard
Practicing the functions in PDAS can involve multiple steps across various features, which may make setup challenging, particularly for entry-level users. This process requires completing numerous steps, navigating through different function managers, and understanding various concepts. So, the flow of replicating intent to ADT is simplified for problem diagnosis and preventive automation with Intent Replication Wizard.
It will combine multiple steps inside one main UI, and reduces the effort and power users can do the main operations themselves.
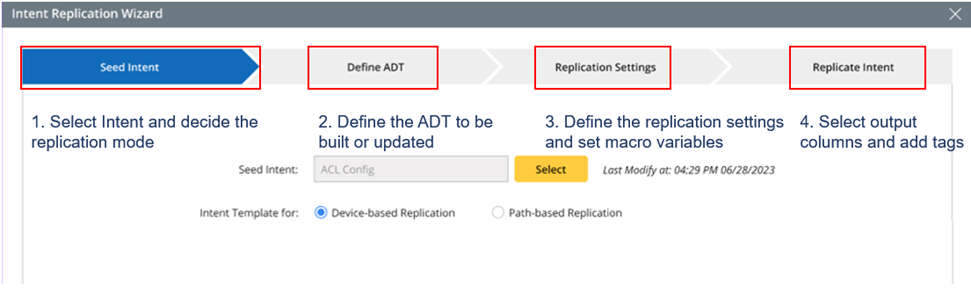
Each step of the Intent Replication Wizard aims to:
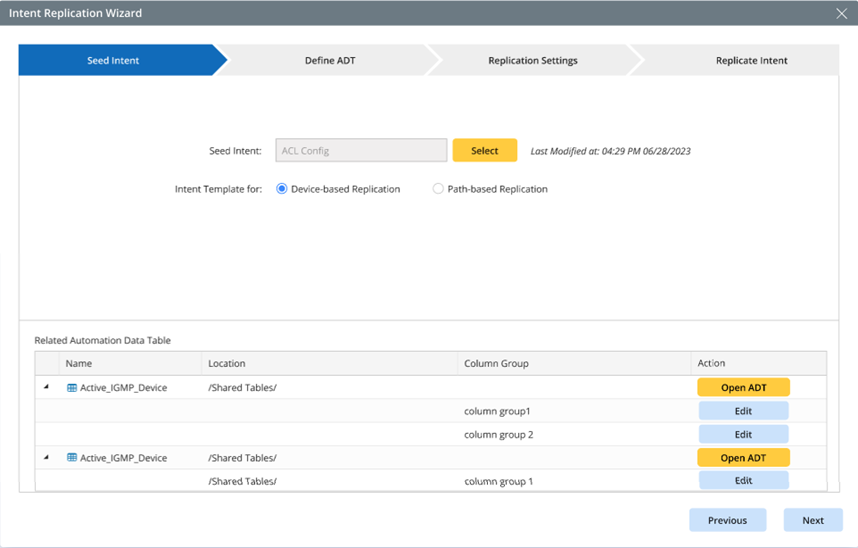
- Seed Intent: Select the seed intent for intent replication and choose the applicable replication mode.
- Define ADT: Create a new ADT or select an existing ADT and then utilize it to accomplish the replication of the seed intent.
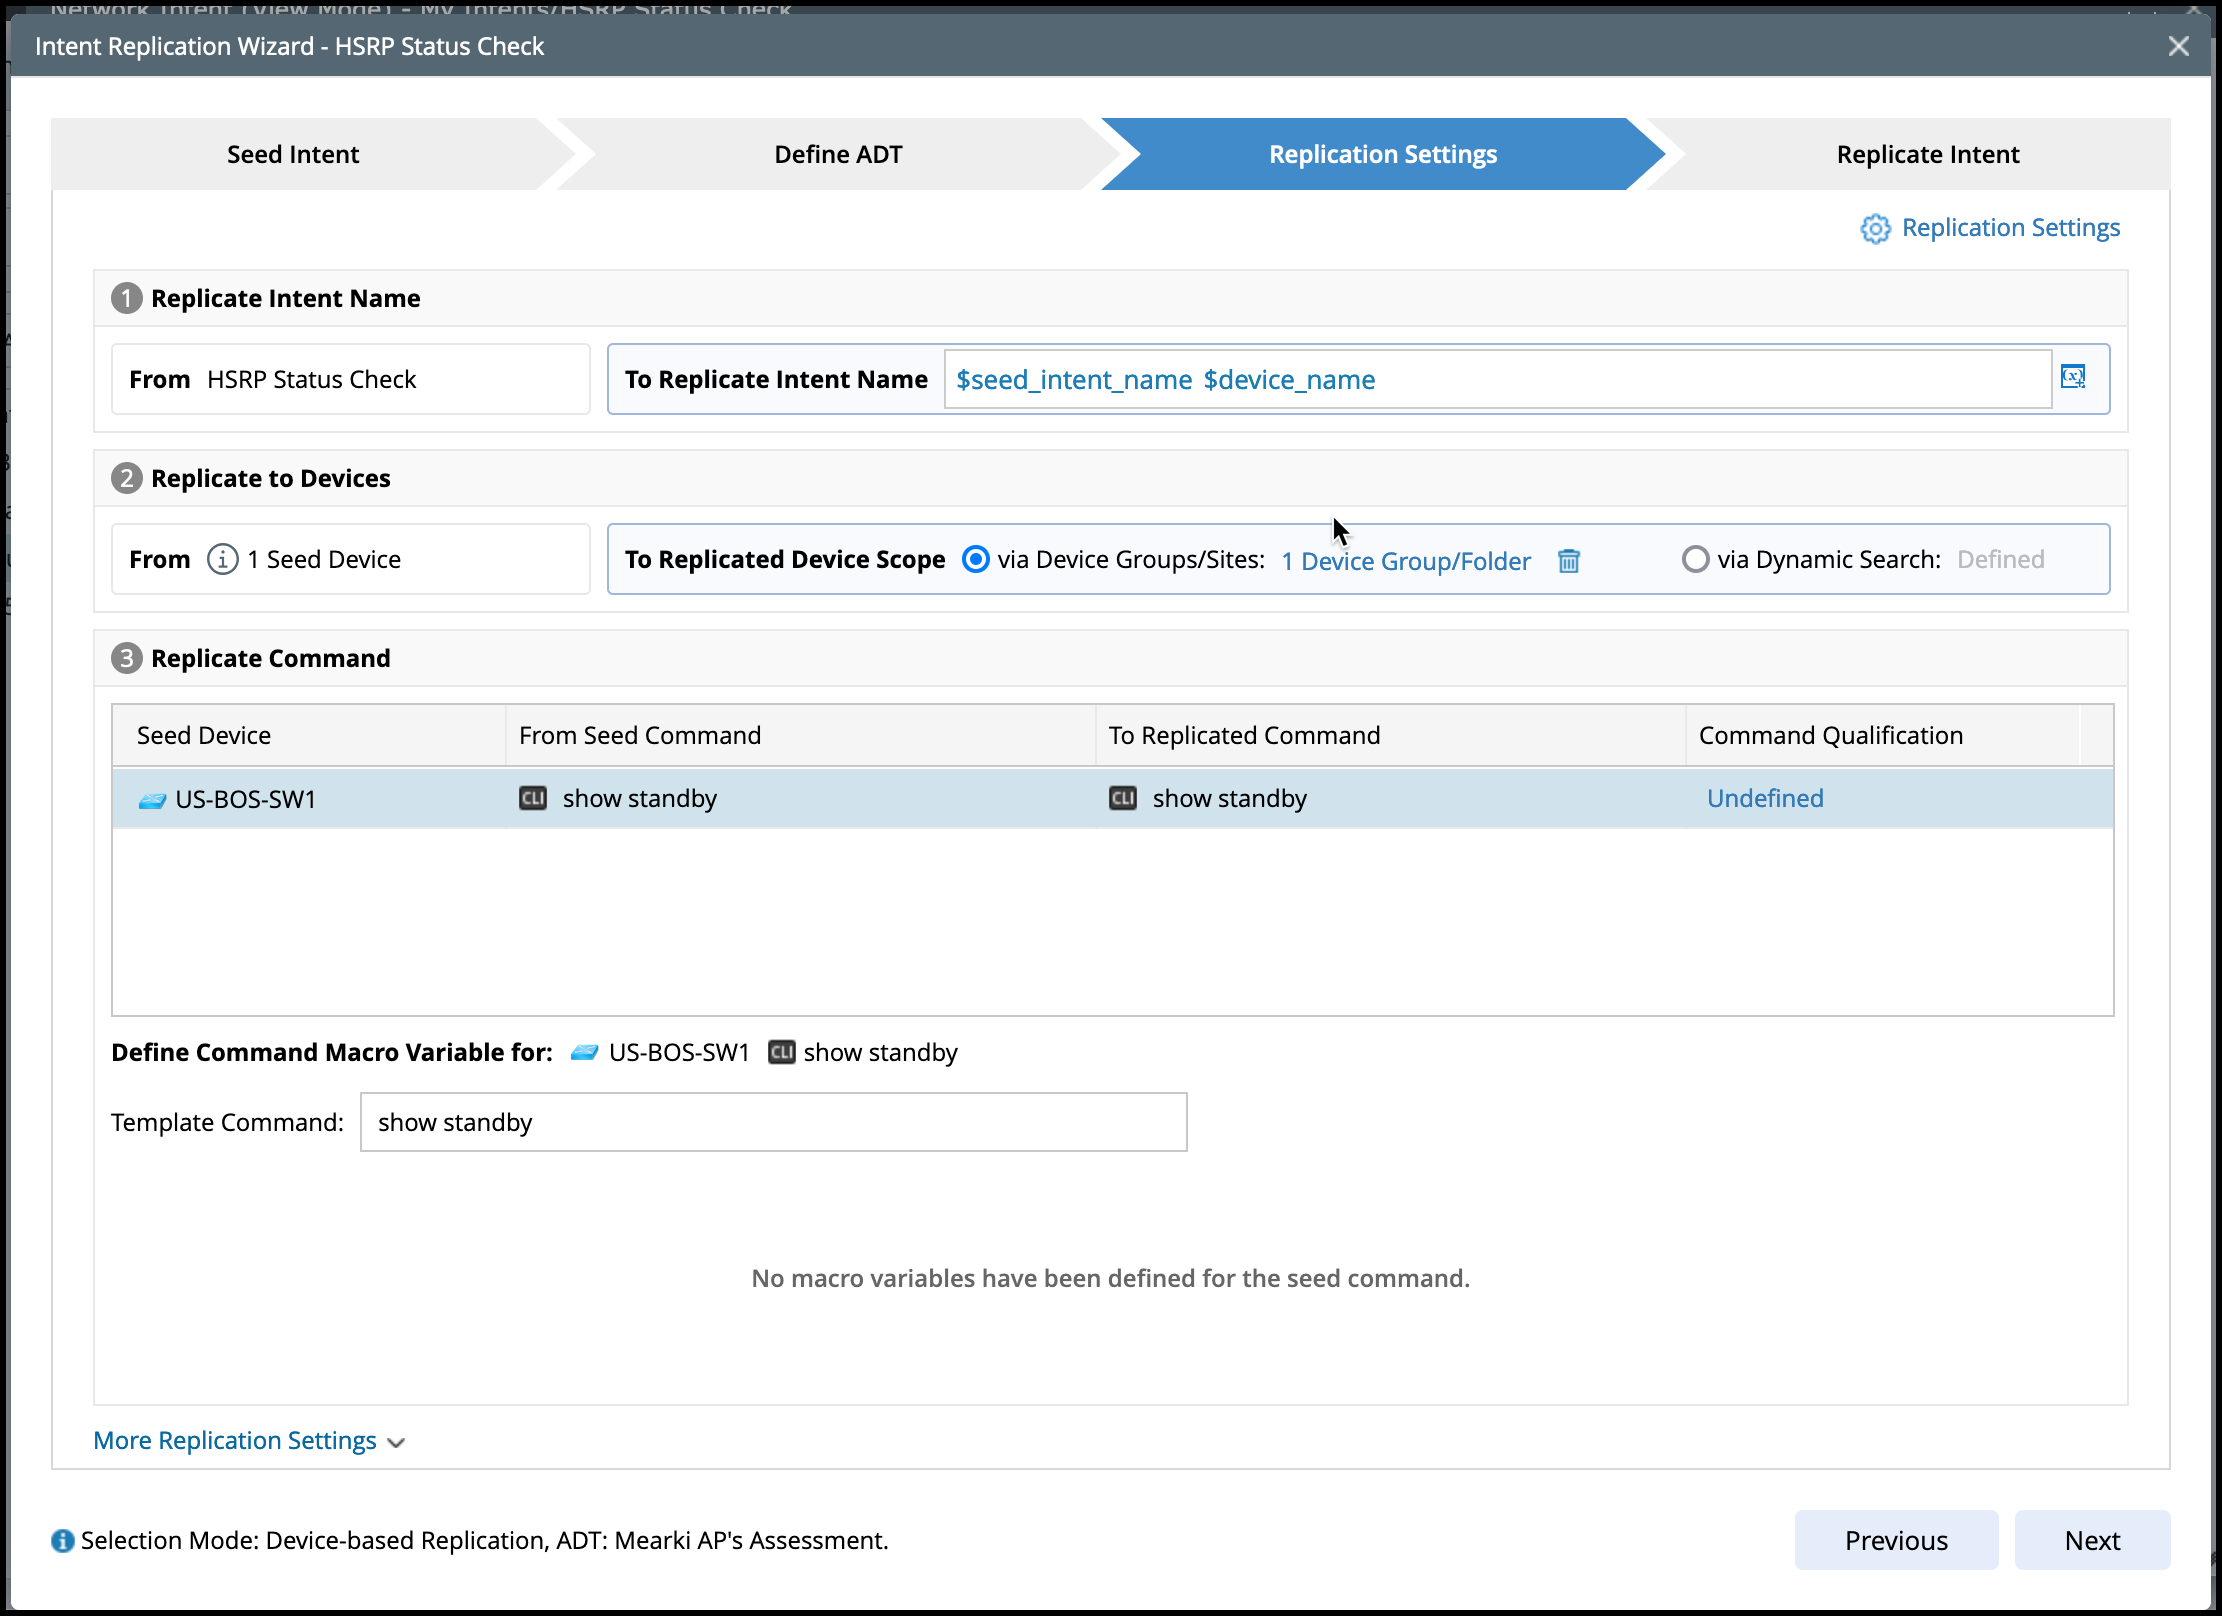
- Replication Settings: Define the qualified device scope for the seed intent template to replicate intent and configure the macro variable values for replicating ADT intents. Also, other advanced replication settings can be made here.
-
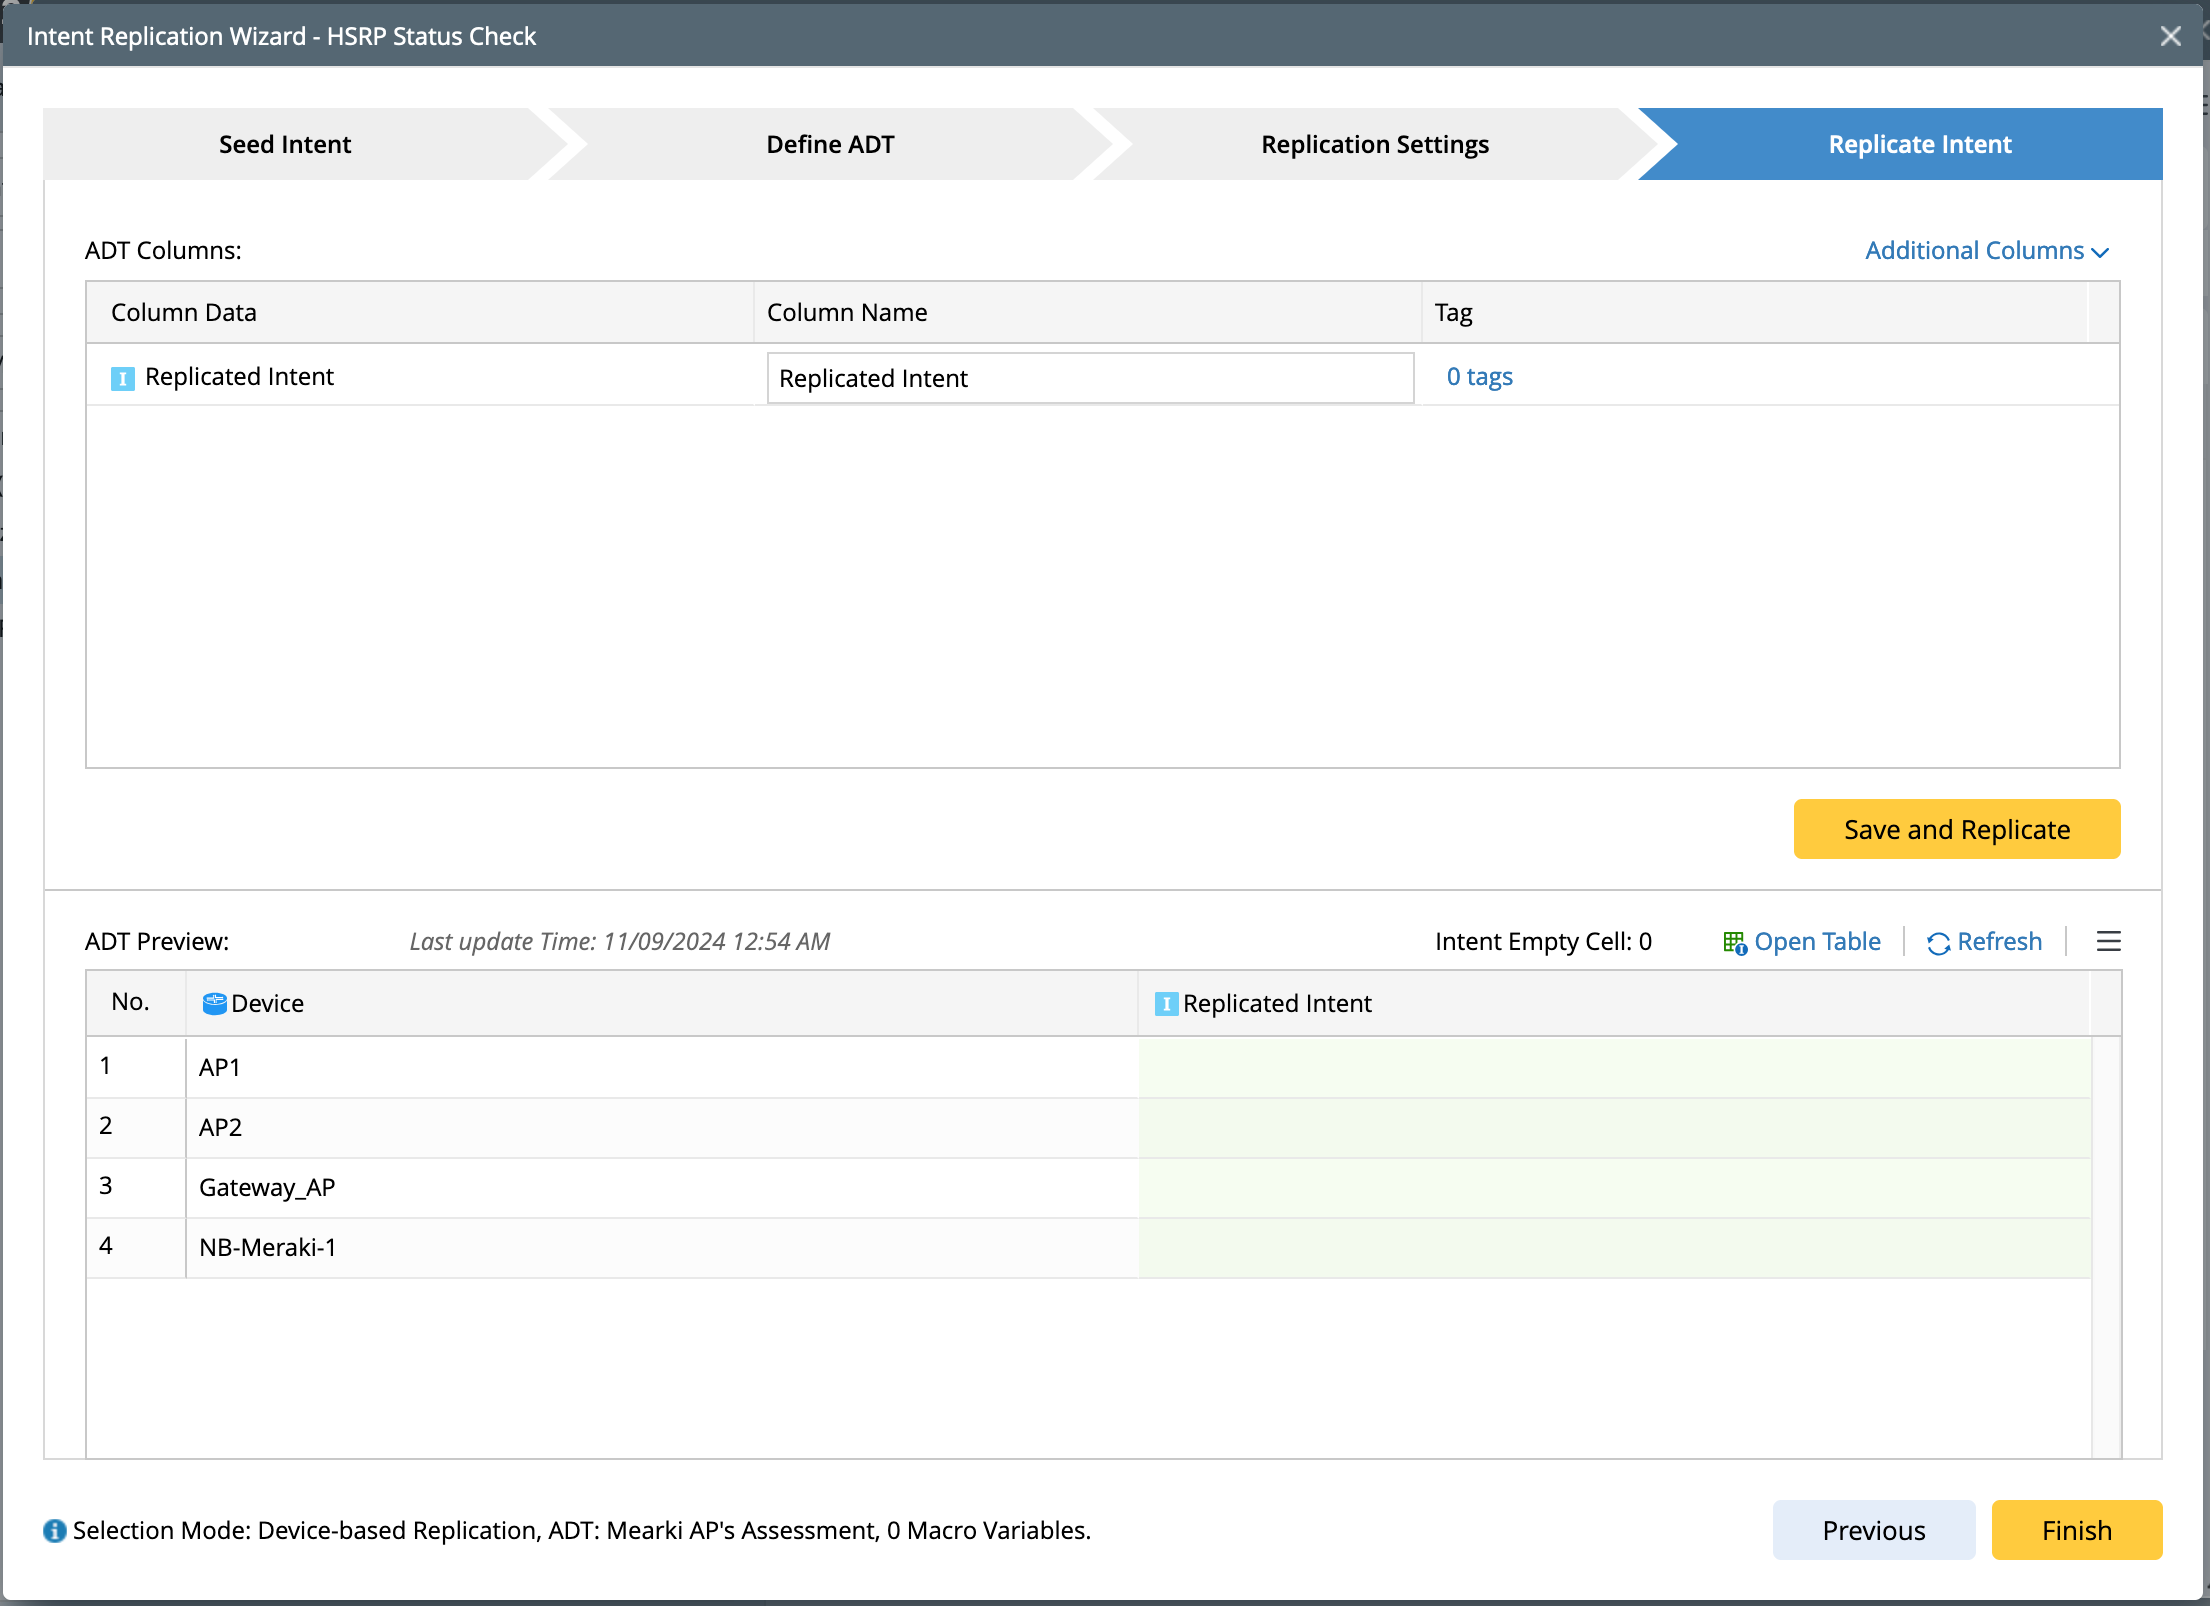
Replicate Intent: Select data fields that will be outputted as columns in the column group, then define the display name or assign tags for each column to finish building or updating the ADT.


|
Tip: After finishing each step, the information about the ”Selection Mode” will be shown at the bottom to record the completed main steps. |
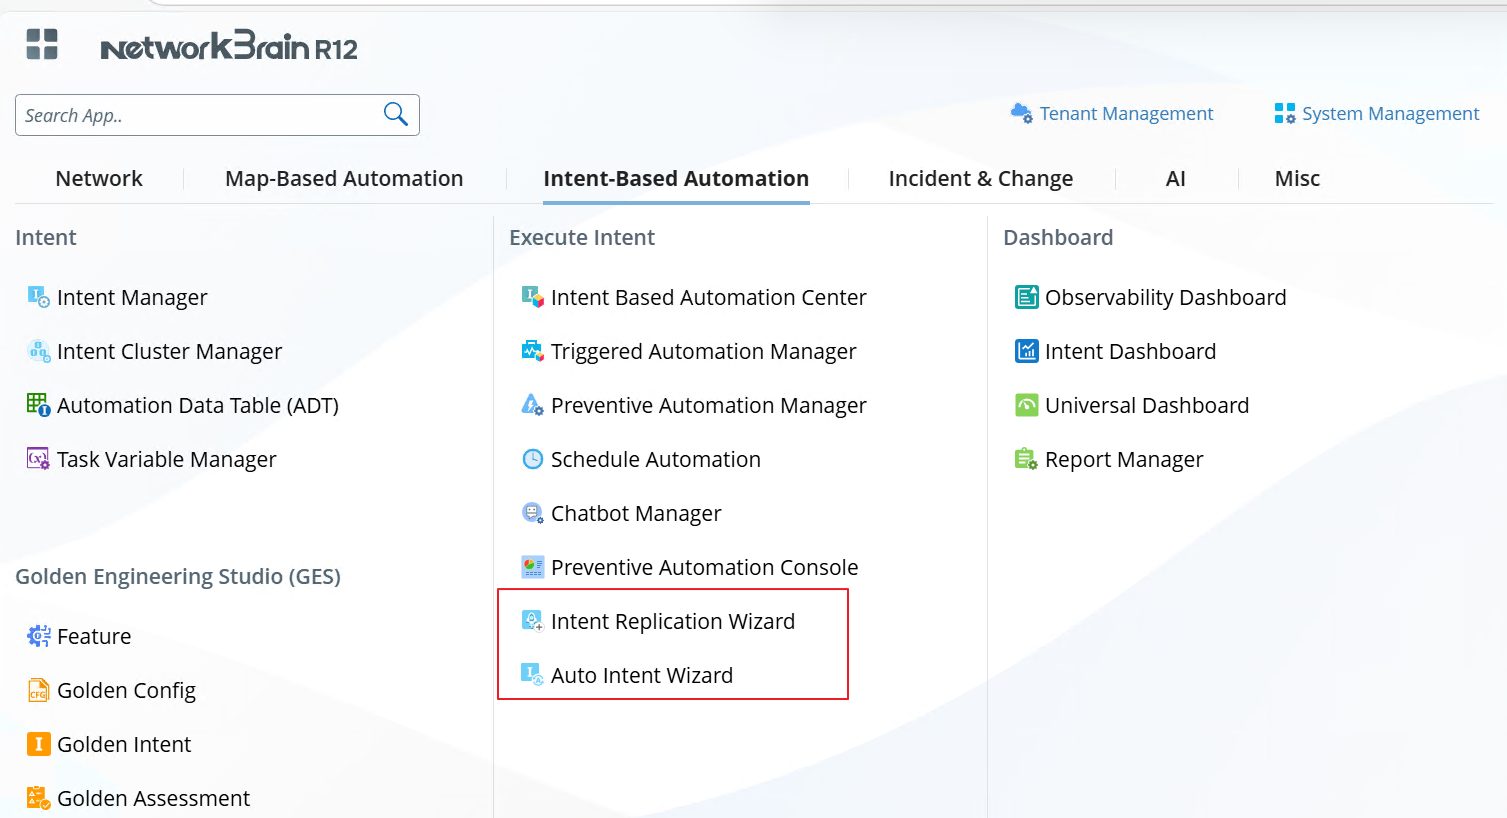
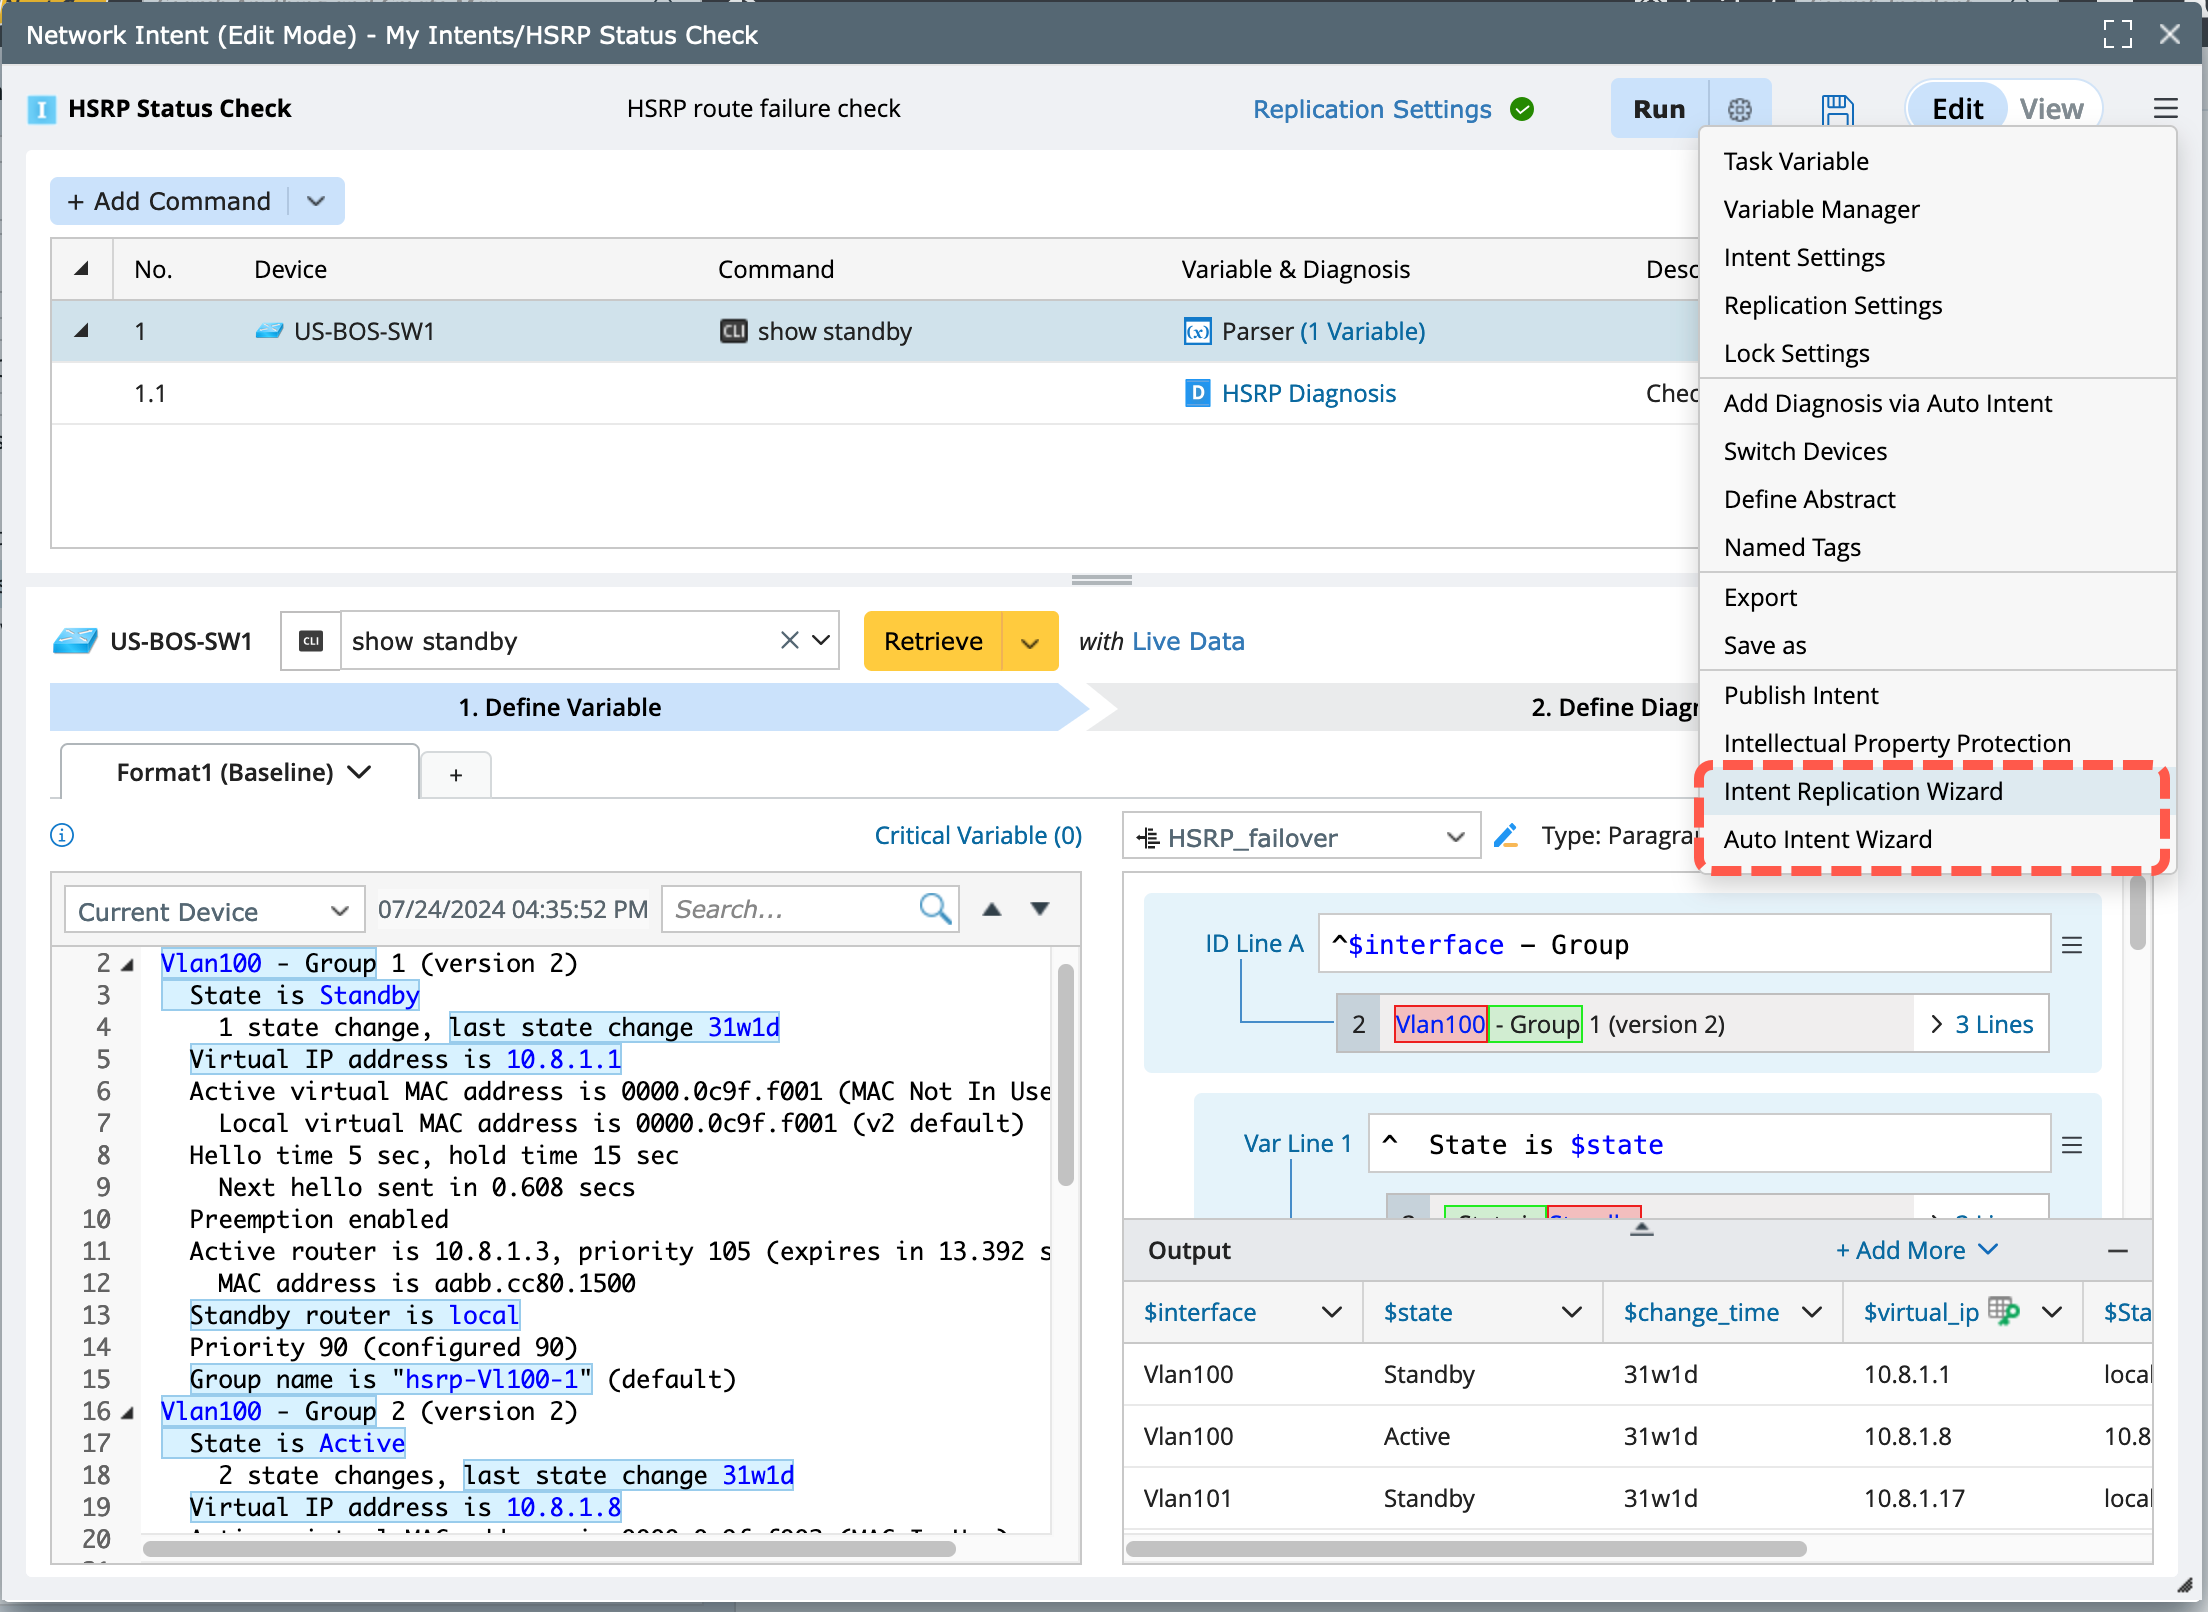
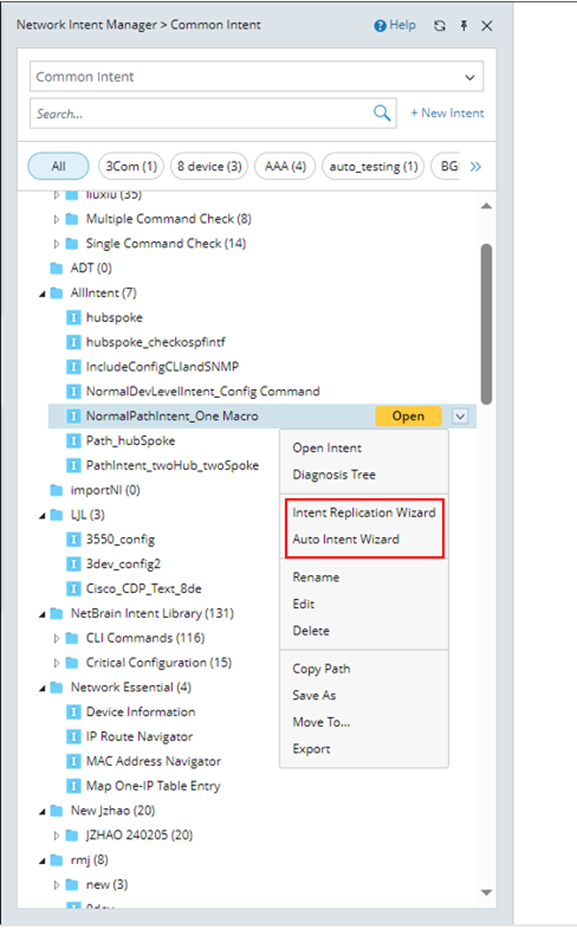
Where to Start
The following table lists the entrances for starting the Intent Replication Wizard and the Auto Intent Wizard.
|
No.
|
Feature
|
Description
|
|
1
|
Start Menu
|
|
| 2 |
Intent (view Mode) | 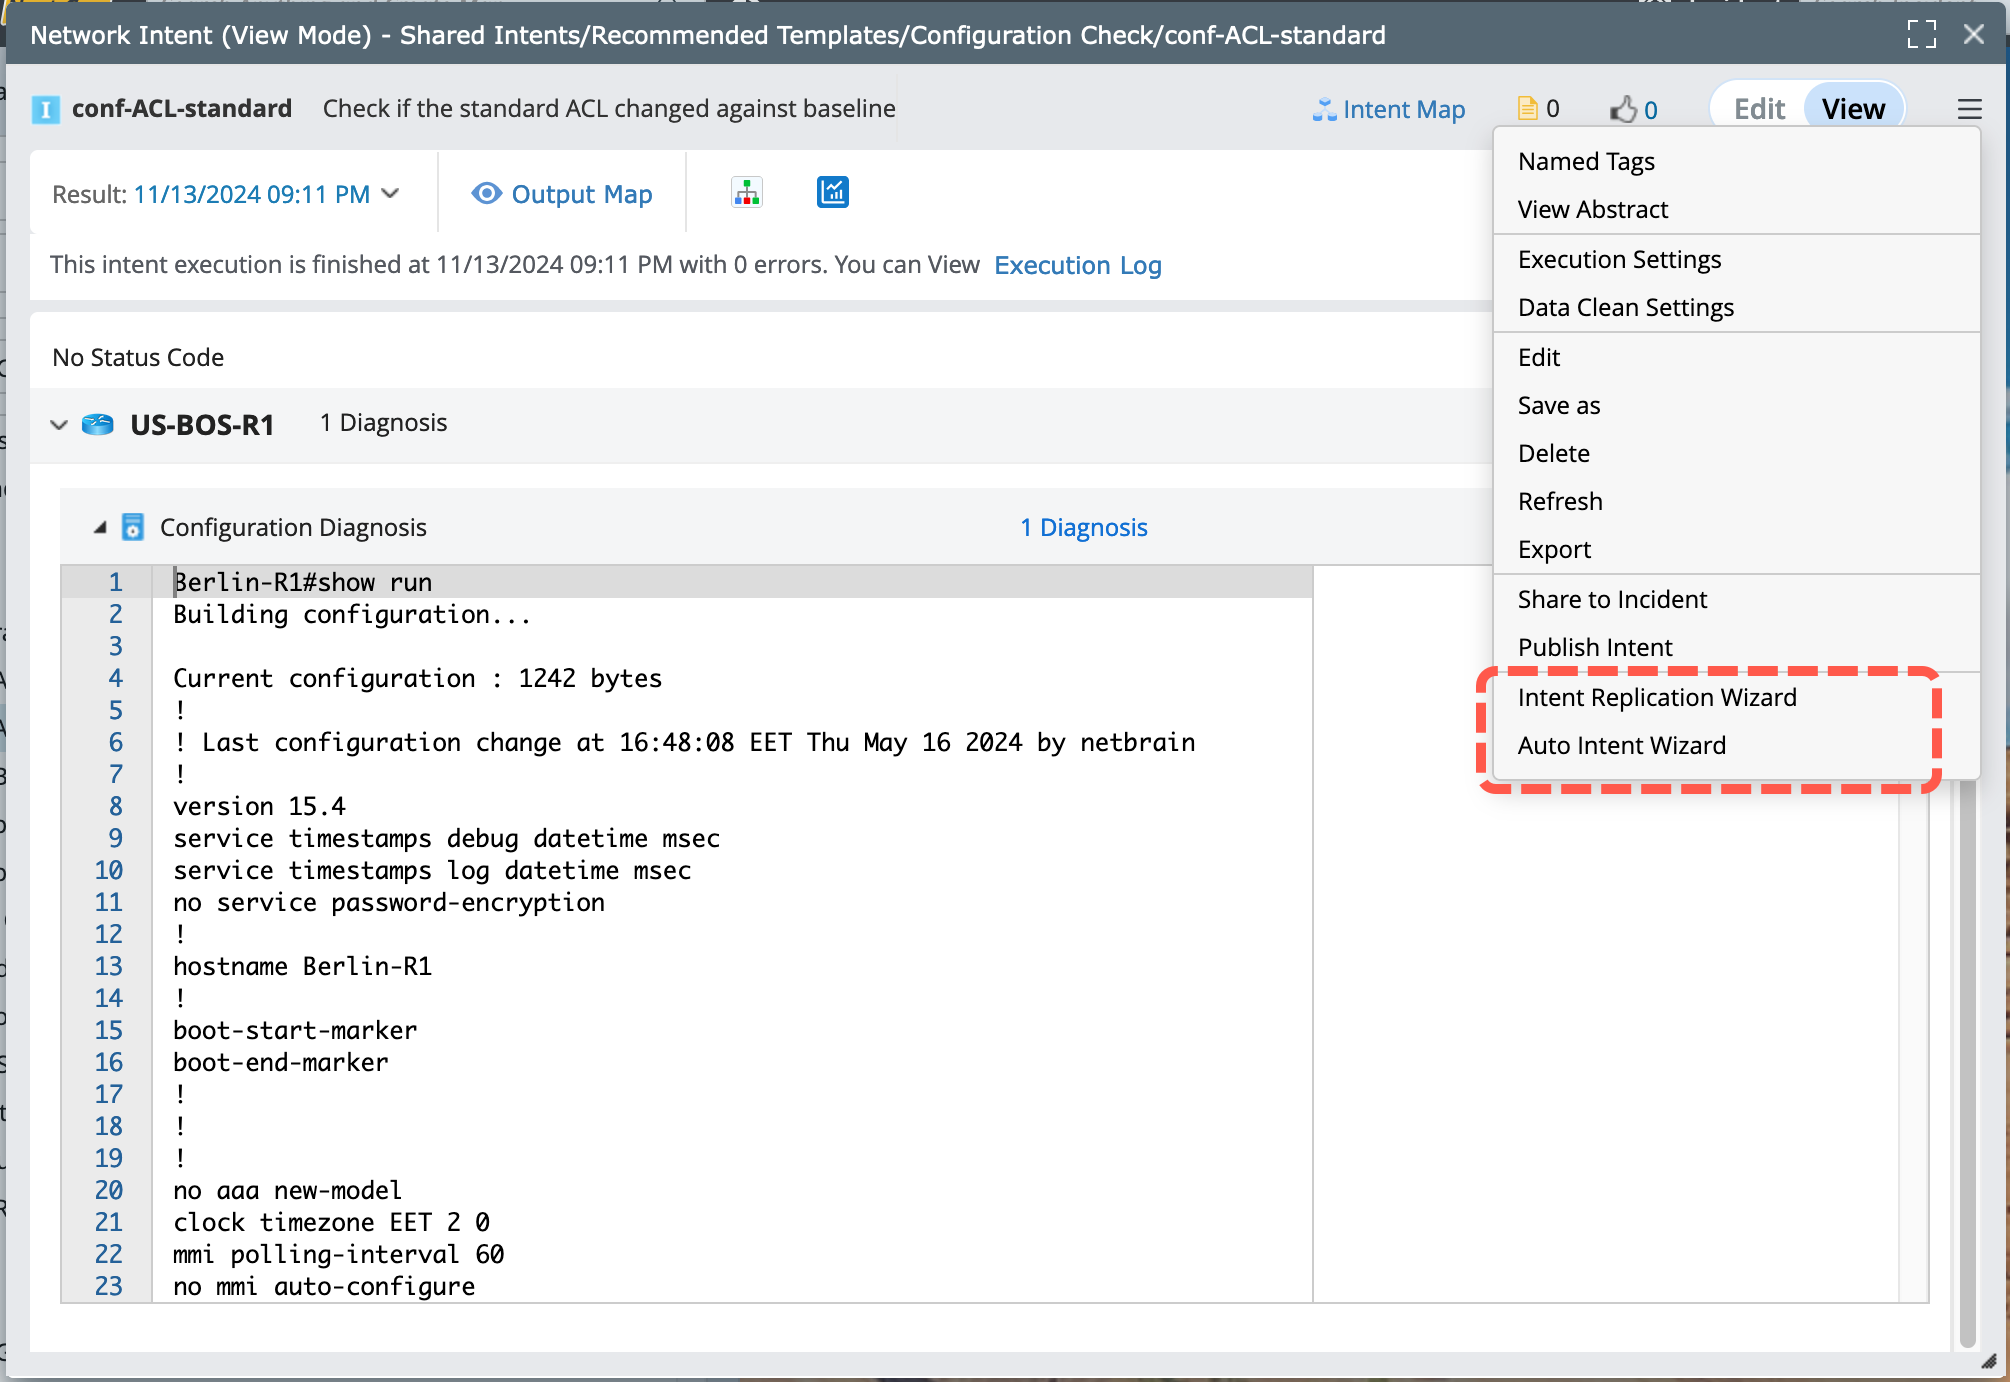 |
| 3 |
Intent (Edit Mode)
|
|
| 4 |
NI Manager
|
|
| 5 |
Map (Map Intent tab)
|
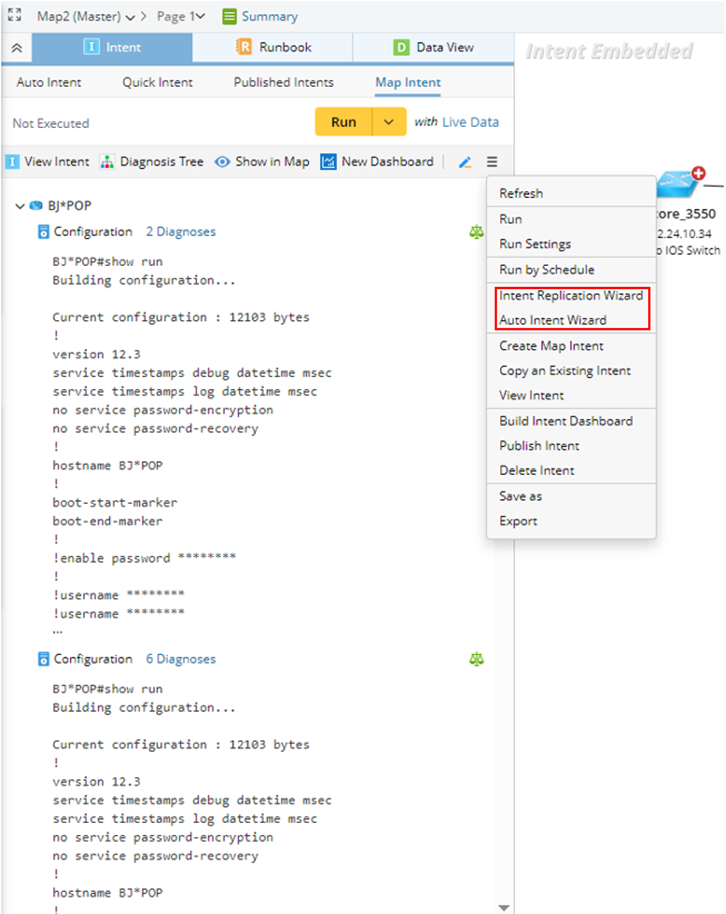
|
| 6 |
Map (Published Intents tab)
|
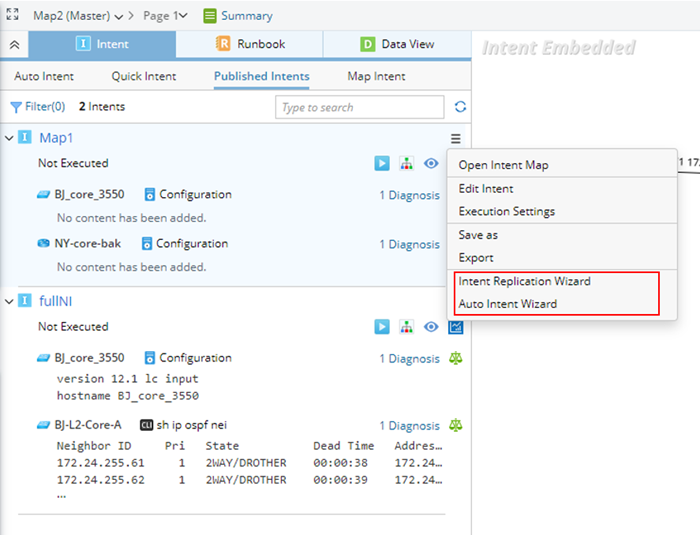
|
| 7 |
Path Browser (Path Intent tab)
|

|
| 8 |
Search Results
|
 |