Managing MongoDB Disk Alert Rules

Contents
More automation tasks the system performs, more device data will be retrieved and more task data will be generated, such as route tables, configuration files, execution logs and so on.
To proactively prevent the system database from data loss or even corruption, the following three rules are enabled with progressive quotas assigned for MongoDB disk usage. Each rule defines different actions with two conditions of the disk usage threshold. The corresponding action will be triggered when either condition is met. The thresholds are all configurable.
Rule |
Actions |
Condition 1 |
Condition 2 |
A |
Send Email Alerts Only 1) |
Usage Percentage Reaches 80% |
Only 20GB Free Space Left |
B |
Send Email Alerts 1) |
Usage Percentage Reaches 90% |
Only 10GB Free Space Left |
C |
Send Email Alerts 1) |
Usage Percentage Reaches 93% 4) |
Only 5GB Free Space Left |
Notes:
1) To enable this function, the email server settings must be configured first. The default frequency for email alerting is 1 hour, indicating the system will not send duplicate emails within 1 hour. It is configurable and other positive integers are also allowed.
2) The deleted historical data includes configuration files, data tables, CLI commands and parser data for all domains in this MongoDB instance.
3) If Rule C is met, the MongoDB serving this domain will become read-only. The disabled writing permissions include: saving maps, saving data as current baseline, and so on. To enable the writing permissions, you can modify the Rule C.
4) The default thresholds for Rule C are recommended values based on Elasticsearch configurations since it shares the disk with MongoDB. When the disk usage reaches 95%, Elasticsearch will also become read-only. Refer to https://www.elastic.co/guide/en/elasticsearch/reference/6.7/disk-allocator.html for more details.
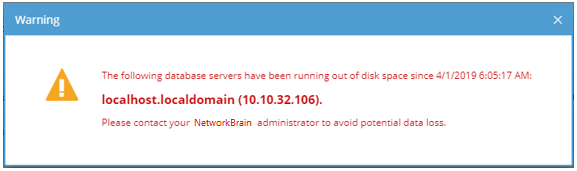
For example, when MongoDB usage reaches a predefined threshold, users will receive both email alerts and in-place warnings in the system. Here is an example of system warning:
Tip: When you encounter the unexpected disablement of written permissions to MongoDB, you can Reset Root Role for recovery.
Customizing MongoDB Disk Alert Rules
To customize MongoDB Disk Alert Rules, for example, only enable a single rule to assign quotas, or add more users to get notified via emails, do the following:
1.In the System Management page, click Operations > Service Monitor from the quick access toolbar.
2.In the login page of Service Monitor Portal, enter the admin username and password, and click Log In.
Note: The service monitor account is different from the user account of the NetworkBrain IE system. The default username/password of the service monitor account is admin/admin.
3.In the home page, click MongoDB Disk Alert Rules at the upper-right corner. The default settings are as follows:
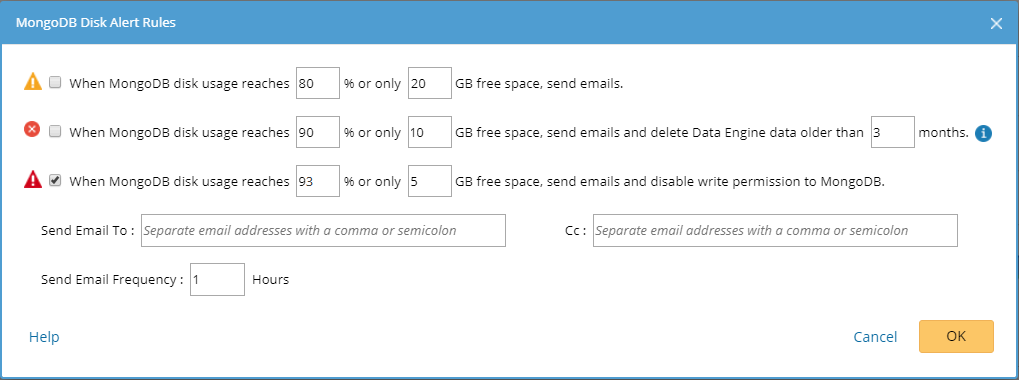
4.Change the settings based on your needs.
1)Specify the disk usage threshold for different levels.
2)Enter the email address in the Send Email To or CC fields. Use a colon or semicolon to separate multiple items.
Note: Email alerts are enabled only when email addresses are added at least in one field.
3)Specify the frequency to send emails.
4)Click OK to save the configuration.
Resetting Root Role for MongoDB
When you encounter the unexpected disablement of written permissions to MongoDB, follow the steps below to reset the root role for MongoDB.
1.Run the following command to connect MongoDB.
▪If SSL is not enabled:
/bin/mongo 127.0.0.1:27017/admin -u <username> -p <password> --authenticationDatabase admin --authenticationMechanism SCRAM-SHA-256
▪If SSL is enabled:
/bin/mongo 127.0.0.1:27017/admin -u <username> -p <password> --authenticationDatabase admin --ssl --sslAllowInvalidCertificates --authenticationMechanism SCRAM-SHA-256
2.Run the use admin command and show users command to check the status of the admin role.
> use admin
> show users
{
"_id" : "admin.DBUsername",
"user" : "DBUsername",
"db" : "admin",
"roles" : [
{
"role" : "roleLimitwrite",
"db" : "admin"
}
],
"mechanisms" : [
"SCRAM-SHA-256"
]
}
3.If the role displays as "roleLimitwrite", run the db.grantRolesToUser("DBUsername", [{role:"root", db:"admin"}]) command to reset the role to "root".
See also: