Executing CLI Commands

Contents
CLI automation is used to retrieve device data by executing specified CLI commands. This automation action is highly customizable, and you can execute different commands on different devices, not limited to the existing devices on a map.
In addition, you can use a parser to parse key metrics from the outputs, monitor them on a map, and see displayed alert if target parser variable deviates from the Golden Baseline. You can also compare CLI command outputs between two time points to view the comparison result.
1.On a map, select Execute CLI Commands from the right-click menu, or select Actions > Execute CLI Commands from the map toolbar. The Runbook pane is opened with the Execute CLI Commands node added.
Tip: If a runbook has already been opened, the Execute CLI Commands node will be added to the current runbook; otherwise, it will be added to personal runbook.
2.Add command for all target devices by entering command directly and click Add..

Tip: To add commands by using templates, click the ![]() icon and select Load CLI Templates. You can also create your own command template. See CLI Template for more details.
icon and select Load CLI Templates. You can also create your own command template. See CLI Template for more details.
Note: You can also click Schedule Command Execution to schedule CLI command execution from a runbook command node. By default, all devices with commands added in the current node will be loaded to the scheduled task.
Note: If you want to define the rule about the entered commands, go to System Management page > Advanced Settings.
3.Click Run.
Note: You can set frequency to recur the execution repeatedly. By default, the Run Once is selected.

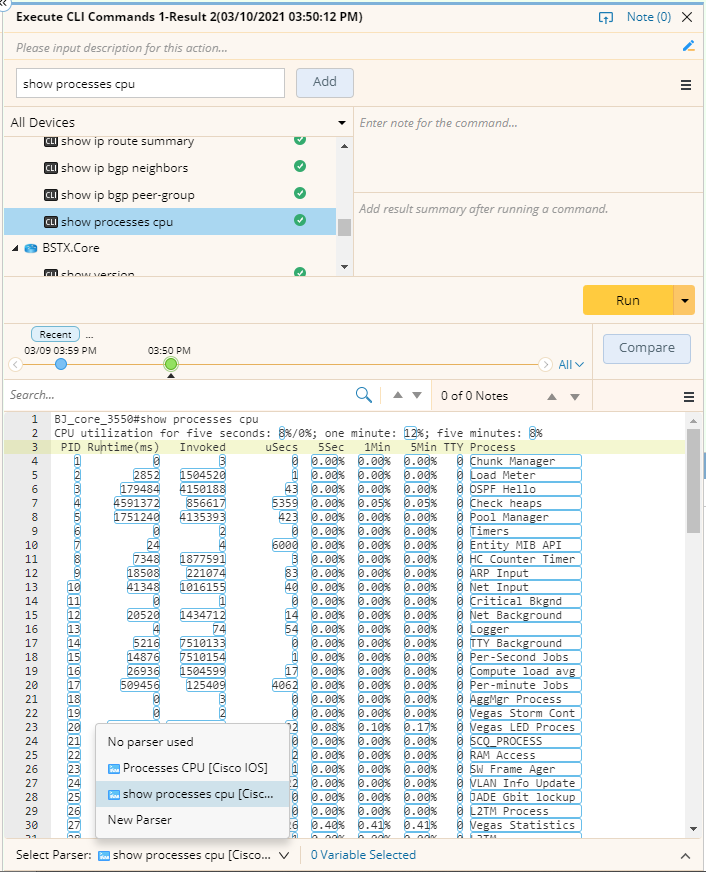
4.After the execution is finished, select a device and a CLI command to view its output.

Note: You can click the pencil icon to add note for command or add result summary after running a command.
Tip: You can directly click a timestamp from the timeline or the dropdown of timeline to view historical data or select the data at two time points to compare.


Tip: To reuse the data of command outputs, you can save the command output for the selected device and add tag for explaining the data meaning.

5.If you want to save one node and share with others, define the target devices. By default, this action applies to all existing devices on the map. To customize target devices, click the  icon.
icon.

1)Click Target Device Qualification. This is a node-level device qualification and the qualified devices can only be applied to the current node.
2)Narrow down the default devices from the current map by setting criteria with dynamic method. You can also manually add devices with static method.
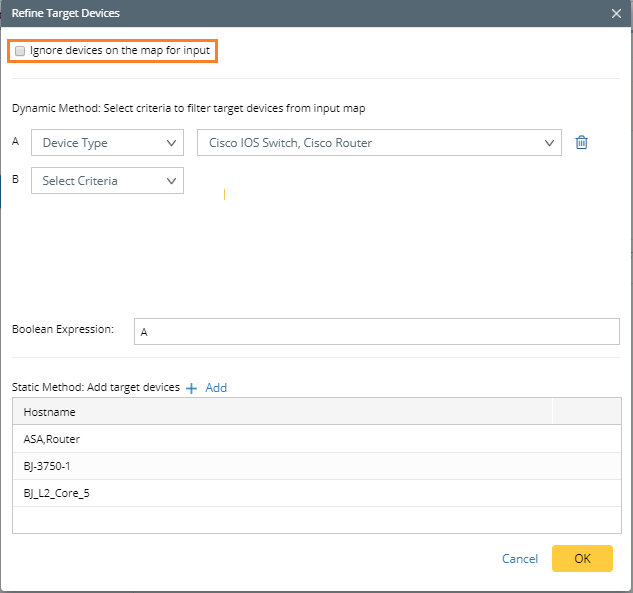
Note: If you select the Ignore devices on the map for input check box, you can only use the static method to manually add devices as input.
3)Click Reload Target Devices to make the qualification work.
6.(Optional) Select a parser to parse variables from the CLI command outputs and monitor them on the map.
1)Select a parser from the list.
Tip: The system will use device types of all target devices and specified CLI commands to search for available parsers from the Parser Library and populate them in the list. If only one parser in the Parser Library is matched, the parser will be auto-selected.
Tip: With the alert defined for the variable in the CLI command result, it is displayed if the variable deviates from the defined value.

Note: You can also click Save As to save the defined CLI automation as Qapp or Data View Template, or add as a Qapp or Data View Template node to the current Runbook.

2)Click Select Variable to select variables that can be parsed from the outputs.

3)Click Run to monitor the variables on the map.

7.(Optional) Select two timestamps and click Compare to compare the CLI command output between two time points for a specific device.

Tip: To save an action node and its input for reuse, point to it and click the ![]() icon to select Save as Favorite.
icon to select Save as Favorite.
See also: