Group the Map Elements
You can group map elements together to improve map organization and visualization. This functionality allows you to consolidate related map objects into a single group for easier management.
To support this feature, a Group type has been added within the Map Stencil menu. The Group type enables users to drag multiple map elements into a group that can be manipulated as a single entity.
Benefits of Grouping Map Elements:
- Improved Map Clarity: Grouping elements reduces visual clutter by consolidating related items.
-
Simplified Management: Groups can be moved, resized, or modified as a whole, simplifying map updates.
- Enhanced Workflow: Streamlines the process of working with complex network maps, saving time and reducing errors.
The following operations can be performed on the Map using the Group type:
-
A Group option has been added to the Map Stencil menu, allowing you to group Map elements together. All elements within the selected area will automatically be grouped.
-
You can add additional elements to an existing group.
-
You can drag elements from one group to another.
-
To remove or ungroup an element from a group, use the right-click menu. You can also drag and drop the element out of the group to remove it.
-
Use the Location attribute to group objects that share the same location value into a single group.
-
Use the Site attribute to group objects that share the same site value into a single group.
- Elements on the map can be grouped based on their shared attributes.
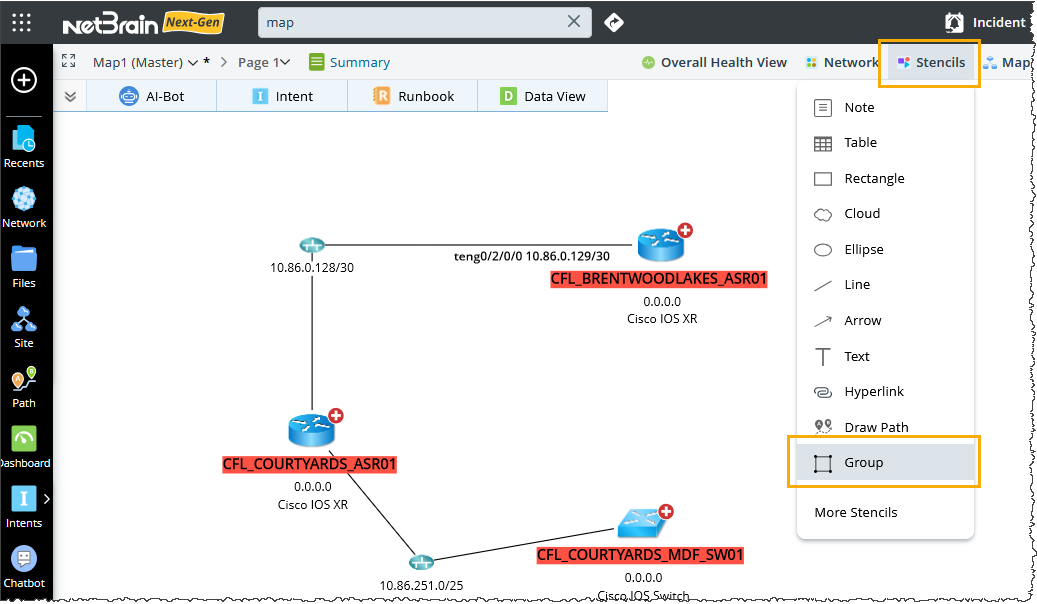
Group the Map Elements using Stencils Menu
To group map elements, follow these steps:
-
Open the map and navigate to the Stencils menu.
-
Select Group from the dropdown.
-
Draw a rectangle around the elements you want to group. Once the rectangle is drawn, the selected elements will be grouped together.
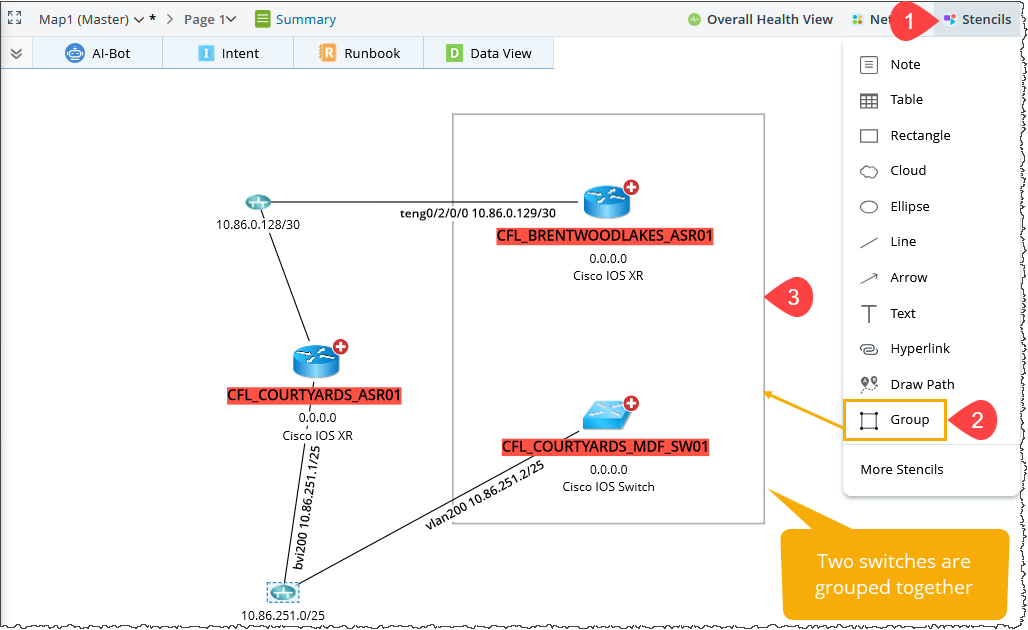
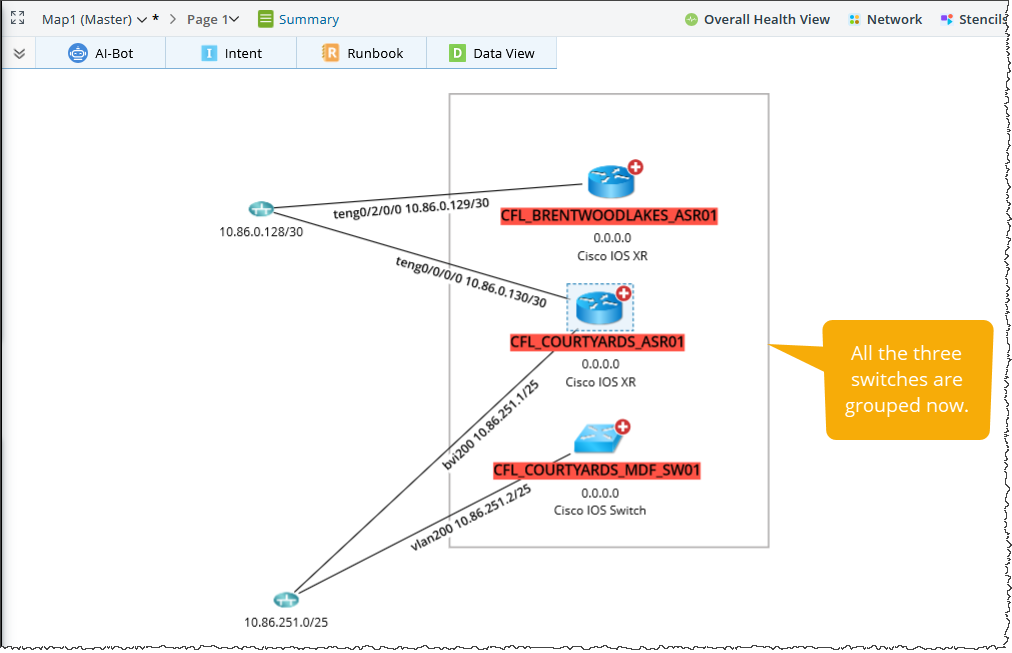
Adding Non-Group Elements to a Group
Elements, excluding group elements, can be added to a Group. In the previous image, two switches are grouped together. In this step an another switch will be added to the existing group.
-
Drag the element you wish to add to the existing Group.
Creating a Group by selecting Multiple Devices on Map
-
On the map, select multiple devices by holding the Shift key.
-
Right-click any of the selected elements and choose Group Selection(s) from the context menu.
-
Enter a name for the group, such as "Group 1" or "Group 2".


Note: - A device can only belong to one group at a time; it cannot be added to multiple groups.
-
Nested groups are supported. For instance, dragging one group (e.g., Group2) into another (e.g., Group1) will create a nested group. You can drag elements between groups. Elements from Group 1 can be moved into Group 2, and elements from Group 2 can be moved into Group 1.

Removing Elements from a Group
To move graphic elements out of a group, you can use both menu options and drag-and-drop.
Below are the methods to remove elements from a group or nested group:
-
Removing an Element from a Group
- Select the element.
-
Right-click and choose Remove from Group.|
You can also drag and drop the element out of the group to remove it.

-
Removing an Element from a Nested Group
- Select the element within the nested group structure.
-
Right-click and select Remove from Group.
-
Ungrouping Nested Groups
- Select elements from Group 2, which is inside Group 1.
-
Right-click and choose Ungroup to separate Group 2 elements from the structure.

Deleting a Group or Multiple Groups
- To delete both a group and all the objects it contains, select the group stencil and choose the Delete Group and Nodes option from the right-click menu.
-
To delete multiple groups and all objects contained within them, select multiple group stencils and use the Delete Group and Nodes option from the right-click menu.

Grouping by Specific Property
Map elements can be grouped based on their shared attributes. To access this feature, right-click in an empty area of the map and select the "Group Layout" menu. This menu displays the available grouping properties based on the types of objects present on the map, such as Physical Devices or Cloud Devices.
The sub-menu lists the supported properties for grouping for each node type.
|
Node Type |
Property for Grouping |
Menu |
|
|
1 |
Traditional Device |
Location Use the GDR Location property value to group objects. Objects with the same Location property value will be grouped together. Objects with an empty Location property will not be grouped. Site Retrieve the GDR Site property values for all objects on the map. Objects with the same Site property value will be grouped together, while those with an empty Site property will not be grouped. |

|
|
2 |
Azure |
|

|
|
3 |
AWS |
|

|
|
4 |
GCP |
|

|