Settings for Exporting a Map
Content Settings
Content Settings determine what contents are included in the exported Word document from a map. The left pane displays the table of the content of the document, which can be renamed, moved up/down, and removed. The right pane is where you can define the text of the document. You can customize the contents of the word document or import a Word Template.
The content categories in the Word document are introduced below:
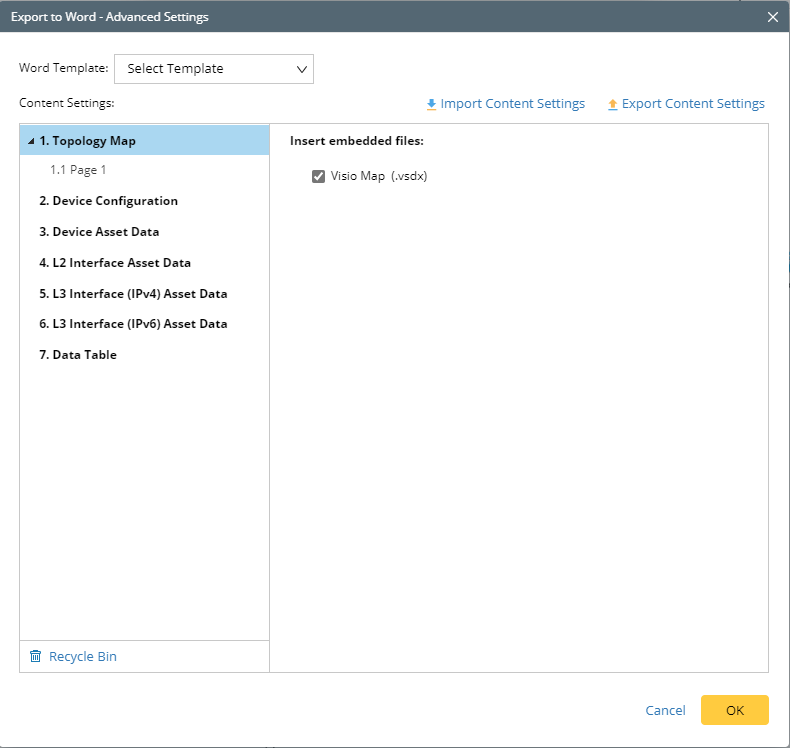
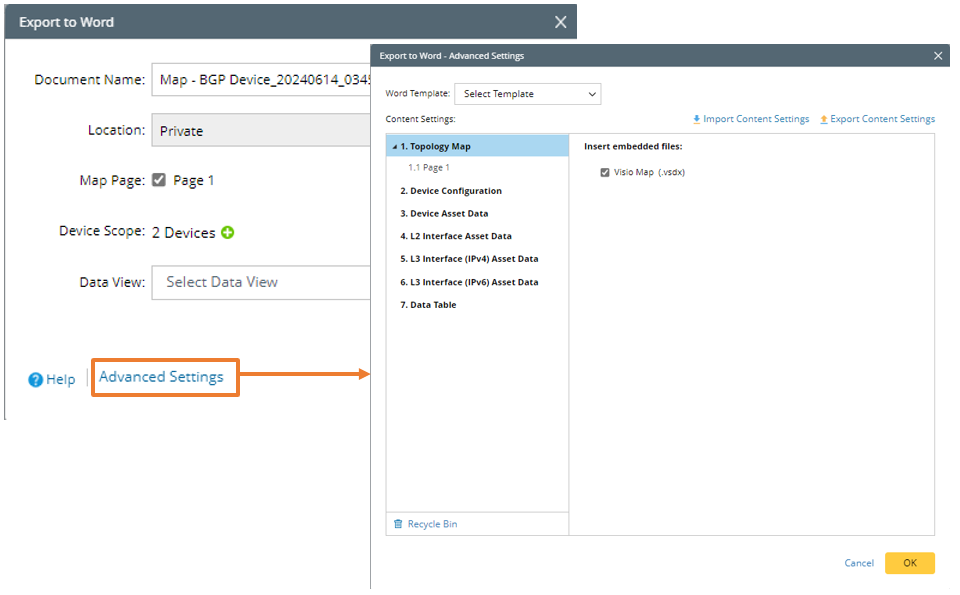
- Topology Map: Visio Map — If this checkbox in the right pane is selected, a Visio map will be embedded in the Word document.
- Path: Path item that can be added to the Word document if a path drawn on the map. in the left pane, the Source and Destination of the path on the map are shown. In the right pane, you can select the specific contents to be exported.
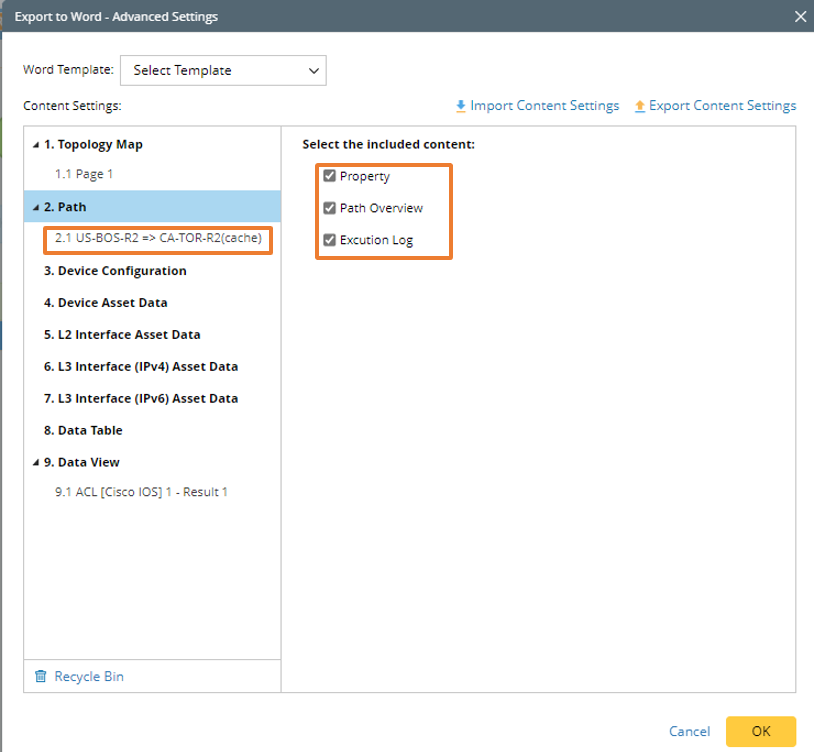
- Property: The path properties, such as name, direction, and data source.
- Path Overview: The general path information, such as path number and device note related to the path.
- Execution Log: The execution log for path-based automation will be exported.
- Device Configuration: This section will define what device configuration will be added to the exported Word file.

- Insert configuration file: Select the checkbox to insert configuration file into the Word document.
- File type: You can choose to display the full configuration or select part of the configurations to be added to the Word document.
- Display Mode: Select the layout of the device configuration. Two modes are provided: Horizontal and Vertical.
- Display configuration in the Word and limit the size to: Enable displaying configuration in the Word document and give the upper limit to the size of the configuration to be displayed.
- Device Asset Data: You can specify device asset data to export. Check the checkbox in the left pane, then this item will be added to the Items Selected list to the right. Click the
 icon to remove a selected item. By default, the following asset data are selected: Hostname, Mgmt IP, Device Type, Vendor, Model, Software Version, Serial Number.
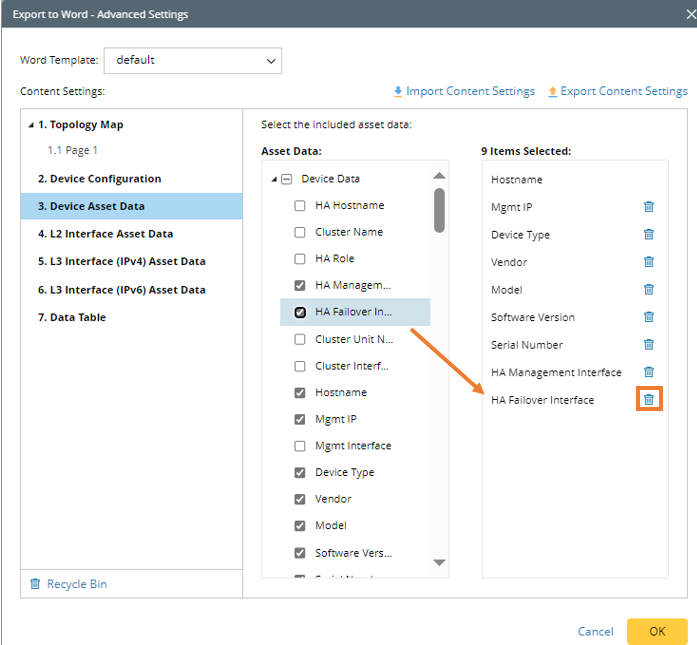

Note: Hostname is selected by default and cannot be removed from the list. - L2 Interface Asset Data: Select L2 interface asset data to be added to Word document. Select checkbox of asset data to move the item to the Items Selected list to the right.

- Interface Scope: You can select all the interfaces or select Visible Interfaces Only to add only the interfaces shown on the map to the Word document.
- Interface Filter: Input keywords to search for the interfaces associated with the map devices. Fuzzy match is supported, and it is not case-sensitive, e.g., you can input 'vla' to search for vLAN interfaces.
Note: Wildcard characters are supported in searching interface. For example, you can input 'vlan*' to search for interfaces having a name starting with 'vlan'.
- L3 Interface (IPv4) Asset Data: Select L3 (IPv4) interface asset data to be added to Word document. The operations and logic are the same as those for adding L2 Interface Asset Data.
- L3 Interface (IPv6) Asset Data: Select L3 (IPv6) interface asset data to be added to Word document. The operations and logic are the same as those for adding L2 Interface Asset Data.
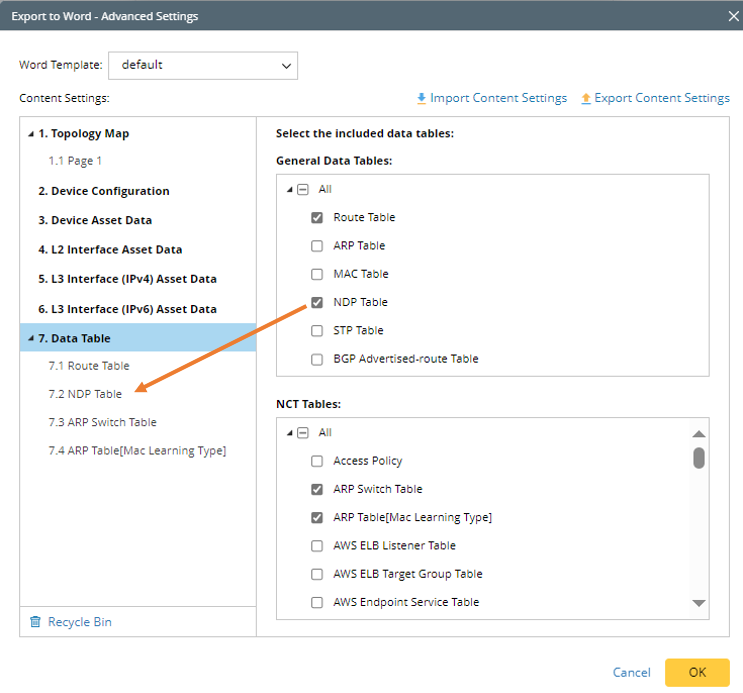
- Data Table: Select data tables to export, such as Route Table, NDP Table, NAT Table and NCT Table. Select table from the right pane, then the table will be added under the Data Table node in the left pane.
- Data View: The data view saved within the map can be applied to the map. Data View of map can be exported to the Word Document.
- Data Table — Data table of devices related to the Data View.
- Monitor Chart — Only include monitor charts with errors or warnings from the Data View.
- Time Range: Set the time span for obtaining the Monitor Chart data of Probe Data View generated in this time period to export to Word document.
Import and Export Content Settings
Another way of creating a satisfactory Word Template is to export the current content settings (the exported content settings template file is in JSON format) and modify it as a template. Then the exported file can be imported to the system to be used as Word Template. 
Word Template
To save the trouble of modifying the style and format of the exported word file, NetBrain provides the capability of using default word template or customized word template.
To define and use default word template, follow the steps below:
- In the Export to Word dialog, click Advanced Settings to open the Advanced Settings dialog.
- Click
 in the Word Template field, the drop-down menu will display, then click the setting icon
  next to the default option.
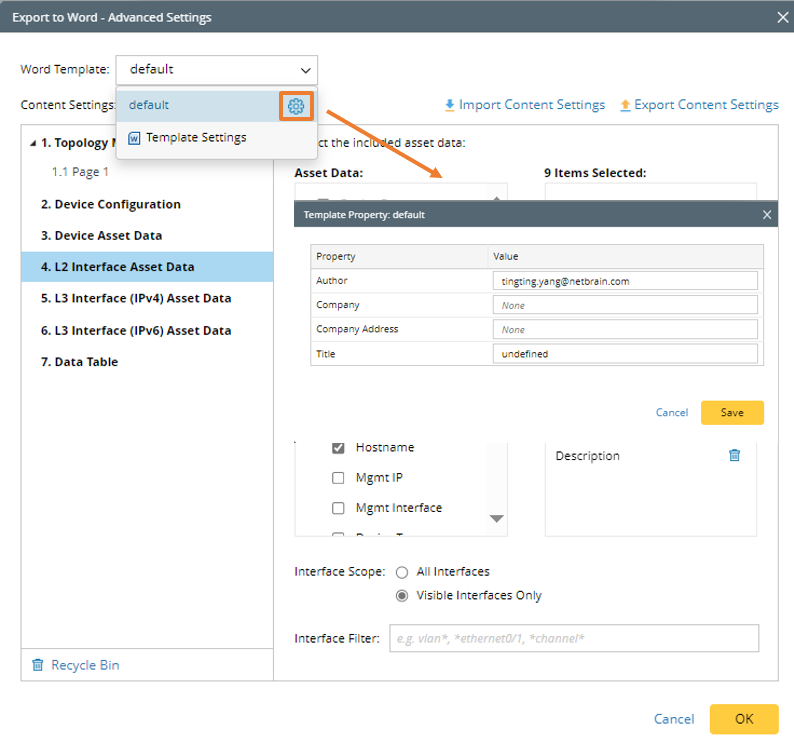
- In the pop-up dialog, define the following:
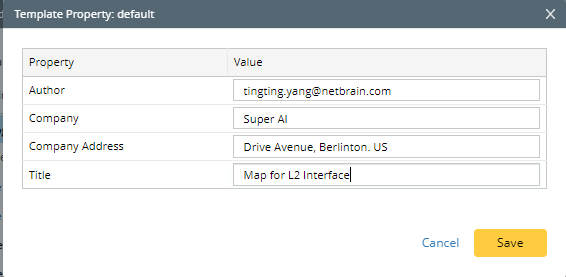
- Author: The current user is automatically filled in this field. If another user logs in to NetBrain, the contents in this field will change accordingly.
- Company: Type the company name.
- Company Address: Type the company address.
- Title: The title inputted here will be shown on the cover page of the exported Word document.
Click Save to save the settings to the default word template.
Select default from the Word Template drop-down menu to apply the default template to the exported word.
To customize a new Template, follow the steps below:
- In the Export to Word dialog, click Advanced Settings to open the Advanced Settings dialog.
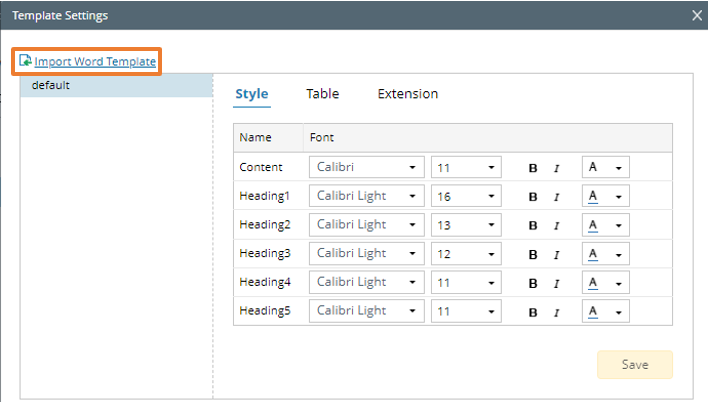
- Click in the Word Template field, the drop-down menu will display, then click Template Settings to open the Template Settings dialog.
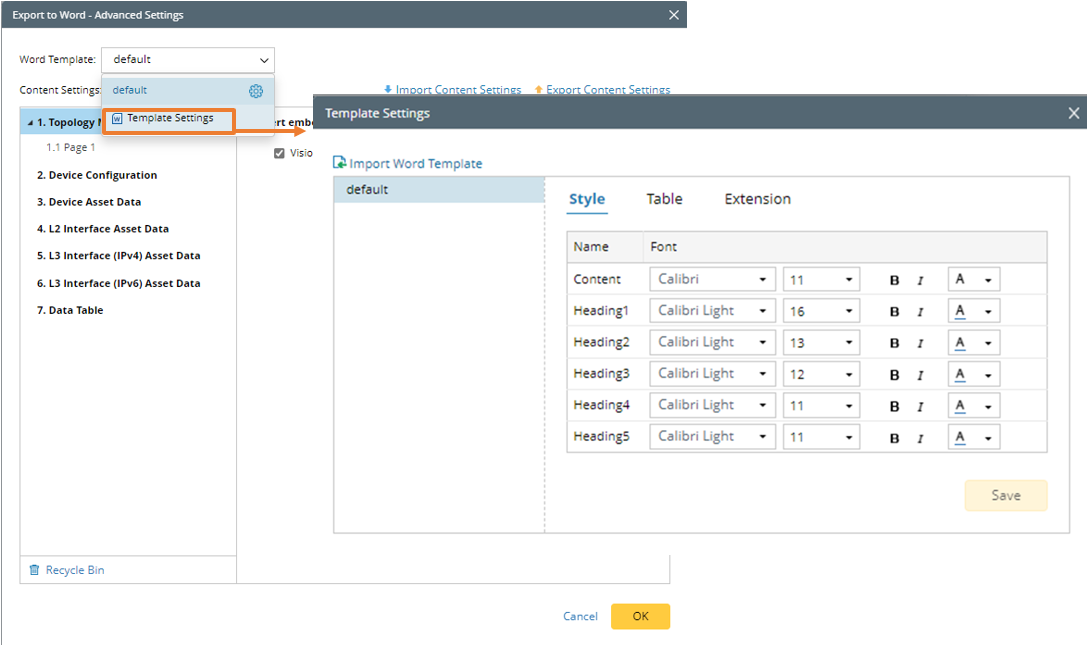
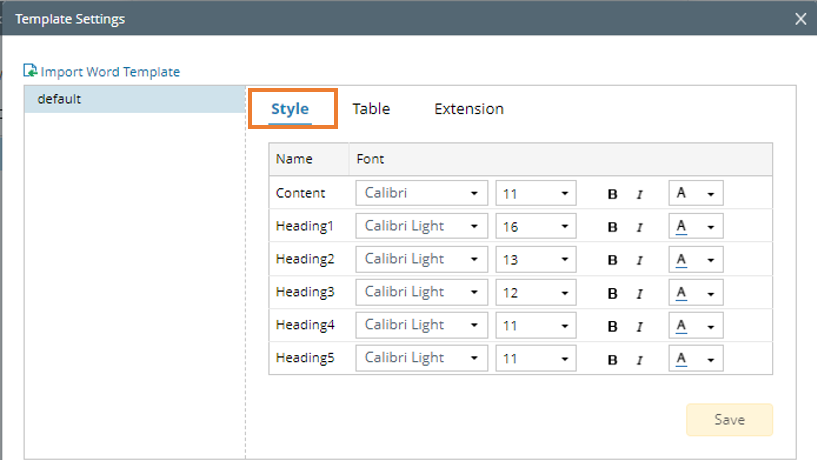
- In the Template Settings dialog, define the following
- Style: Define the style of content and different level of headers.
- Table: Define the style of the table header and table row of the table in the exported Word doc.
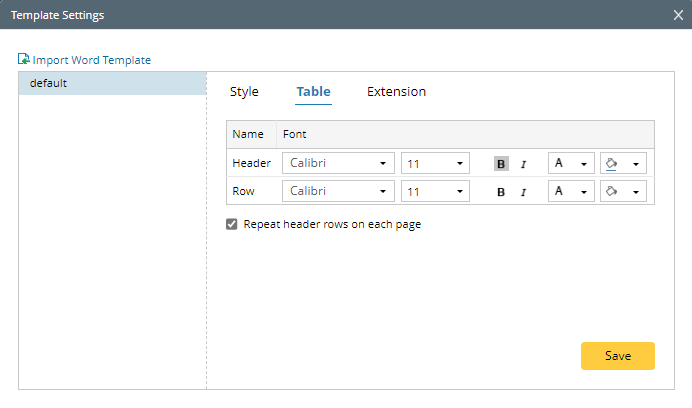
Note: Check the Repeat header rows on each page checkbox, the header will appear on each page if the table is separated by several pages. - Extension: If the Display creation information on cover page checkbox is enabled, the creation time of the Word doc will be added to the exported Word file.

- Style: Define the style of content and different level of headers.
- Click Save to complete the settings.
Configure More Word Template Settings
The Word Template can be exported. Therefore, another flexible way of modifying a Word Template is to Export Word Template → Modify Word Template → Import the Word Template.
To finish this procedure, do the following:
- In the Export to Word dialog, click Advanced Settings to open the Advanced Settings dialog.
- Click in the Word Template field, the drop-down menu will display, then click Template Settings to open the Template Settings dialog.
- Select one Word Template from the list in the left pane (in this instance, 'default' template is selected), then click Export from its drop-down menu to export the current Word Template to your local machine.
- Modify the exported Word Template, e.g., changing the background pic on the cover page, changing the company name, and more.
- Click Import Word Template to import the modified Word Template to NetBrain. Then, the new Word Template is ready to be used.