R12.1 Project Publication-2025Dec23
Manage Incident Type
Manage Incoming Incident Type
Navigate to an Incoming Incident Type:
- Click the start menu and select Intent-Based Automation > Triggered Automation Manager.
- Click the Manual-setup Triggered Diagnosis > Incoming Incident Type tab.
- Select an Incoming Incident Type, and click
 .
.
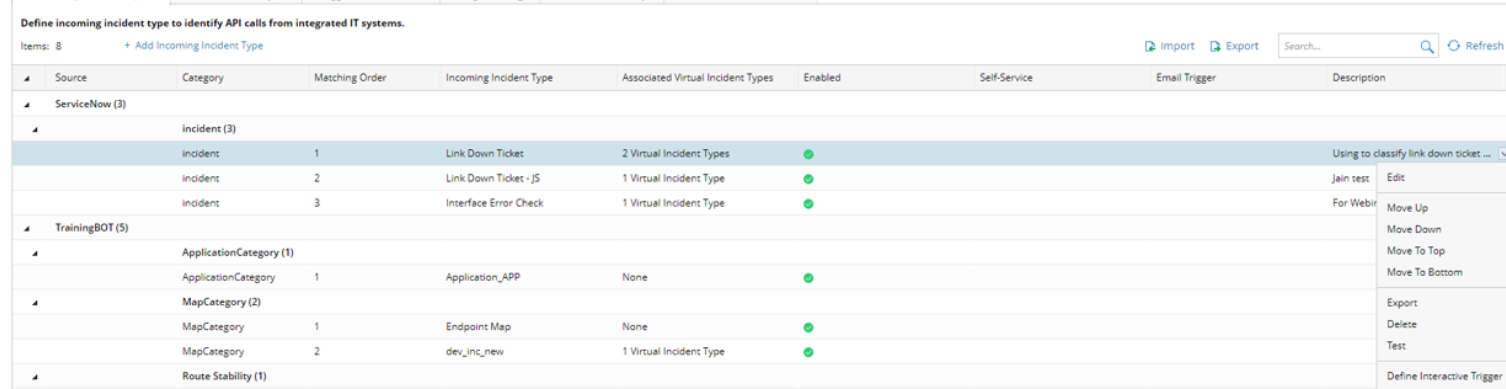
You can perform the following operations:
- Edit, delete, or test the incident type.
- Export the incident type to a local file.
- Move the incident type up, down, to the top, and bottom.

Note: As the incident types are grouped by their source and category, the incident type can only be moved within its source.
Note: The system will match an incoming API call to Incident Types according to the order. - Define the Interactive Trigger for this incident type, so the incoming incident type can also classify sources from Email or self-service.
- To export all Incident Types, click
 .
.
To import an incoming incident type from a file (in .XIT format), click Import from the drop-down menu or ![]() > Add Incoming Incident Type … > select a local file in the pop-up window.
> Add Incoming Incident Type … > select a local file in the pop-up window.
Manage Virtual Incident Type
Navigate to a Virtual Incident Type:
- Click the start menu and select Intent-Based Automation > Triggered Automation Manager.
- Click the Manual-setup Triggered Diagnosis > Virtual Incident Type tab.
- Select a Virtual Incident Type, and click .
You can perform the following operations:
- Edit or delete the incident type.
- Export (or Click ) the incident type to a local file.
- Define the Interactive Trigger for the incident type, so the incoming incident type can also classify sources from Email or self-service.
To import a Virtual Incident Type, click Import from the drop-down menu or ![]() > Add Virtual Incident Type … > select a local file in the pop-up window.
> Add Virtual Incident Type … > select a local file in the pop-up window.