Support All Intent Types
Runbook intent node supports the following intent types: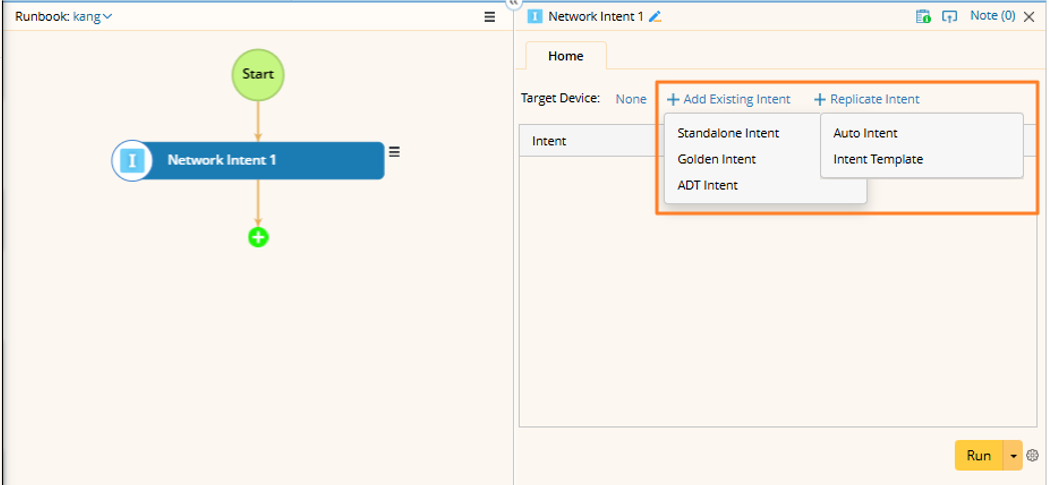
Golden Intent

- Select a single feature (only features containing golden intents will be listed). Then, the system will filter the cloned intent devices in all golden intents under the selected feature using the target devices.
- View the listed golden intents: If a golden intent contains any of the target devices, it will be listed and selected by default.

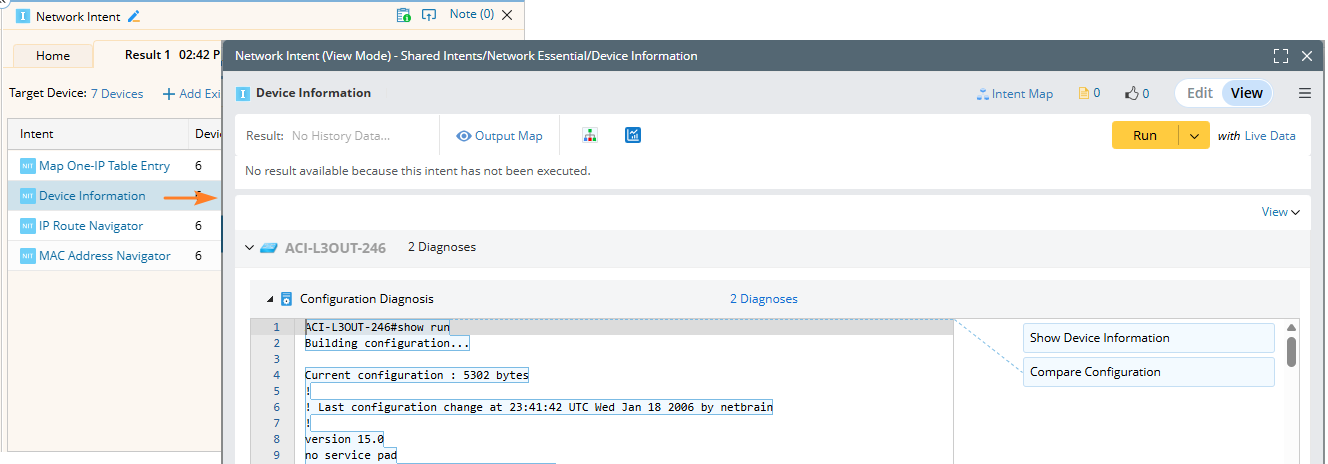
Note: If you click the golden intent name, a new tab page will open and navigate to this golden intent in the GES Golden Intent Manager. You can learn more definition and diagnosis logic in details. 
- Click Run to execute all intents. Then the matched golden intents will be executed together within a wrapper intent. The execution results (including Data View, remediation, CSV, etc.) will be automatically summarized under the current wrapper intent.

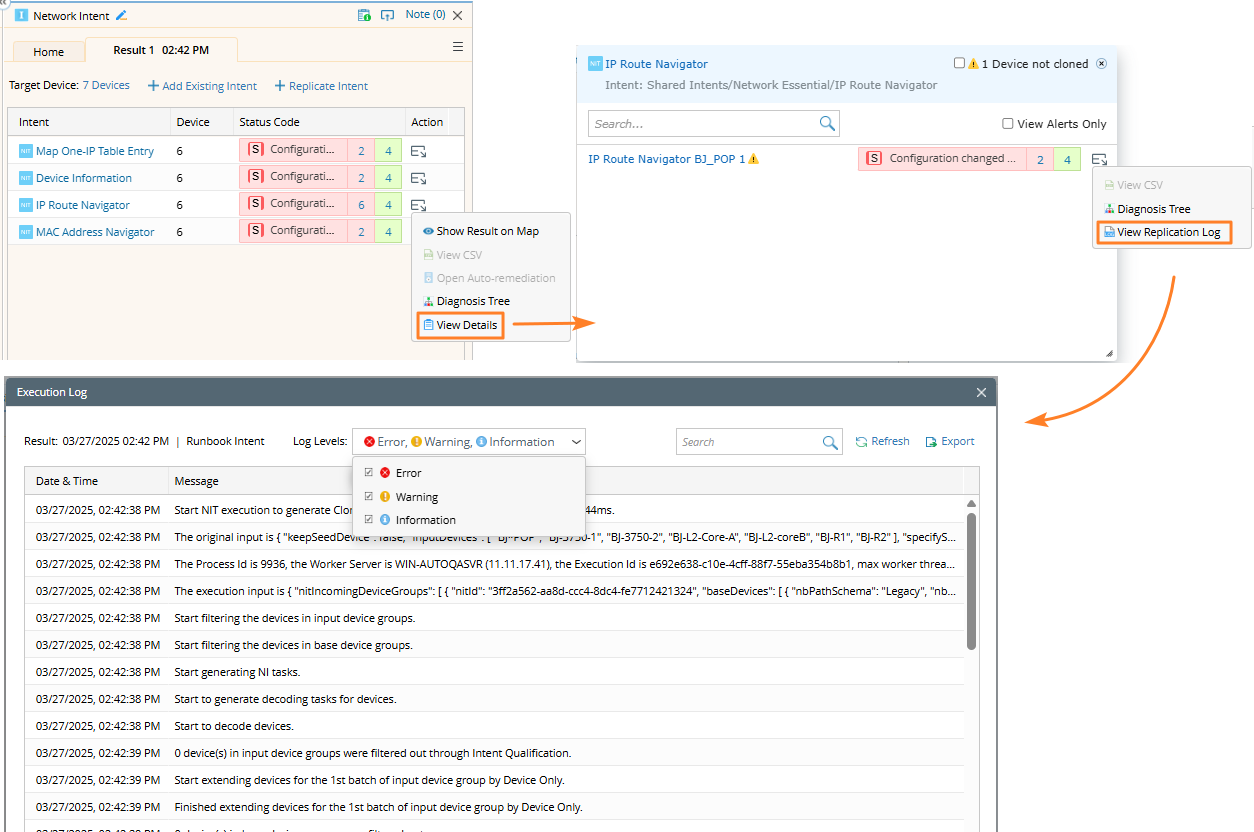
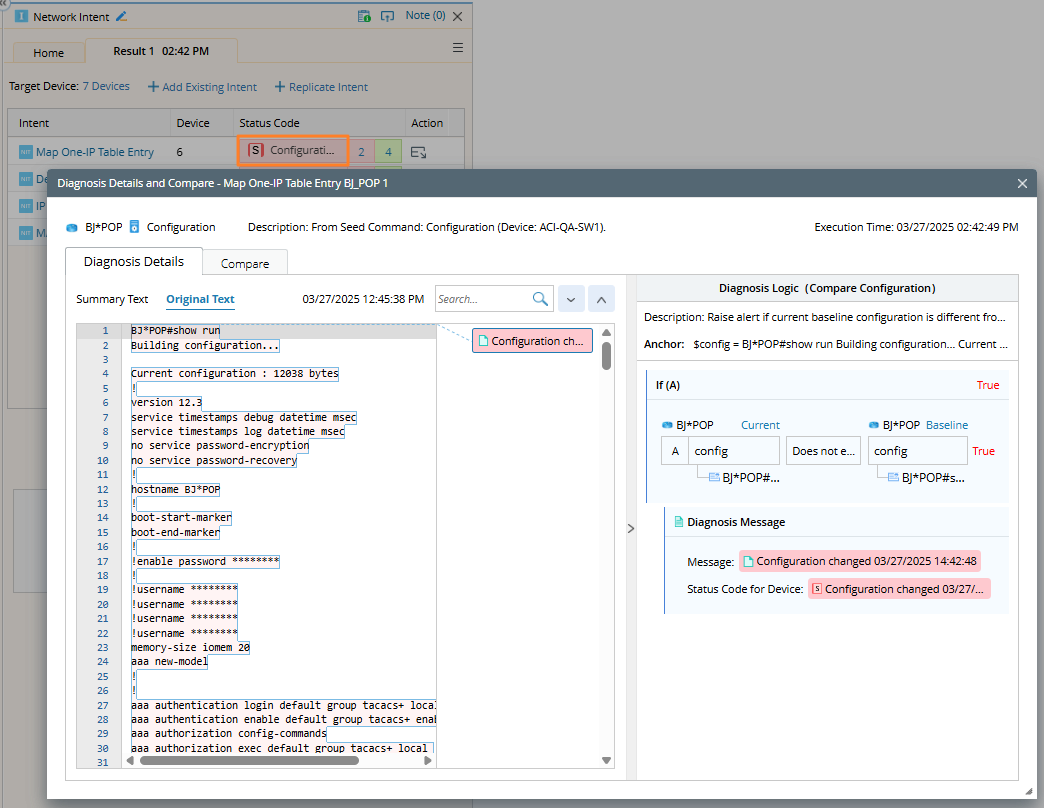
- You can click View Details to check the status code of each specific Golden Intent of a device.
- In the detailed tip window, you can search the content using the search box. The following context menus for each intent are also provided.
- When the View Alerts Only check box is selected, only the intents with alerts are displayed.

ADT Intent

- Select a single ADT (only ADTs containing intent column will be listed). The filtering logic is the same as that of the golden intent. The system will filter the intent devices in all intent columns under the selected ADT using the target devices.
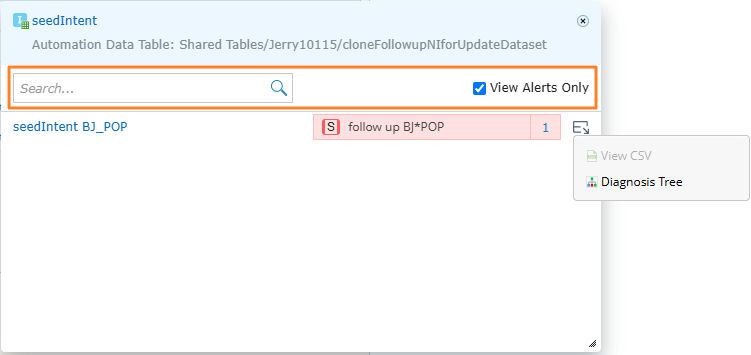
- View the seed intent: If an ADT contains any of the target devices, the seed intent, not the intent column, will be listed and selected by default.
Note: The Filter Column by Target Device option is unchecked by default, which means all intent columns of the selected ADT will be listed, and no filter logic will happen. When the option is selected, the system will filter the intent devices in all intent columns using the target devices.
Note: When you click the ADT intent column name, a new tab page will open and navigate to this ADT in the ADT Manager.

- Click Run to execute this node, and the summary information will be displayed.

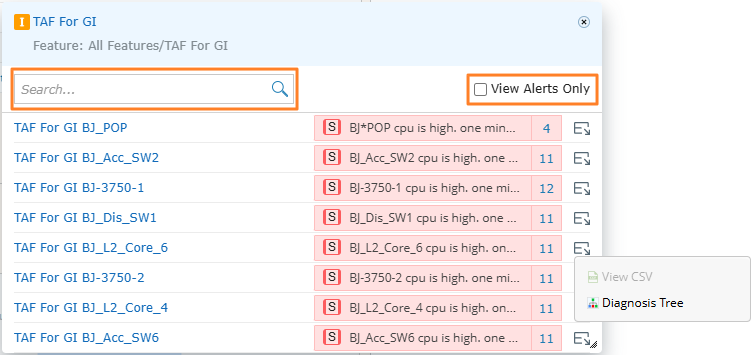
- You can search the content using the search box, and the following context menus for each column are provided.
Note: Items that are undefined or not generated will be disabled and cannot be clicked. - When the View Alerts Only check box is selected, only the intents with alerts are displayed.
Auto Intent
Unlike golden intent and ADT intent, which already have specific intents existing in the system, Auto Intent and Intent Template (NIT) dynamically replicate clone intent on the input devices and input variables (or variable values if needed) and execute the clone intents. Therefore, running such a node implicitly includes a step to replicate the intent using Auto Intent.
If the selected Auto Intent contains input variables or task variables, you need to input values for them.
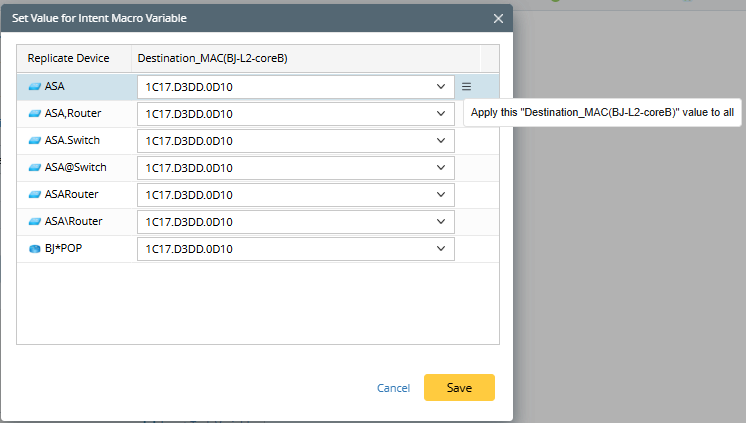
- For Macro Variable: You can click Set Macro Variable link in the Status Code column to enter a value in the input box for each device. If you want to apply input value to multiple, use the Apply to All to batch apply the value to other devices’ variables.
- For Task Variable: The Input Task Variable link will be displayed if an intent contains any task variables. Users can define all intent task variables.

After you click Run, the system will first perform replication, which follows the same process as Auto Intent replication. Every 50 devices will be replicated to one cloned intent by default.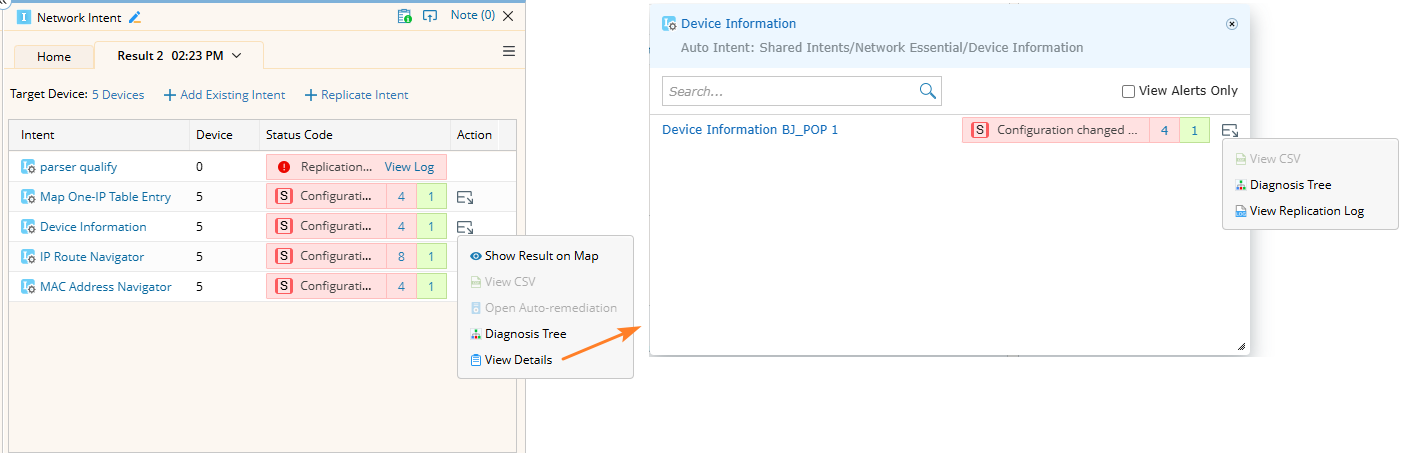
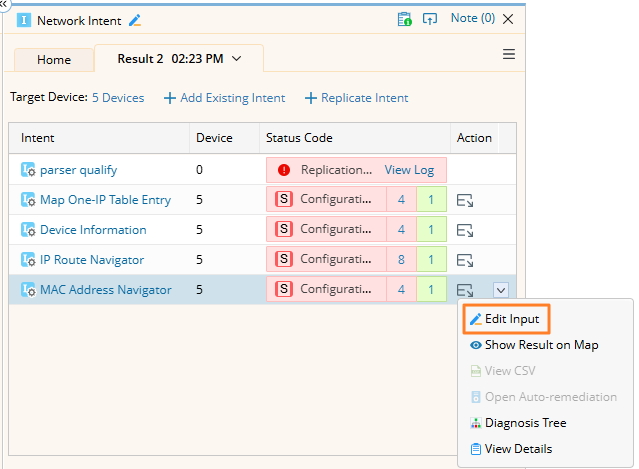
- You can view or edit the input variable values again using the Edit Input menu.
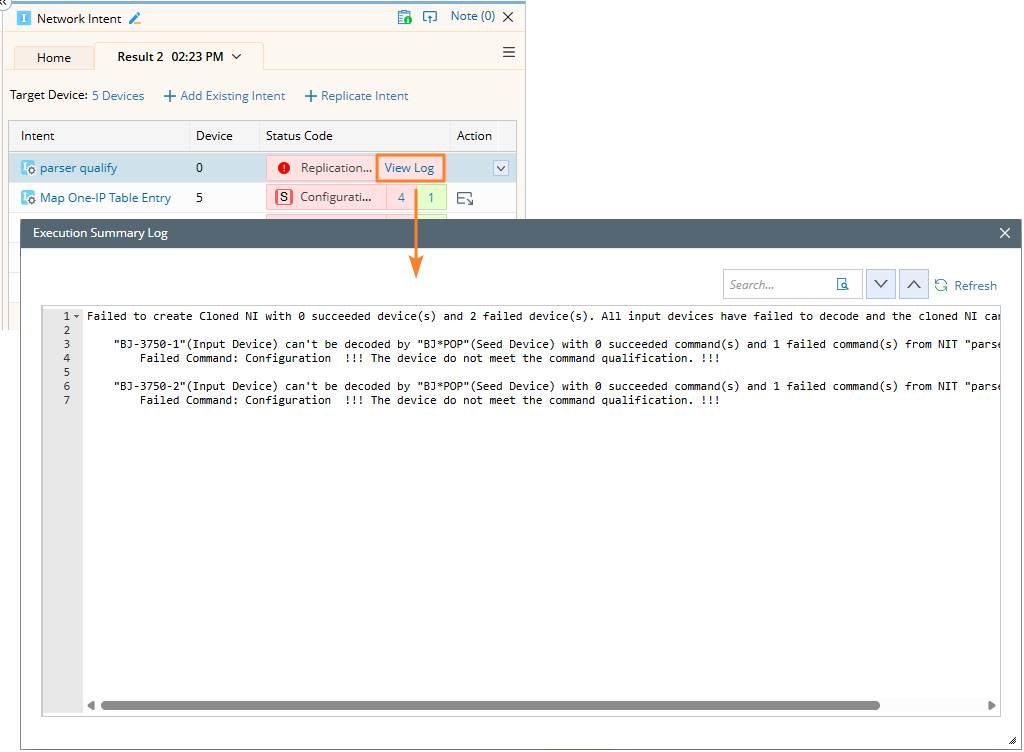
- Click View Log to view the execution summary log.
Intent Template

Add NIT, and then the execution logic is similar to that of the Auto Intent: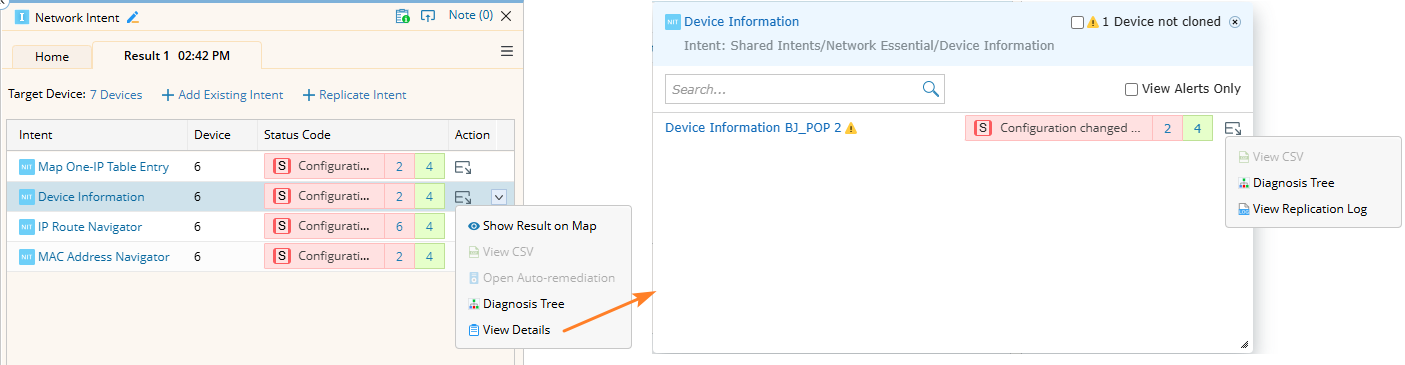
- Click the Intent Template name to open the seed intent.
- If input variable values are required, enter them first.
- Click Run. The system will replicate the intent, then execute the cloned intent and display the results.
- View Replication Log: Opens the log dialog.