Import Configurations and CLI Data
If it takes a while for you to allow live access to the NetworkBrain system, you can import configurations and CLI data directly into the system. Also, for some network devices which cannot be accessed by the NetworkBrain system, you can import the data.
The Import File Wizard supports the format of the commonly used data, one command data per file, or multiple commands of one device per file. You can also use other file formats by customizing the file detection logic.
On your desktop page, click the  icon and select Import File Wizard under the Discovery tab from the navigation menu. The wizard has four steps:
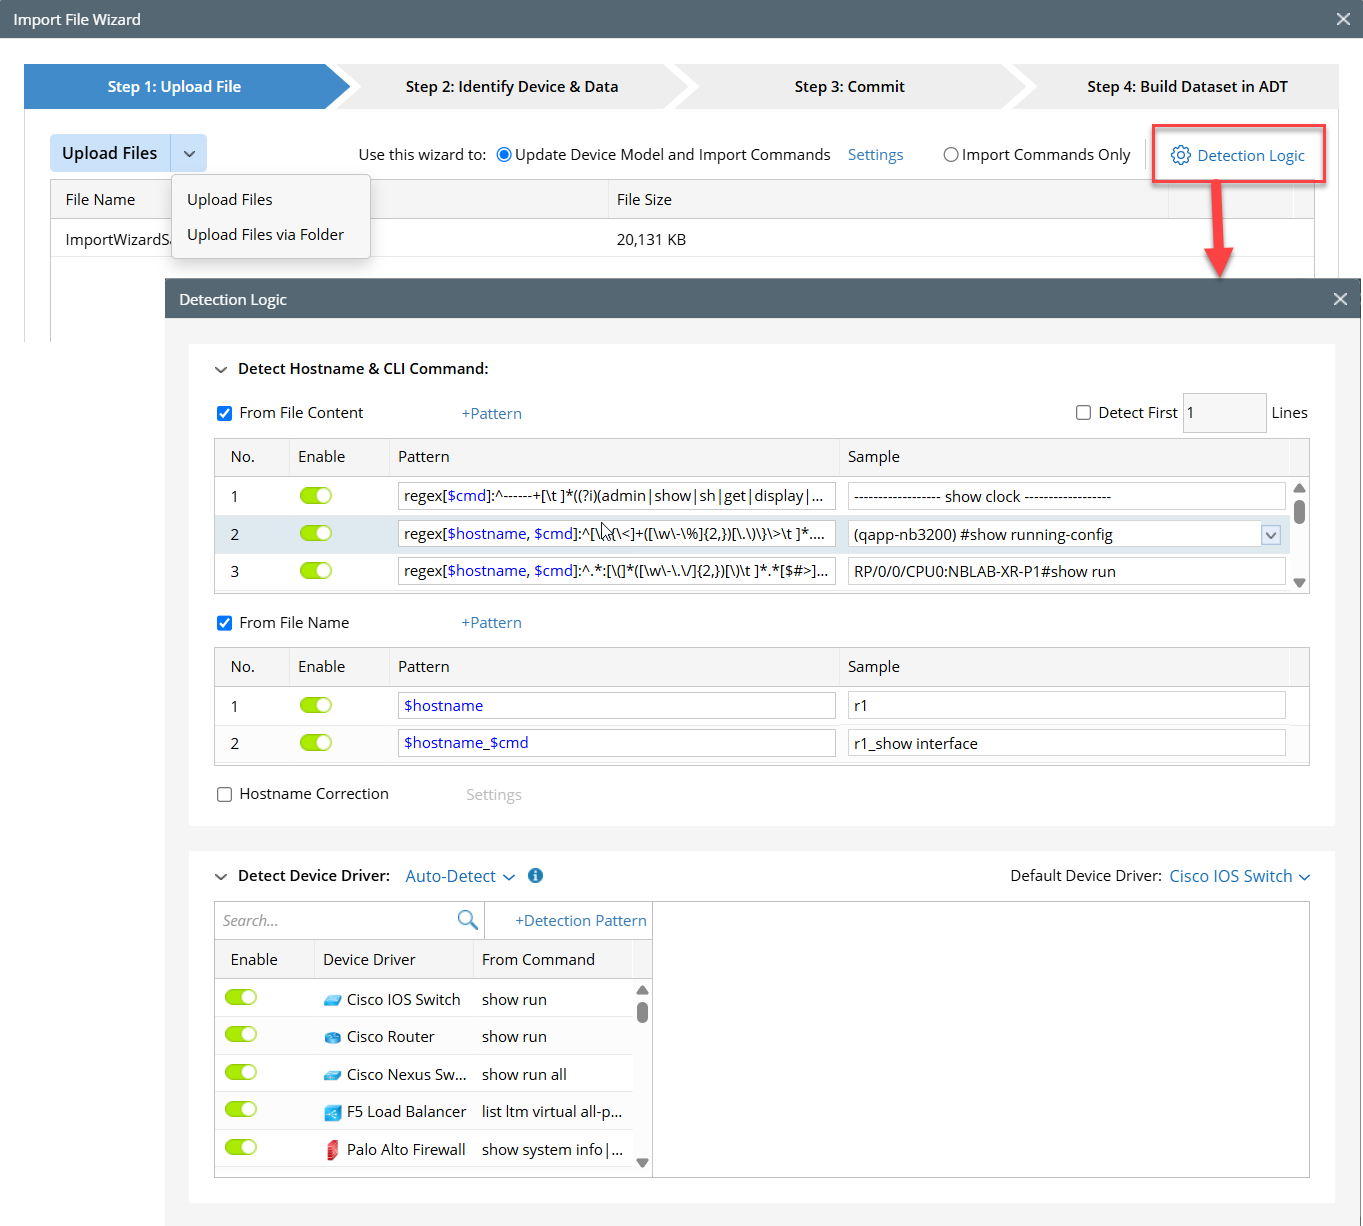
Step1: Upload File
In this step, you can upload individual files or all files in a folder. Only the files with the text type are supported, such as the .txt, .config, and .log formats. Additionally, you can also upload zip files directly.
The file can include the output of multiple commands (for example, the output of the CLI command show tech) or the device configurations (for example, the output of the command show run for Cisco devices). The file name can be <hostname>.txt or <hostname>_<command name>.txt. The system can detect the hostname from the file name or the file contents and detect logic defined in the Dtection Logic setting, which you can modify.
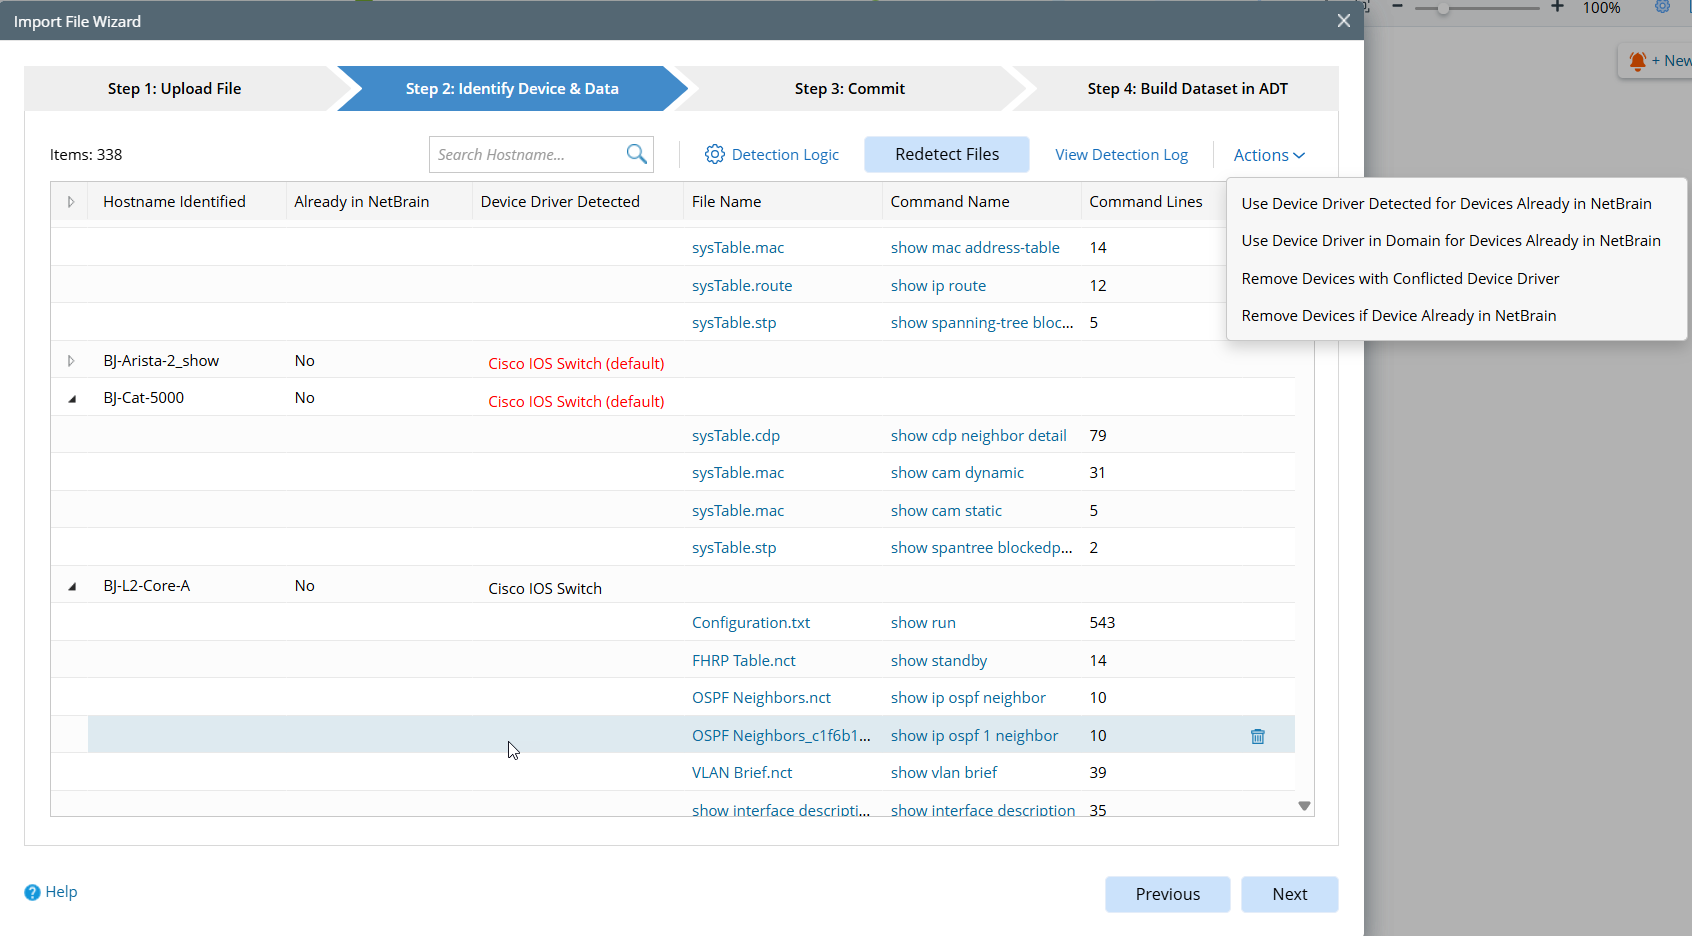
Step2: Identify Device & Data
Once you click Next on the Upload File tab (the first step), the parsing starts, and the current tab displays the parsed hostname, file name, command names, and other data for you to review. In this step, you should check whether the hostname is parsed correctly and modify the detection logic if not. Click a command to view its content. You can view the detection log for any error and take action to resolve the issues of the conflict. For example, you can select which device driver (detected one or in the domain) for a device already in the domain or remove the device if the detected device driver conflicts with one in the domain.
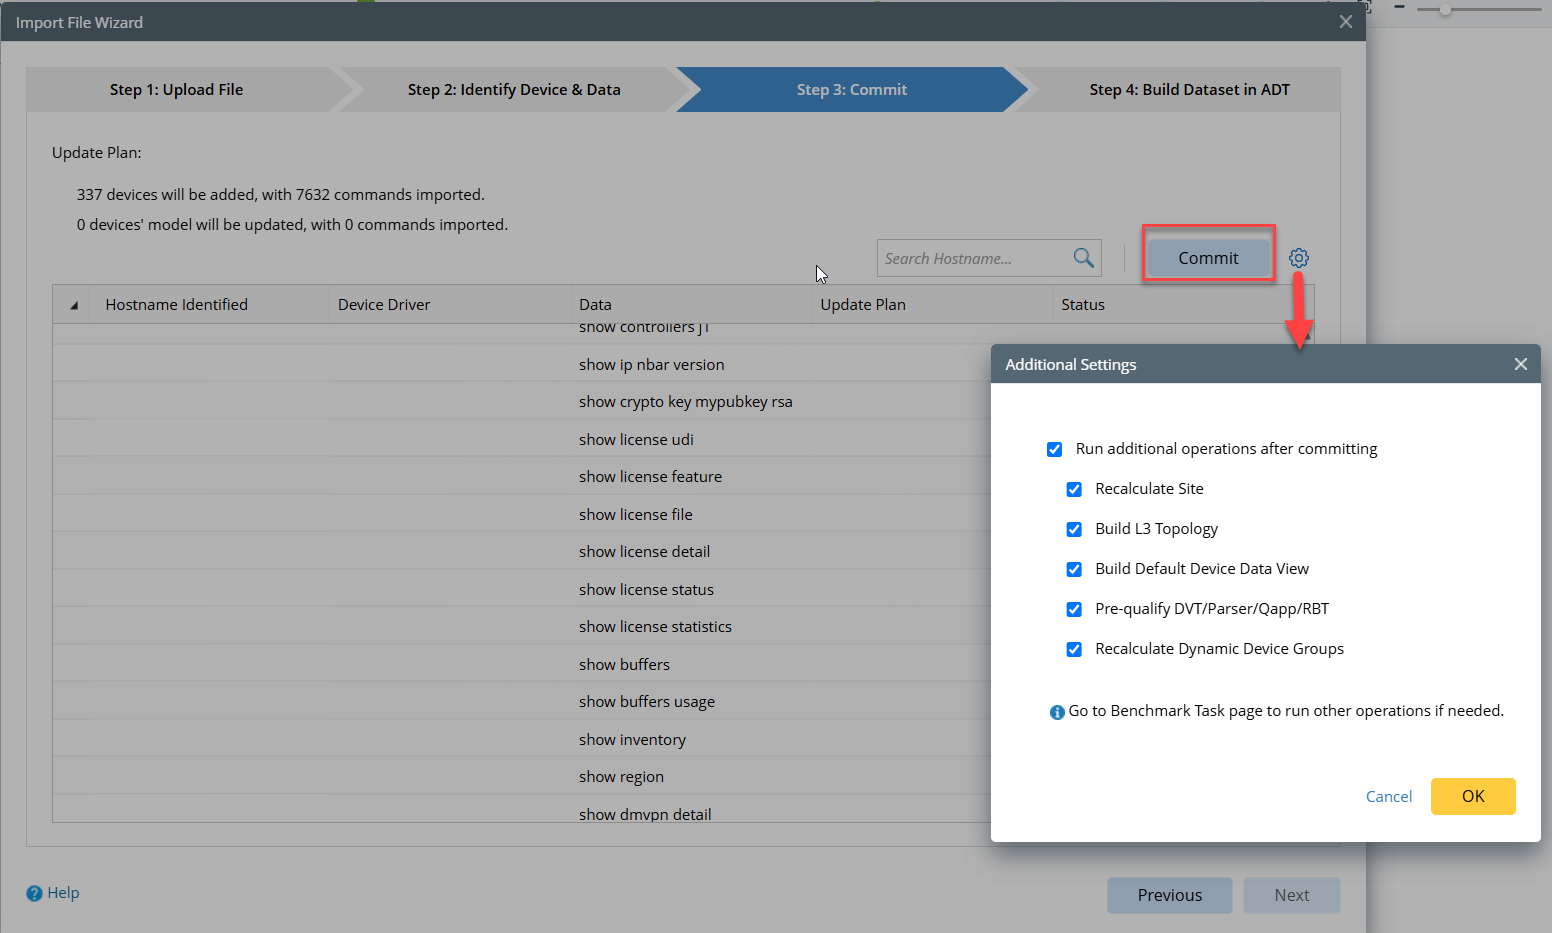
Step3: Commit
In this step, you commit to importing the data to the system. After the commit button is clicked, the system will parse the configurations and CLI command data with the driver and build the corresponding device models into the current domain, including device properties, L3 topology (L2 topology is not built by default), etc.
Step4: Build Dataset in ADT
In this last step, you can build an ADT dataset, which can be used as the default data source for all automations. Create a new ADT under a shared folder and select the New Dataset Column. Then check the checkbox Set as Default Dataset and click the Apply button. After that, the imported configurations and CLI data will be used by automation, such as Golden Discovery and Golden Intents.
