R12.1-JA-2025June05
Create Probes in Batch
Auto Probe provides a quick way for power users to create probes in batches on a set of qualified devices or interfaces. Once completed, power users can use these device/interface probes to set up the ADT based PAF.
Add Seed Probe:
Seed probe on a device can be created from Preventive Automation Manager > Monitoring Probe tab, refer to Defining Flash Probe for further detailed information.
Create Auto Probe:
To create a new Auto Probe on a device:
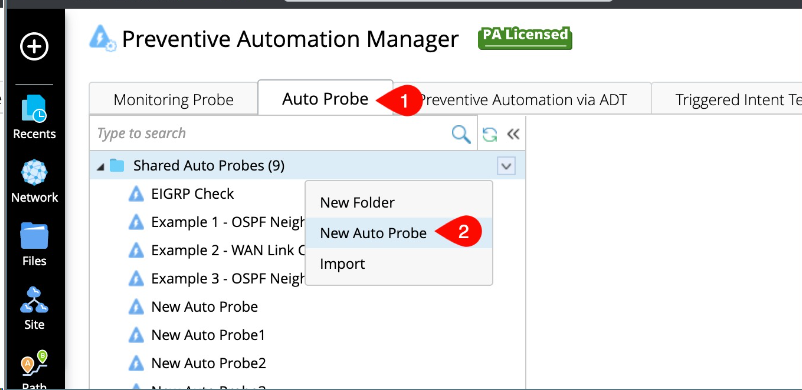
- Go to Preventive Automation Manager > Auto Probe tab.
- Select the New Auto Probe from drop down menu located next to Shared Auto Probes.
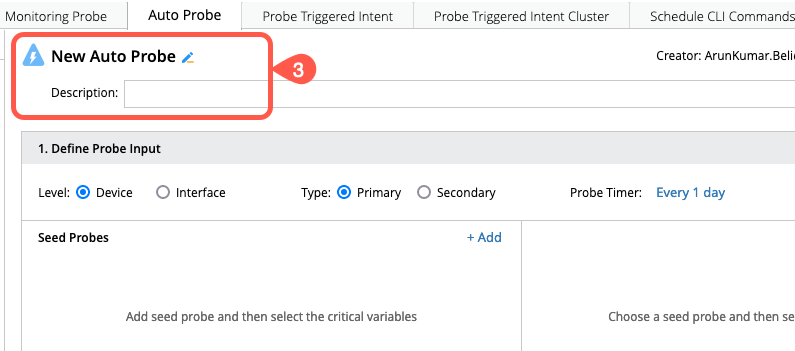
- Rename the newly created auto probe and add brief description.
-
In the Define Probe Input pane:
- Choose the required option for fields like Level (Device/Interface), Type (Primary/Secondary) and Probe Timer frequency.
- To choose the seed probes that you have created, click on +Add located next to the field Seed Probes which will popup a window to choose the probes via Devices.
- Select the Critical Variables from the list on the right side of the window.
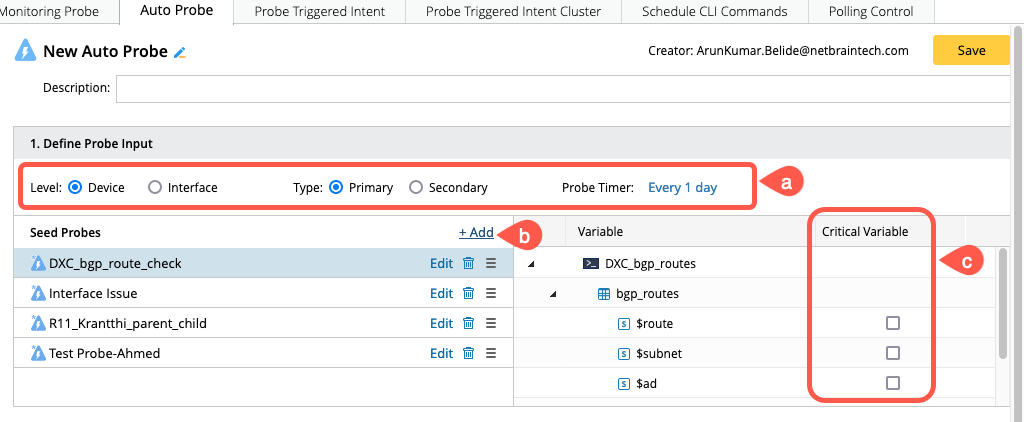

Note: Select at least one critical variable from each seed probe to create the Auto Probes in batch.
-
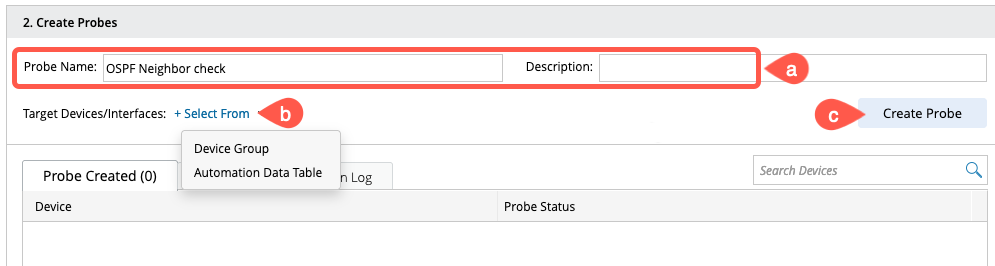
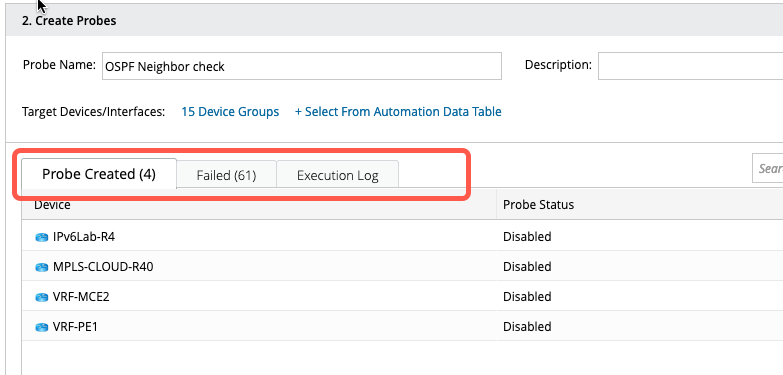
As defining the probe inputs is completed, go to Create Probes pane to select the target:
- Fill in the Probe Name and Description details in brief.
-
Click on +Select From to add all the target devices/interfaces from Device Group and/or Automation Data Table.
- Click on Create Probe to generate probes in batch.
- The probes that are Created and Failed will be listed in separate tabs along with the Execution logs.
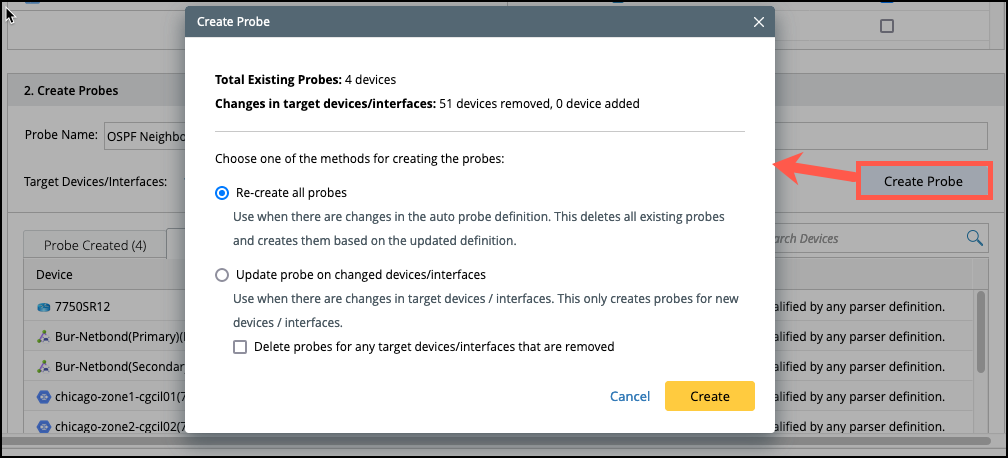
- To recreate all probes or update probe on changed devices/interfaces, click on Create Probe and select the option as per your use case.
- Verify everything and click on Save button located at the top right corner of the Auto Probe tab.
- The saved Auto Probe can be viewed in the manager section.