Looking Glass Probe configuration to trigger ADT Intents
By running the Looking Glass Probe on a limited set of devices, it can detect any anomaly in the whole network. Then, these probes will parse alert information to identify problematic entries and trigger intent diagnosis for a larger group of devices. Deploying the looking glass probes to monitor the network status will significantly reduce the devices needed to run the probes and the system resources needed for high-frequency polling.
Typical looking glass probes include:
- Route Table Check: Filter critical route from the show ip route and compare the data with the baseline to verify if the routes remain same. Any changed routes can be exported to the error code to trigger the corresponding intent diagnosis stored in ADT.
- Neighbor Table Check: Using the command show ip bgp neighbor, compare the BGP neighbor status with baseline data to verify these neighbors are healthy. In case of any neighbor with issues, the neighbor information can be exported to the error code to trigger the intent diagnosis stored in ADT.
Configure Looking Glass Probe to Trigger Intents of ADT
The process of configuring looking glass probes to trigger ADT involves the following steps:
- Configure Looking Glass Probe
- Configure Match Condition for error code of LG probe with ADT row
- Calculate LG Probe Coverage
- Configure secondary probe for verification (optional)
- Configure Intent to Trigger (optional)
Configure the Looking Glass Probe:
Configure the probe as detailed in the Section Defining Flash Probe, it involves the following step by step procedures:
- Define parser and select parser variable
- Define table row/column filter
- Define the diagnosis logic.
- Define the error code table.

Configure Match Condition for LG probe error code with ADT row:
To configure the match condition for looking glass probe error code with ADT row:
- Open the Preventive Automation Manager from the netbrain desktop and go to Preventive Automation via ADT tab.
-
Select the created automation from the list, and its basic configuration and intents are displayed in the bottom half of the pane.
- Go to the Looking Glass probe tab in the bottom half of the Pane.
- Click on +Add Looking Glass probe to open a pop-up window Add Looking Glass Probe.
- Select Manage Looking Glass Probe to choose the looking glass probe defined in Configure Looking Glass Probe.
-
Select the Default Goup or add a new group using +Add Group located at the top right corner of the window and then click on +Add Probe to popup another window Add Flash Probes.
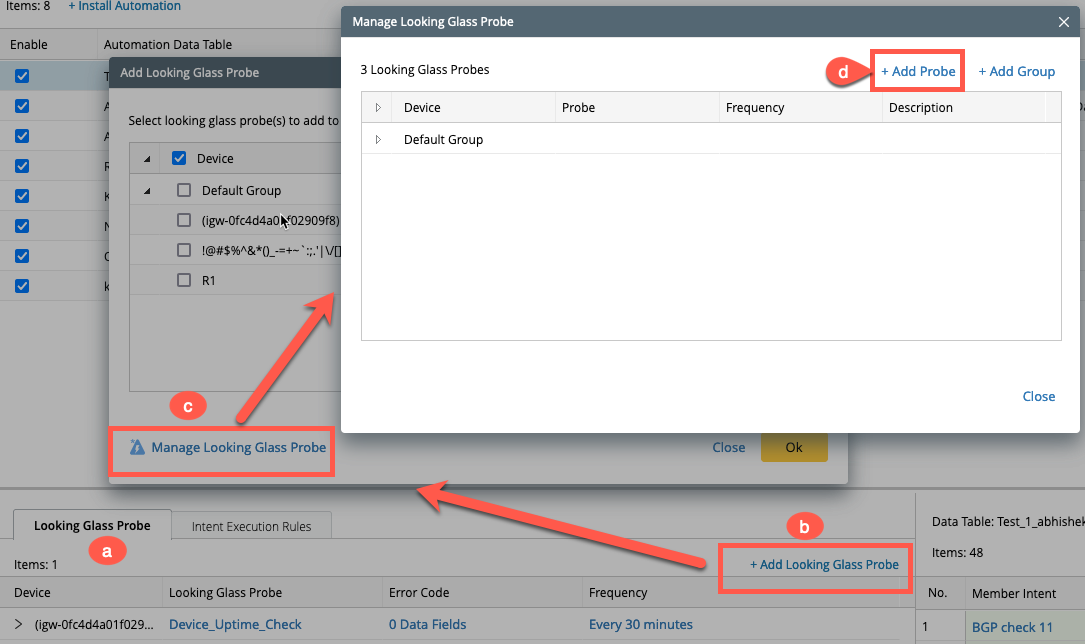
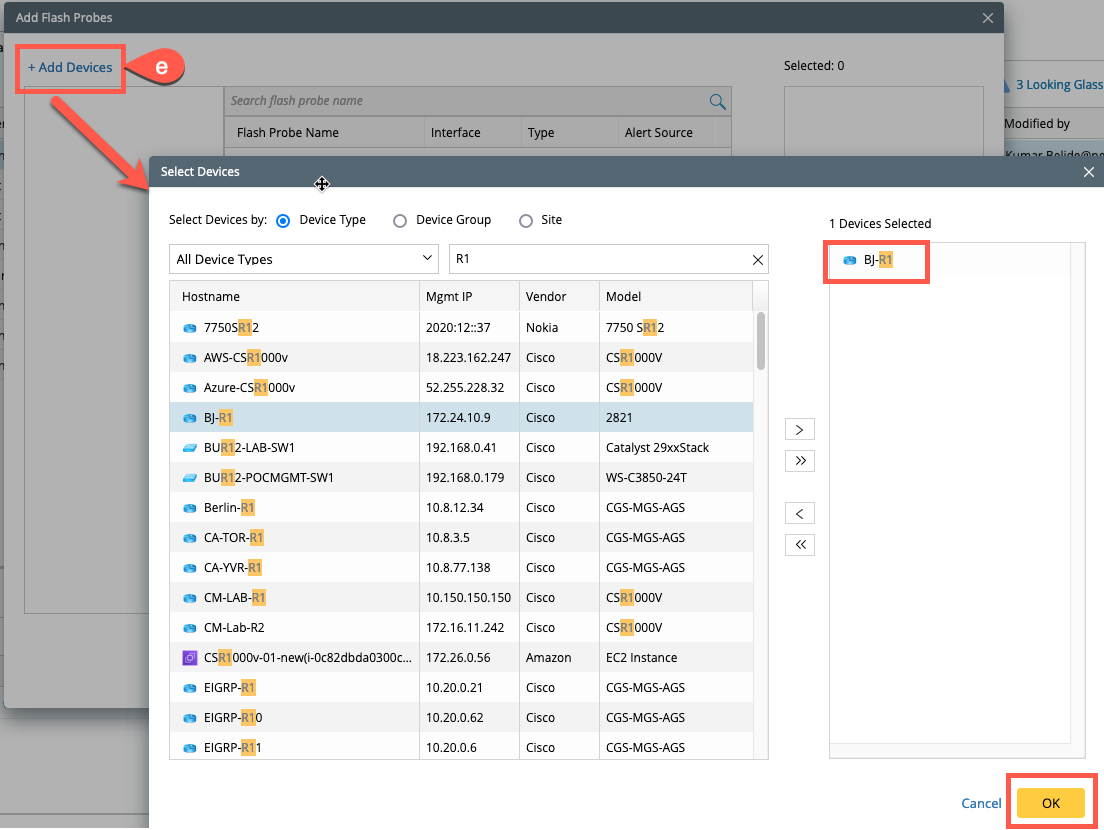
- Click on +Add Devices which will further another window Select Devices, choose the required devices and select > and then OK.
- Now all the device probes will appear in the Add Flash Probes window, select the applicable probe and select > and then click OK.
- The selected probe now appears in the Manage Looking Glass probe window and then back in Add Looking Glass probe window, select it and click OK.
-
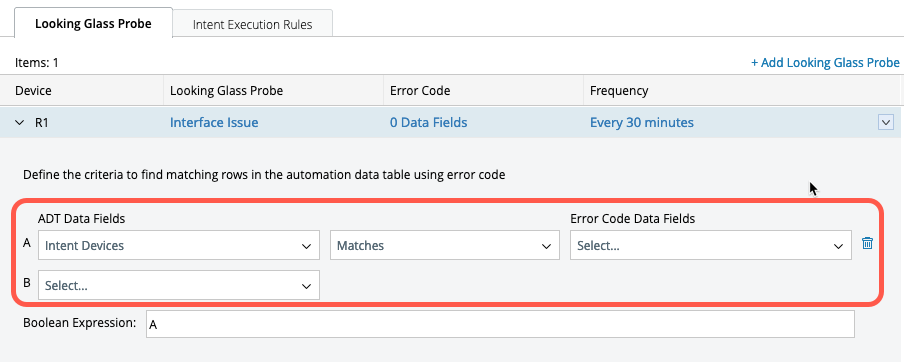
After selecting the Looking Glass Probes, configure the match between the ADT Table Fields and Error Code data Fields as shown in the following figure.
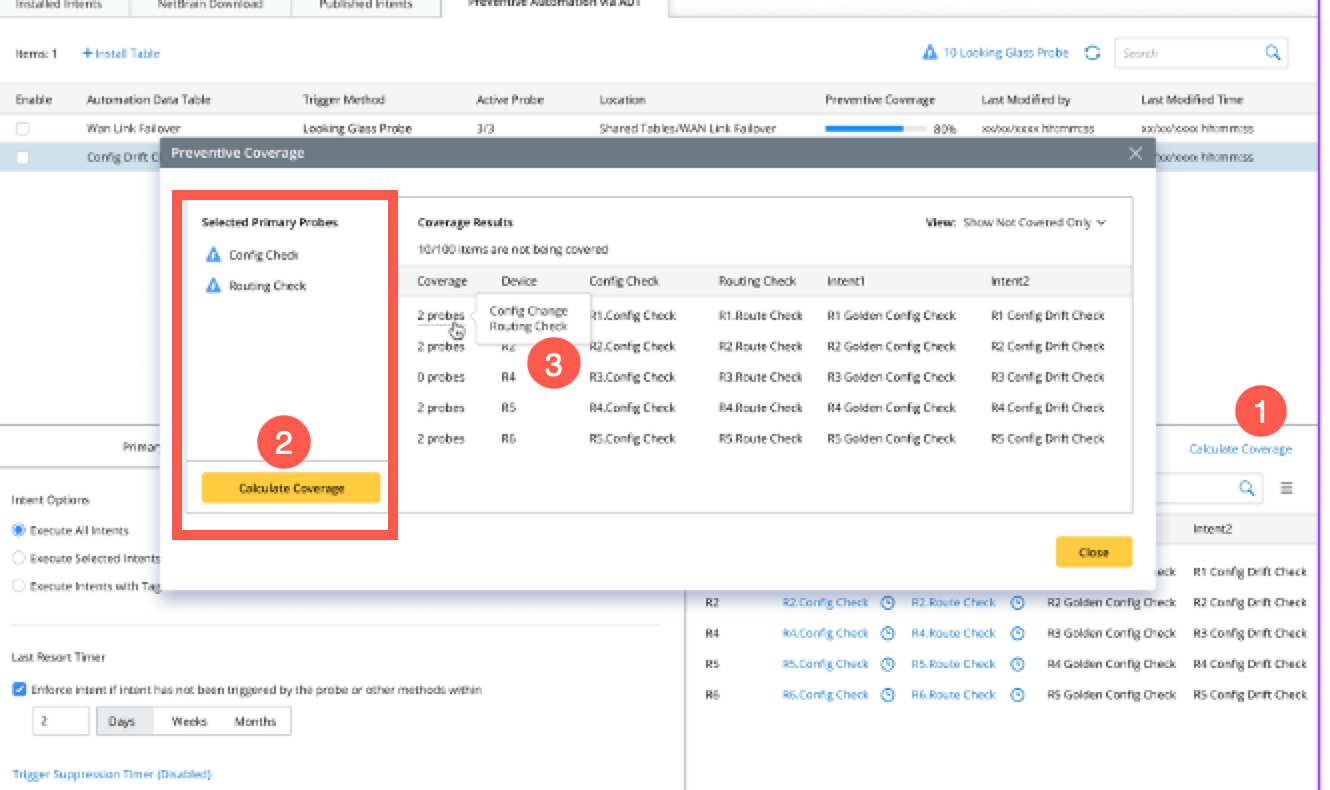
Calculate Coverage:
Use the calculate coverage function to test whether the looking glass probe covers all the critical ADT rows.-
Click on Calculate Coverage and a to open Preventive Coverage window.
-
By default, all the LG Probes are selected. Click on Calculate Coverage and the coverage will be calculated .
-
After calculating, the system will provide information for each LG Probe. When the user hovers on the information, it will provide detailed information of the match to the probe as shown in the following figure:
-
You can select different options from the drop down menu of the View field for different results:
- Show Not Covered Only
- Show Covered Only
- Show All

INTENT EXECUTION RULES
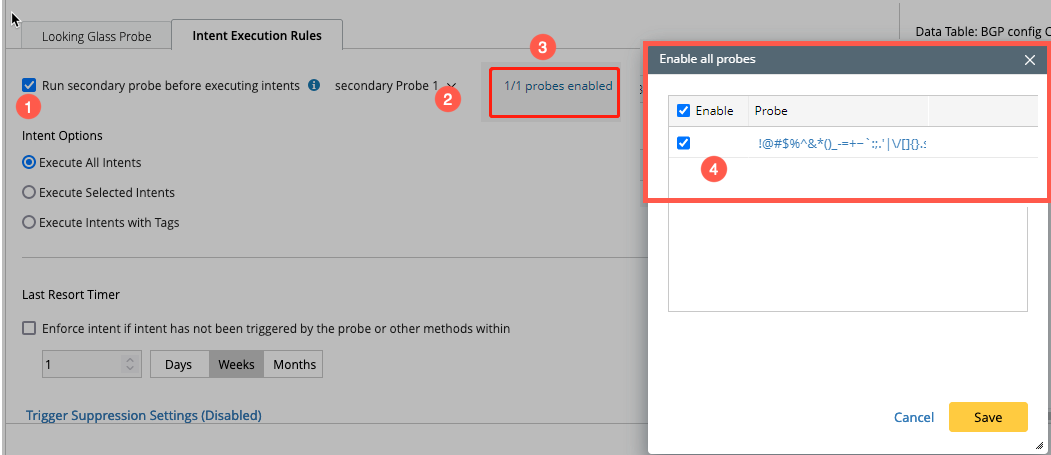
Configure Secondary Probe to Trigger:
In case, if you want to check some symptoms before looking glass probe triggering Intents, then you can use the secondary probe to improve the accuracy. And only if the Selected Secondary Probe generates an alert, the selected Intents will be executed further.
For example: You have a critical ADT table to manage critical WAN links and use the command show ip route on looking glass devices to identify the critical route change. If any route change happens on looking glass device, it will trigger the intent execution. In some cases, the route change on looking glass devices does not necessarily be the WAN link of the ADT table affected. And in this case, you can configure the secondary probe on the WAN link devices using the command show ip route to verify the route entries on the WAN link devices are indeed affected.
To enable the secondary probe:
-
Check in the Run secondary Probe before executing intents to enable secondary probe column selection.
-
Select the secondary probe column from the drop down menu.
-
Click X/X probes enabled to pop-up the window Enable all probes.
-
Check in all the secondary probes required as per your use case and click Save.

|
Note: The Secondary Probe may be triggered by different sources. So, the secondary probe should be associated with the Looking Glass Probe triggering the execution of Intents. If the Secondary Probe is triggered by any other Primary Probes, even if there is an alert, the Intents will not be triggered. |
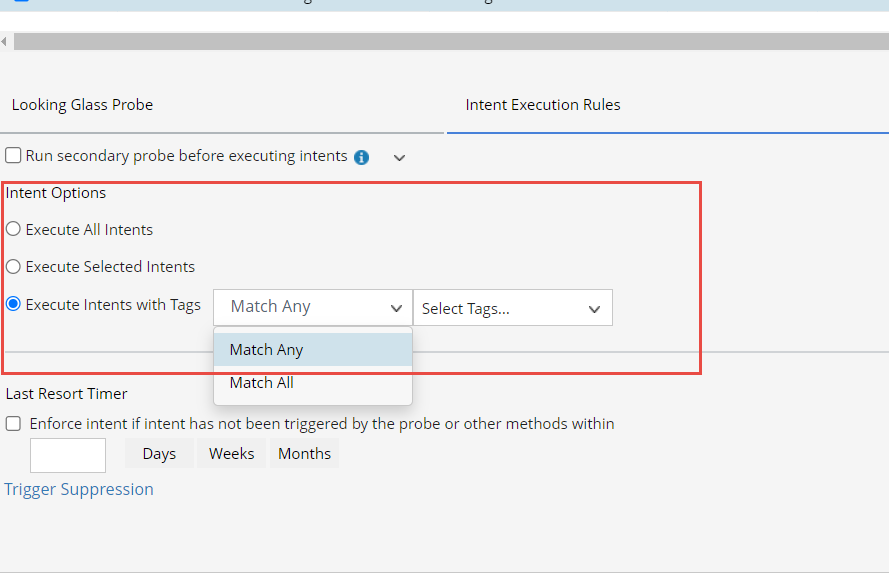
Configure Intent to be triggered:
For each row in the ADT table, intents will be executed after matching with the data. The configuration options for executing Intents are as follows:
- Execute All intents: Executes all Intents.
- Execute Selected Intents: Executes specified Intent Columns, one or multiple Intent Columns can be selected
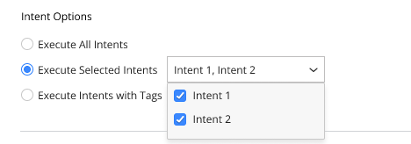
- Execute Intents with Tags: Based on the tags present in all intent columns, corresponding intent tags are listed for the user to select. One or more tags can be chosen here.
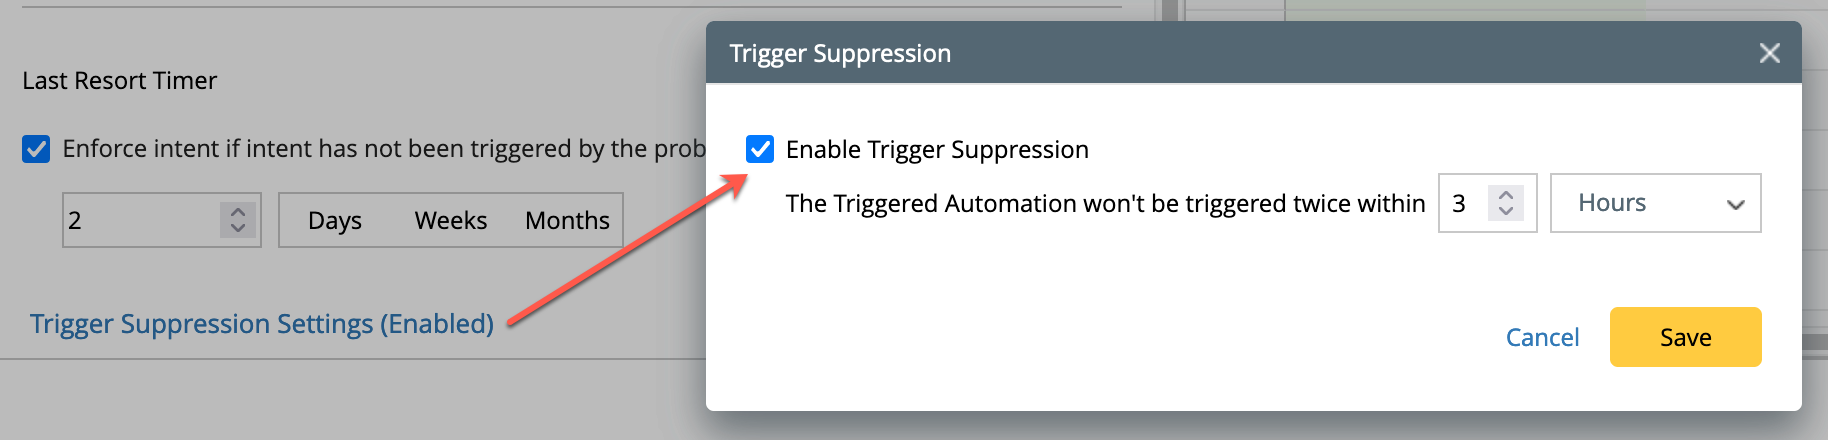
Last Resort Timer:
Enable this option by selecting checkbox to allow the system to execute the Intent if it has not been executed within a certain period of time.
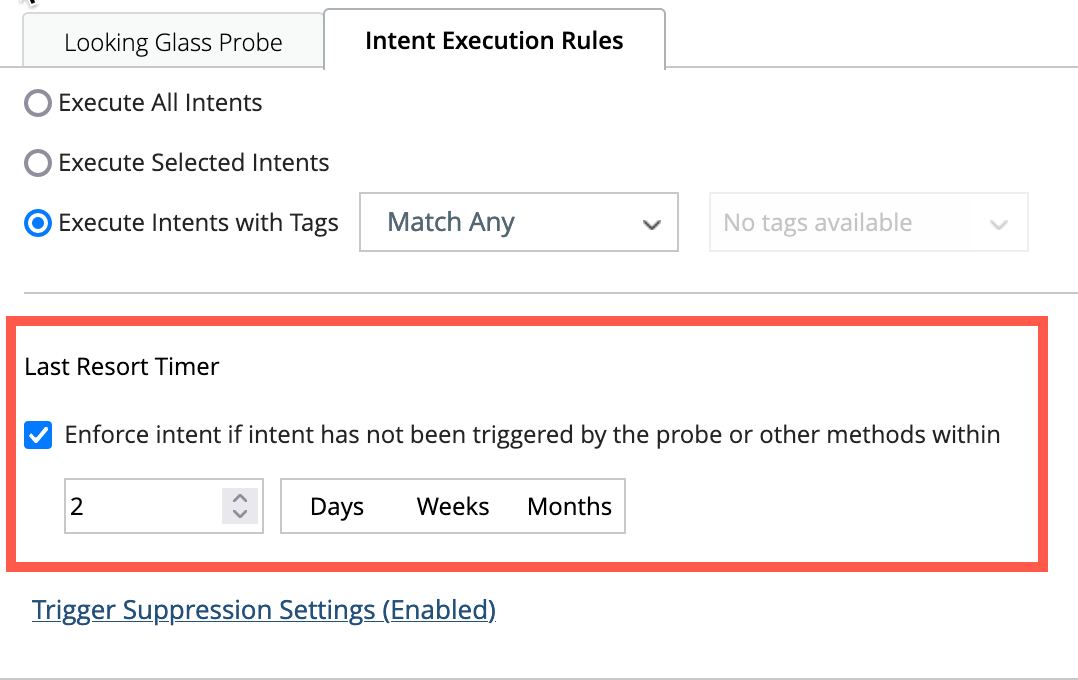
Trigger Suppression Settings: By enabling this option, triggering the automation twice in the specified time period can be avoided.