Defining Playbook

Contents
Use either of the following ways to define a playbook.
Note: Recommended project structure (only applicable to Sync Up Playbook from SCM): https://docs.ansible.com/ansible/latest/user_guide/playbooks_best_practices.html#directory-layout
Using or Installing Ansible Role
One crucial way to organize your playbook content is Ansible’s “roles” organization feature. You can either embed your role content in your project directory 1) or trigger the installation of the roles on Ansible by including the roles in a requirements.yml file and defining the file in your Ansible project directory. 2) (The directory layout must be '/roles/requirement.yml').
Note: 1) Best practice of setting up role directory structure: https://docs.ansible.com/ansible/latest/user_guide/playbooks_reuse_roles.html
Note: 2) Reference documents on how to define the requirements.yml file: https://docs.ansible.com/ansible/latest/reference_appendices/galaxy.html#installing-multiple-roles-from-a-file
Manually Define Playbook
After the Manually Defined option is enabled, define the playbook script in the text field.
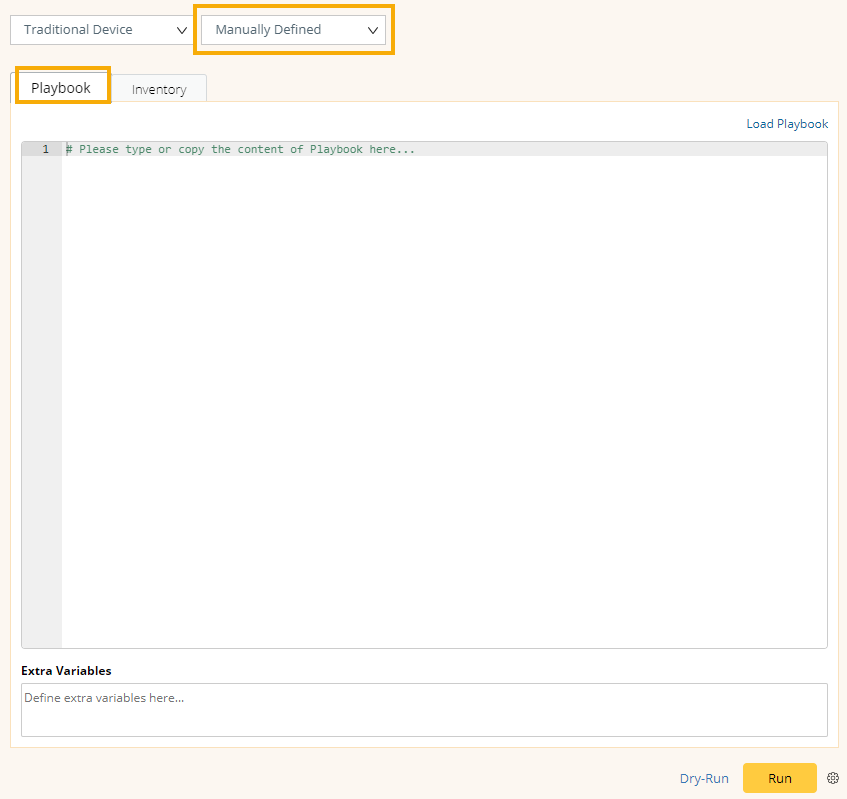
Tip: You can also click Load Playbook to import a pre-defined file from the local.
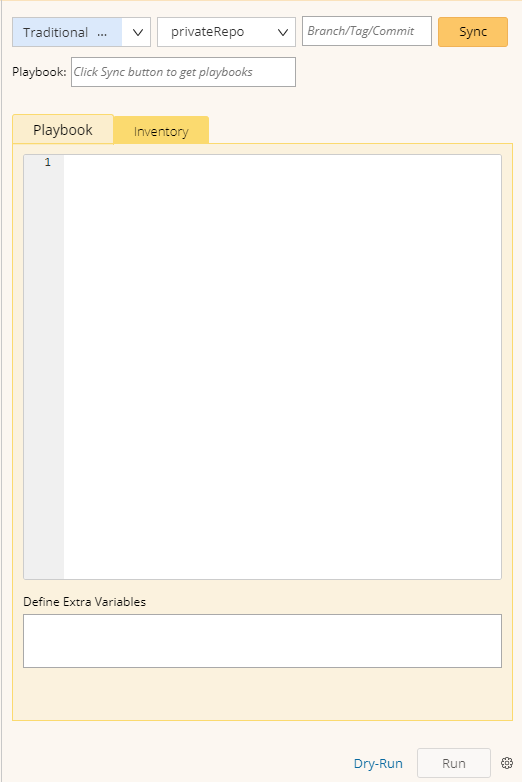
Sync Up Playbook from SCM
Note: Git Client must be installed on both Web Server and Ansible Agent Server before using any SCM related functions.
1.Click Manually Defined and select SCM Manager from the drop-down list.
2.Click the  icon and select the desired SCM repository from the drop-down list.
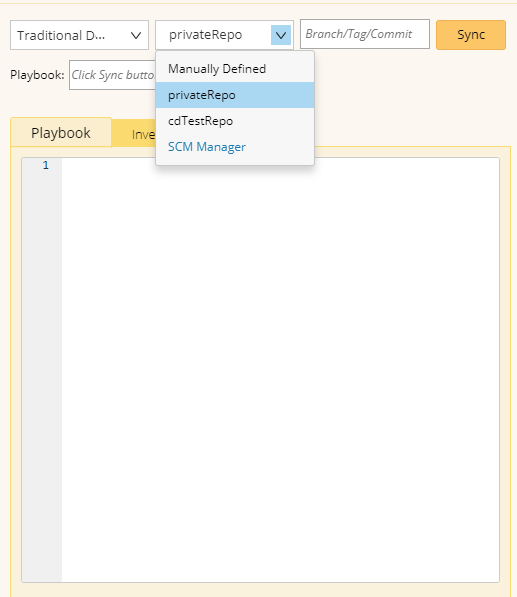
Tip: See SCM Manager for more details to add a new SCM.
3.Click Sync to retrieve the latest version file from SCM.
Tip: You can also enter a branch, tag, or commit number in the text field (next to Sync button) to retrieve a specific revision file.
4.Select a desired playbook (in .yml or .yaml format) from the drop-down list.
