Configuring Auto Upgrade Settings

Contents
Knowledge Cloud (KC) manages both the framework components and the platform resources and allows NetBrain Workstation to automatically upgrade a patch or minor release. Besides replacing the files, the auto-upgrade process may restart services, execute the database upgrading, check the system health and roll back the release if the update fails.
Due to security considerations, there will be no direct connection between KC and NetBrain Workstation. NetBrain System Administrator must download the software update package from NetBrain Customer Portal, manually upload the package into the system and then schedule system updates accordingly.
NetBrain Workstation Auto Upgrade flow consists of the following steps:
Note: Only user with System Management permissions can perform the following actions.
2.Download Package from NetBrain Customer Portal
3.Upload Package to NetBrain Workstation
Check the Latest Version
Follow the steps below to check the available releases from NetBrain:
Note: The following steps only apply to the online auto upgrade procedures.
1.Log in to the System Management page.
2.In the System Management page, select Operations > System Update.
3.By default, the Automatically check the latest version check box is enabled. You can click Check Update Now to see if there is a new version available.
Note: The Web API Server is required to have internet access in order to perform the function of Check Update Now.

4.When this check is enabled, NetBrain Workstation will check whether a minor release, a patch, a customized built-in, a customized resource or common platform resource updates have been published since the last time check (either auto or manual check). The latest available version will be displayed with the release note.
5.If the respective release or patch is available, after reviewing the Release Note, click Get Latest Version to Download Package from NetBrain Customer Portal.
Download Package from NetBrain Customer Portal
Follow the steps below to download the system upgrade package from NetBrain Customer Portal:
1.Log into the NetBrain Customer Portal with your username and password.
Note: After clicking Get Latest Version in NetBrain Workstation, you will be redirected to the NetBrain Customer Portal. The portal account credentials are required by the web browser to grant access to the NetBrain Customer Portal.
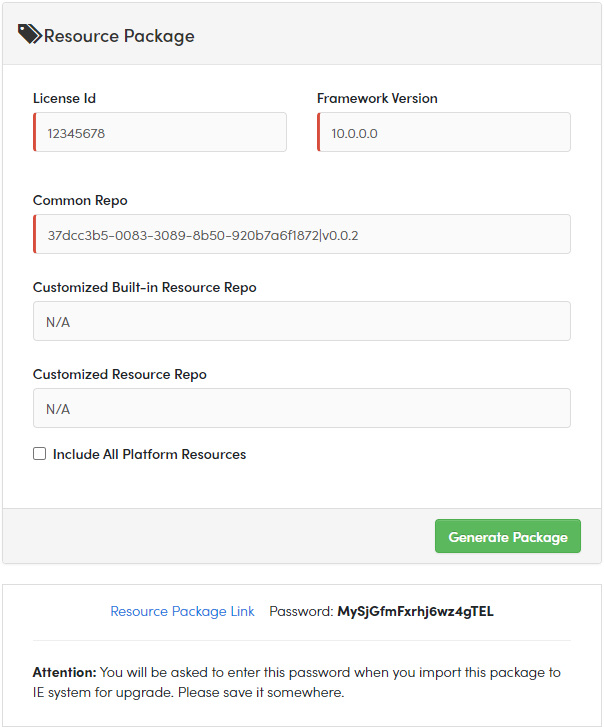
2.Confirm the required info and click Generate Package.
Tip: Required info includes the License ID, Framework Version, Common Repo Version, Customized Built-in Resource Repo, Customized Resource Repo.

3.Click Resource Package Link to download the package to your local drive.
4.Keep note of the password for next step- Upload Package to NetBrain Workstation.
Upload Package to NetBrain Workstation
Follow the steps below to upload the system upgrade package to NetBrain Workstation:
1.Log in to the System Management page.
2.In the System Management page, select Operations > System Update.
3.Click Upload Latest Version.
4.Click Browse and select the system upgrade package (.zip file).
5.Enter the password and click Upload.

Schedule Update
Follow the steps below to schedule the system update:
1.Log in to the System Management page.
2.In the System Management page, select Operations > System Update.
3.Click Schedule.
4.Review and update Test Plan

1)Click Select and specify the desired Tenant/Domain to perform Domain Health Check.
Note: If there are more than one tenant or domain, step 1) must be completed before proceeding to step 2).
Note: If there is only one tenant and domain, the Initial Tenant will be automatically selected and you can directly proceed to step 2).
2)Click Auto Test Group to specify the devices for Data Accuracy Test.

Tip: The devices in the Auto Test Group are automatically selected according to the device type discovered by the system. You can also manually edit or delete any devices to suit your specific needs.
3)Click Auto Test Application Folder to specify the application for Data Accuracy Test.

Note: The last used Application Paths (up to 5 paths) will be automatically copied to the Auto Test Application Folder. You can also manually change the auto selected path in Application Manager.
5.Set up the schedule to start the system update.
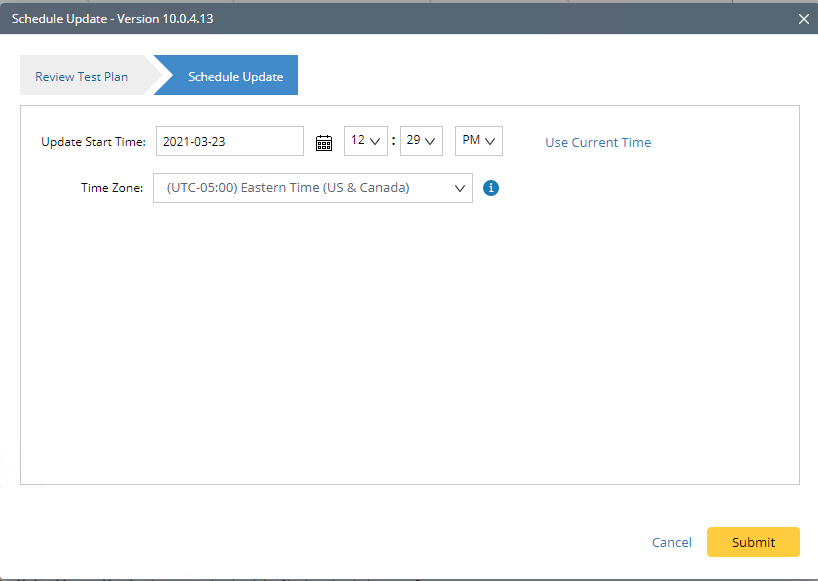
Tip: You can edit or remove the system update time once it is scheduled.
6.Click Submit to apply the above settings.
Note: A confirmation message will prompt if the selected tenant/domain does not have application path, you can click Yes to dismiss the message and continue with the update process.
View Update Status
There are three possible outputs of auto update:
•The system is successfully updated to the new version.
•The update fails, and the system is rolled back to the old version.
•The update fails, and the system rollback fails.

View Update History
Follow the steps below to view the update history:
1.Log in to the System Management page.
2.In the System Management page, select Operations > System Update.
3.Click View Update History.
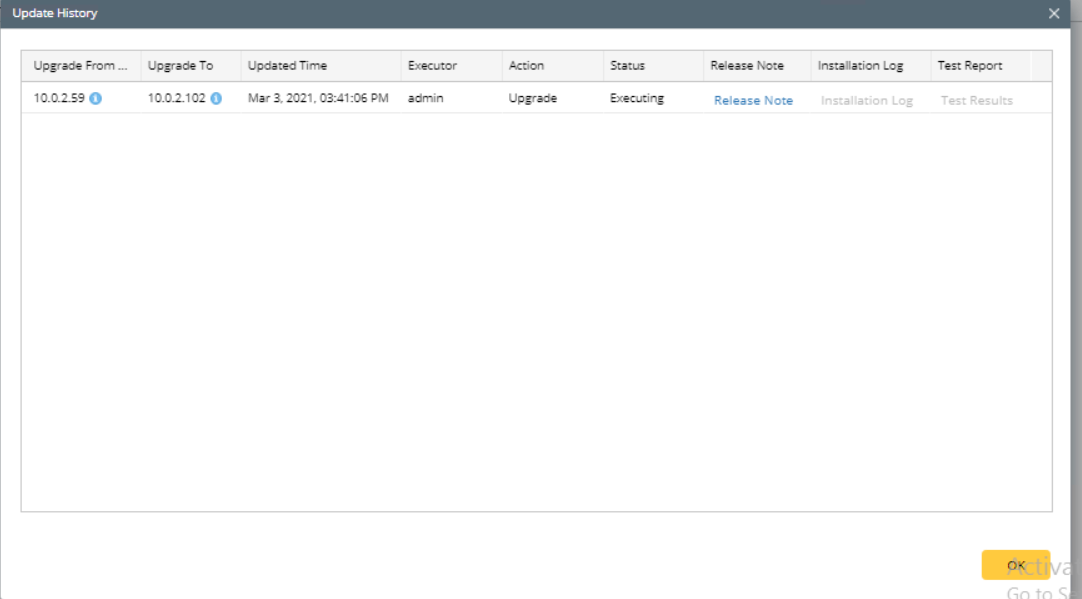
The update history only records the releases the system is scheduled to update with. The update history table provides the following information:
•Version: the release number to which the system is updated.
•Update time: when the system finished the update.
•Executor: the person to schedule the update
•Status: one of three status in View Update Status.
•Installation log: the link of the installation log.
•Test report: the link of the test results.