NIT Install to Probe
NIT Install to Probe

|
NOTE: Add the required intent template as the Template Mode to the intent library before installing it to probe. |
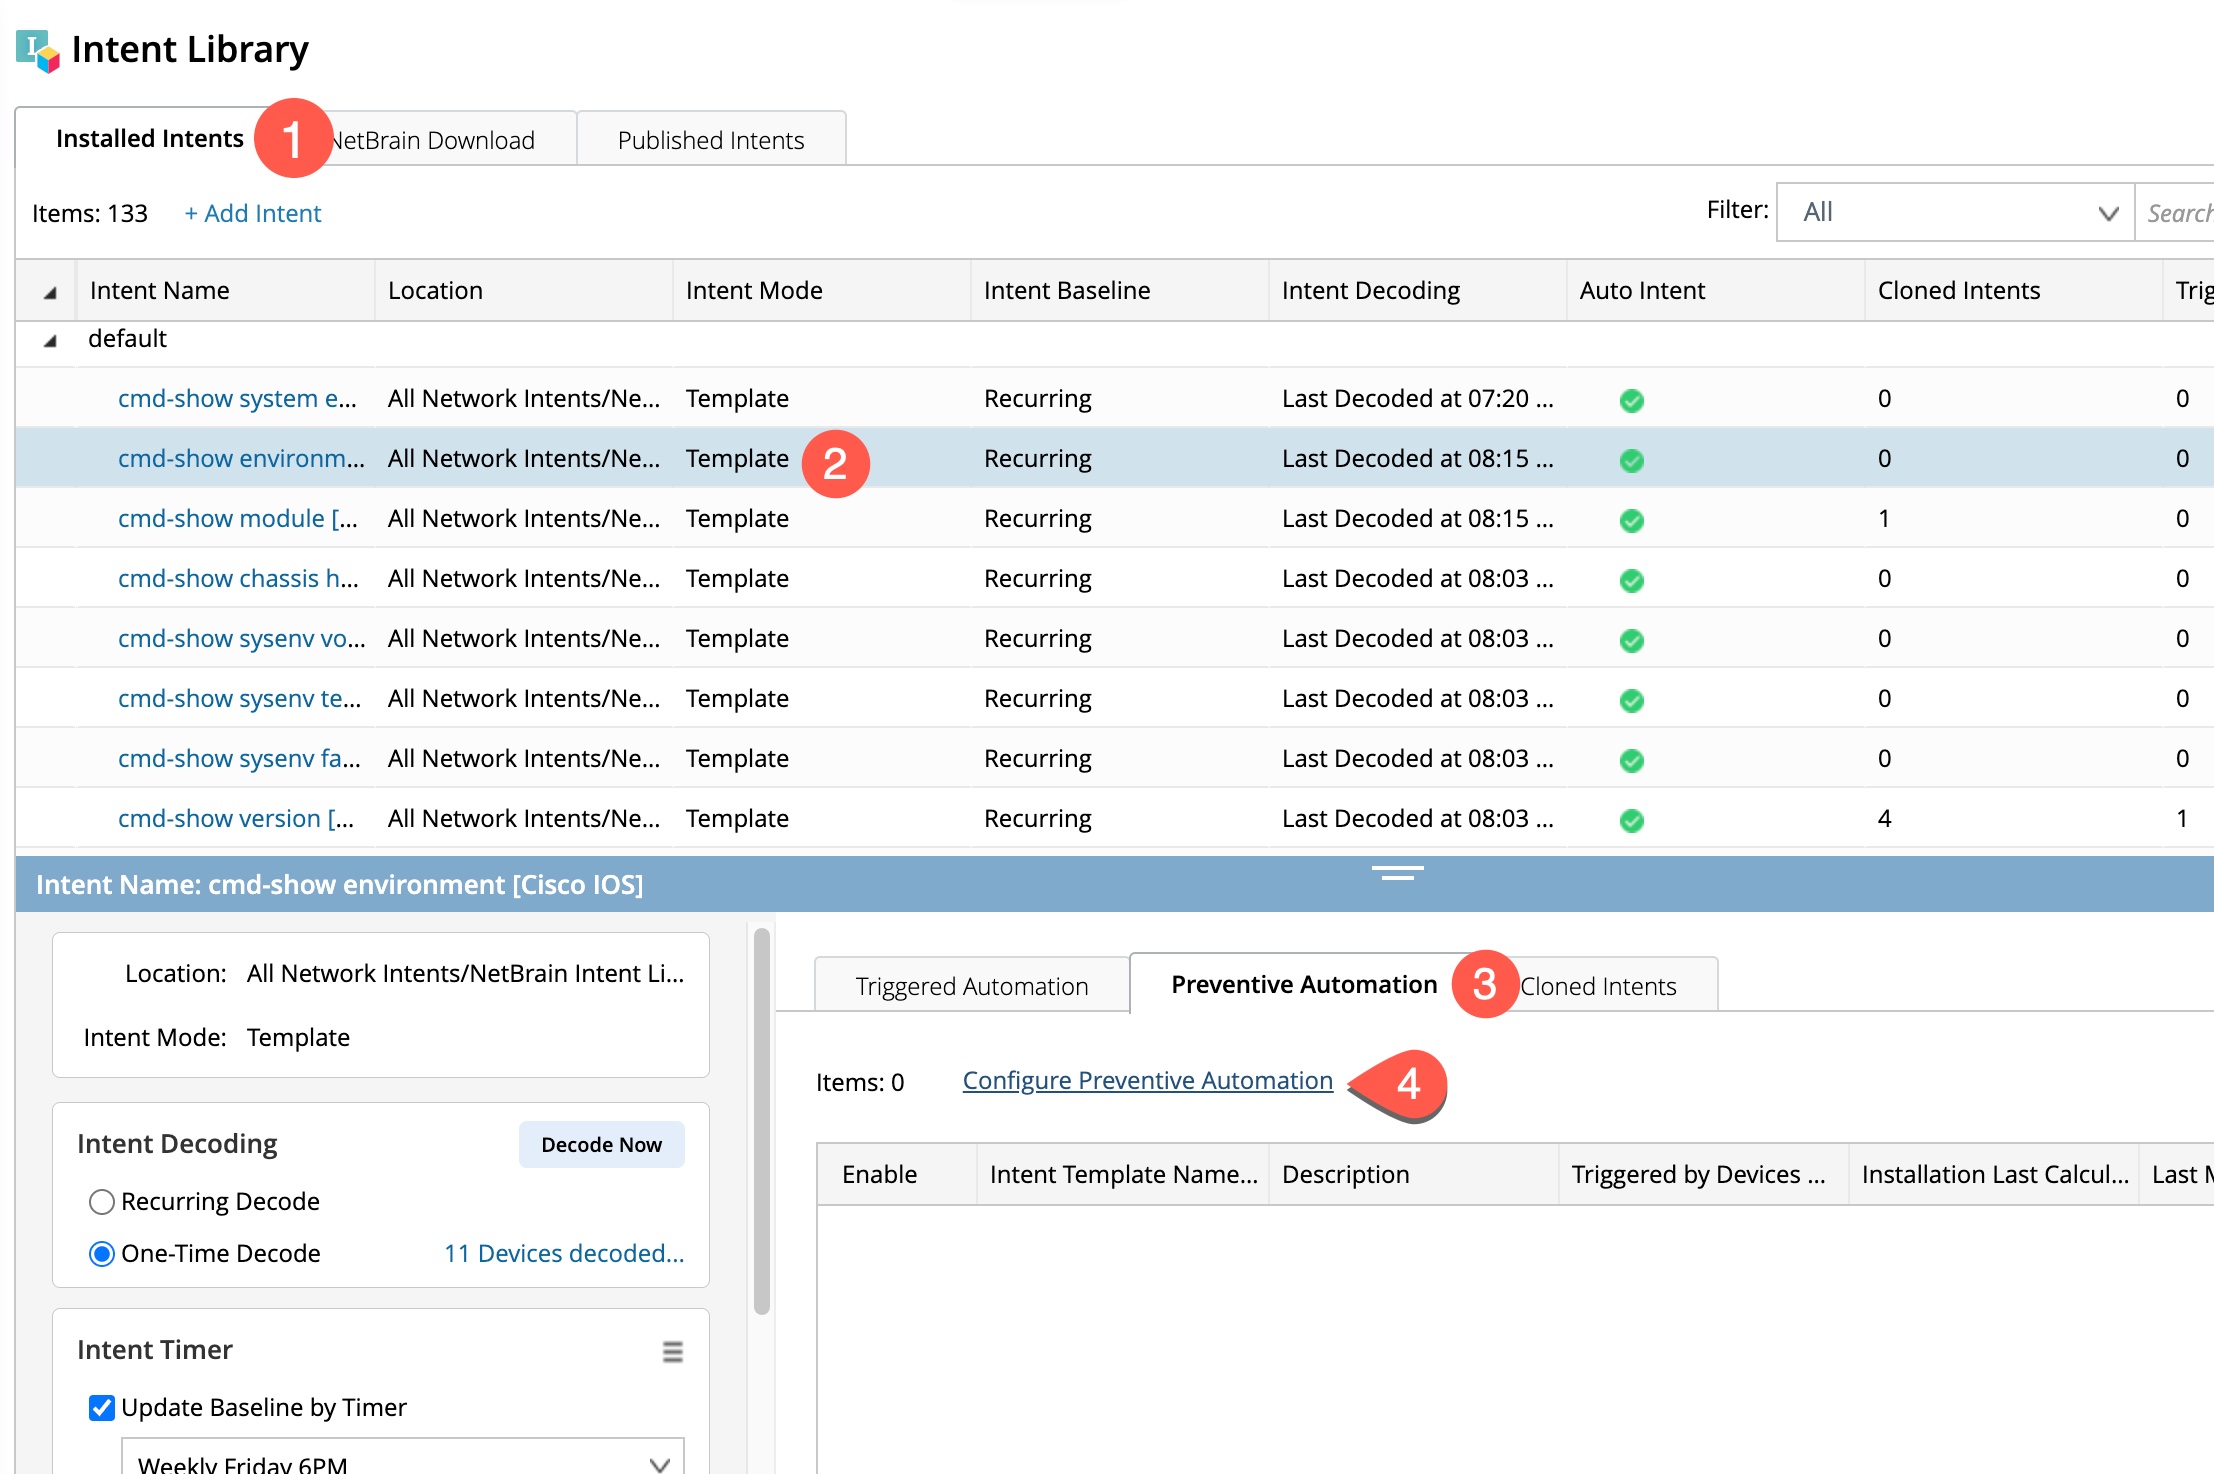
- Open the Intent Library; by default, the screen will appear with the Installed Intent tab open.
- Select an NIT item from the template list, and its basic configuration is displayed at the bottom half of the installed Intent pane.
- Go to the Preventive Automation tab in the bottom half of the Installed Intent Pane.
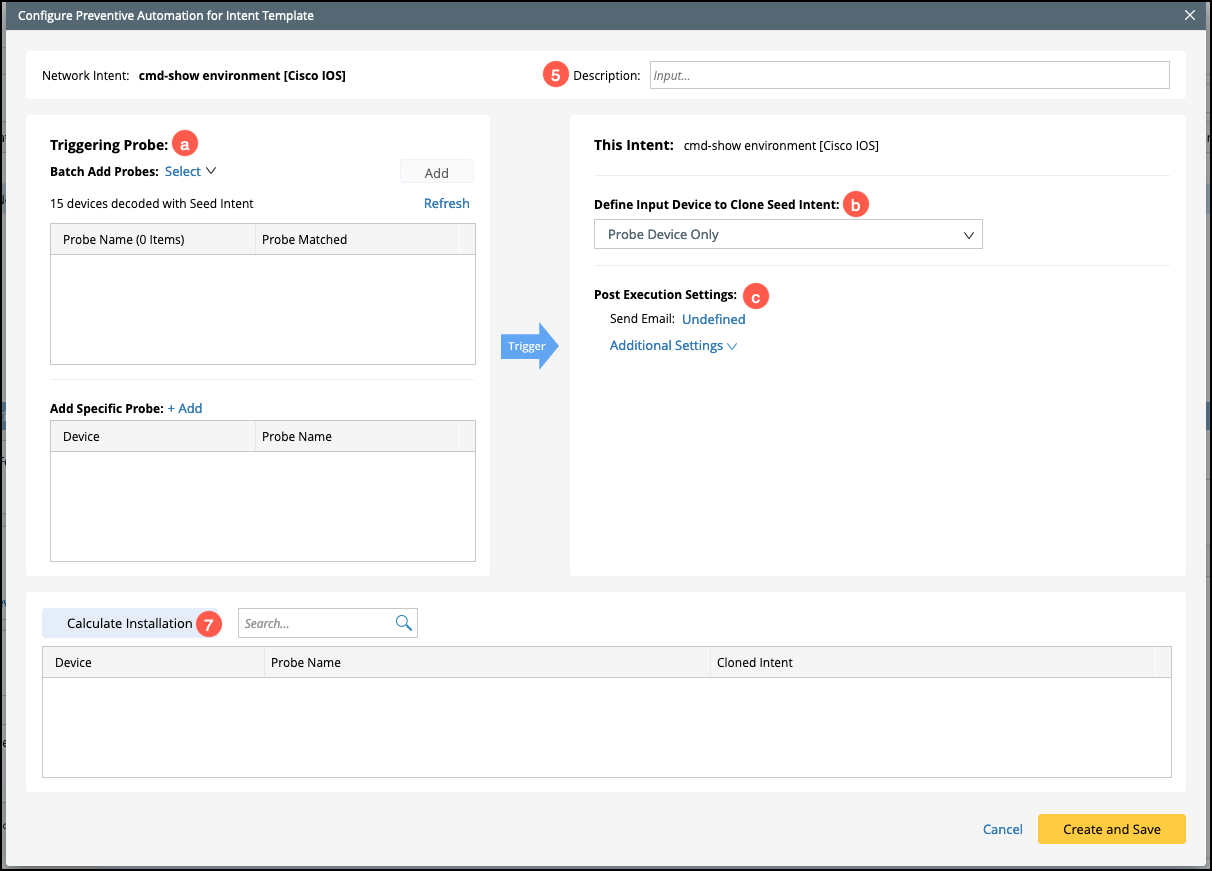
- Click on Configure Preventive Automation to open a pop-up window, Configure Preventive Automation for Intent Template.
- Fill in the corresponding description in the Description field.
-
To install an NIT to probe, you need need to enter the details in the following sections of the window Configure Preventive Automation for Intent Template:
-
Upon providing the required details in the listed sections, click on Calculate Installation to add the devices.
- Click on Create and Save button at the bottom right of the window.
- Close the pop-up window “Configure Preventive Automation for Intent Template”.
|
|
NOTE: Template cmd-show environment [Cisco IOS] is taken as an example.
|
|
|
NOTE: The system will calculate the installed intents and display the message “Cloned Intents have been installed on 11 Devices” next to Calculate installation button. |

|
|
NOTE: The information of the NIT cmd-show environment [Cisco IOS] installed to probe is listed in the table under the Preventive Automation tab. |

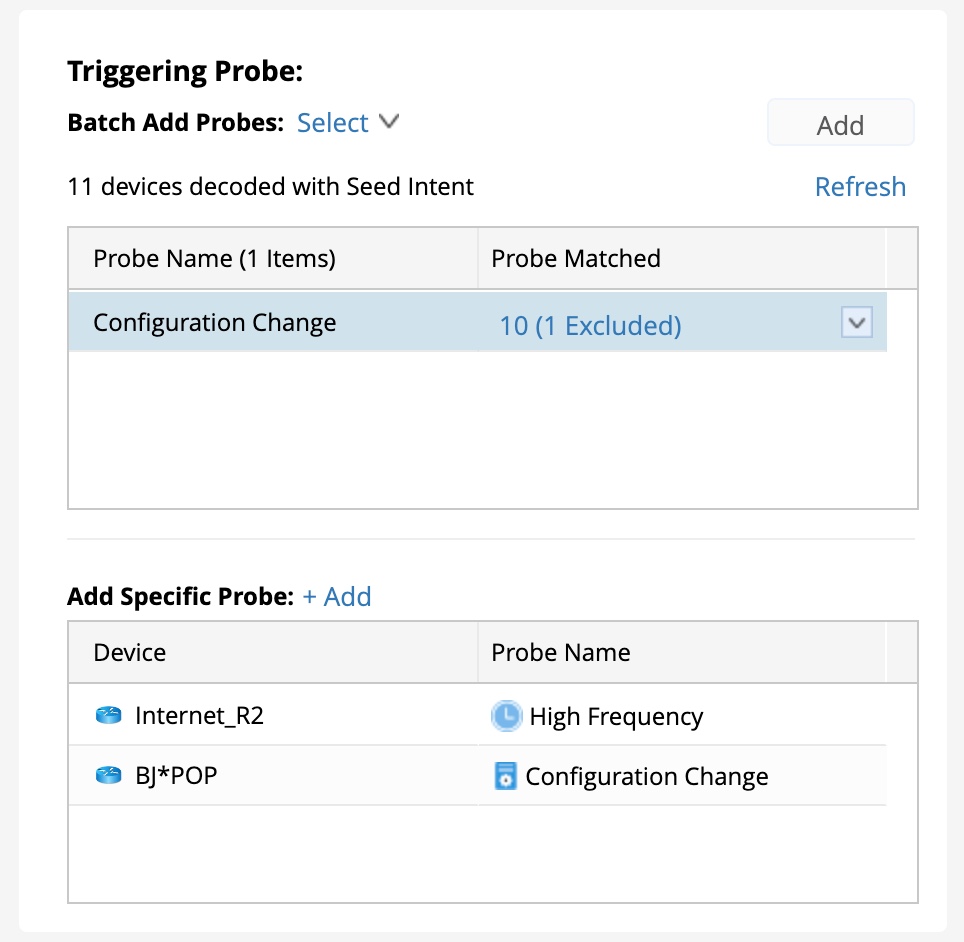
Triggering Probe
You can select all the required probes either as a batch or each specific one manually. The final probe list is a collection obtained from both selections.
-
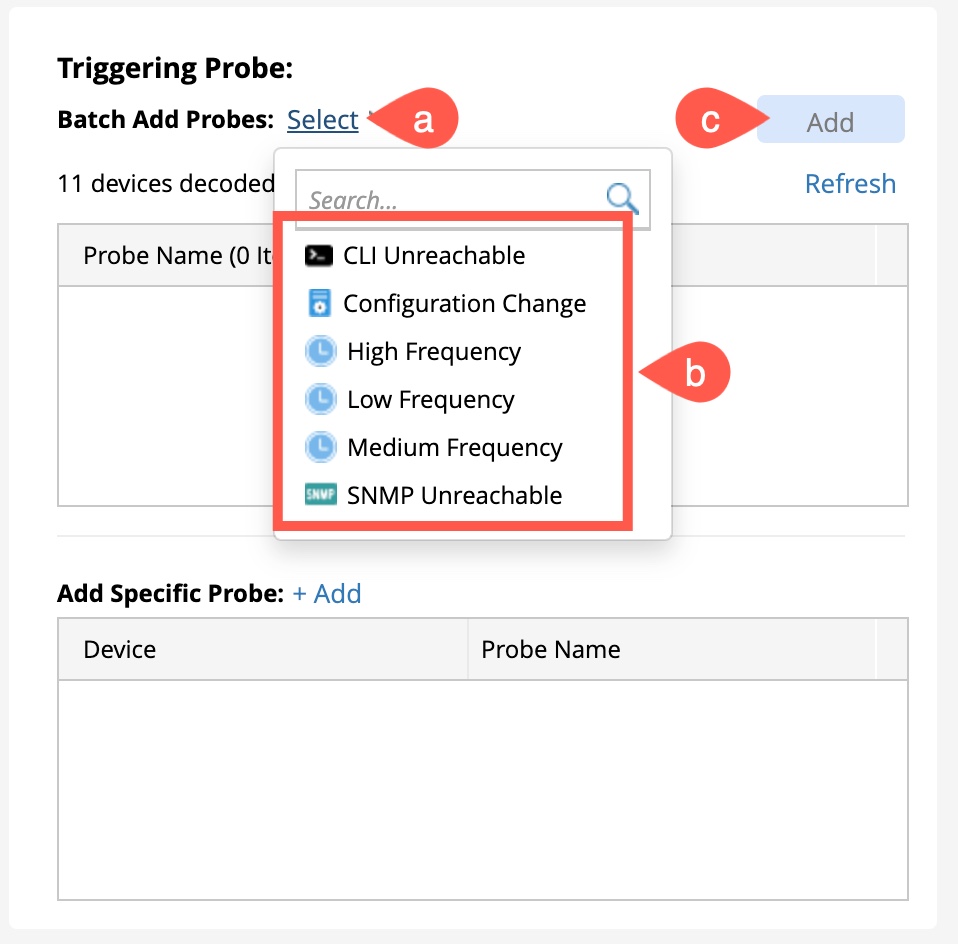
Add probes as a batch:
- Click on the link Select next to Batch Add Probes, and a drop-down window will appear.
- Select the required probe from the drop-down window.
- Click Add, and the corresponding probe name and device count are added to the list.
- To exclude devices from the batch, click on the probe count to open a window Add Probe by Name Across All Intent Devices.
-
Select the devices you want to exclude and click on the
 button to move the devices to Excluded Device column on the right.
- Click OK to save and close the modifications.
NOTE: By default, all the device probes are included. 

- Adding a Specific Probe:
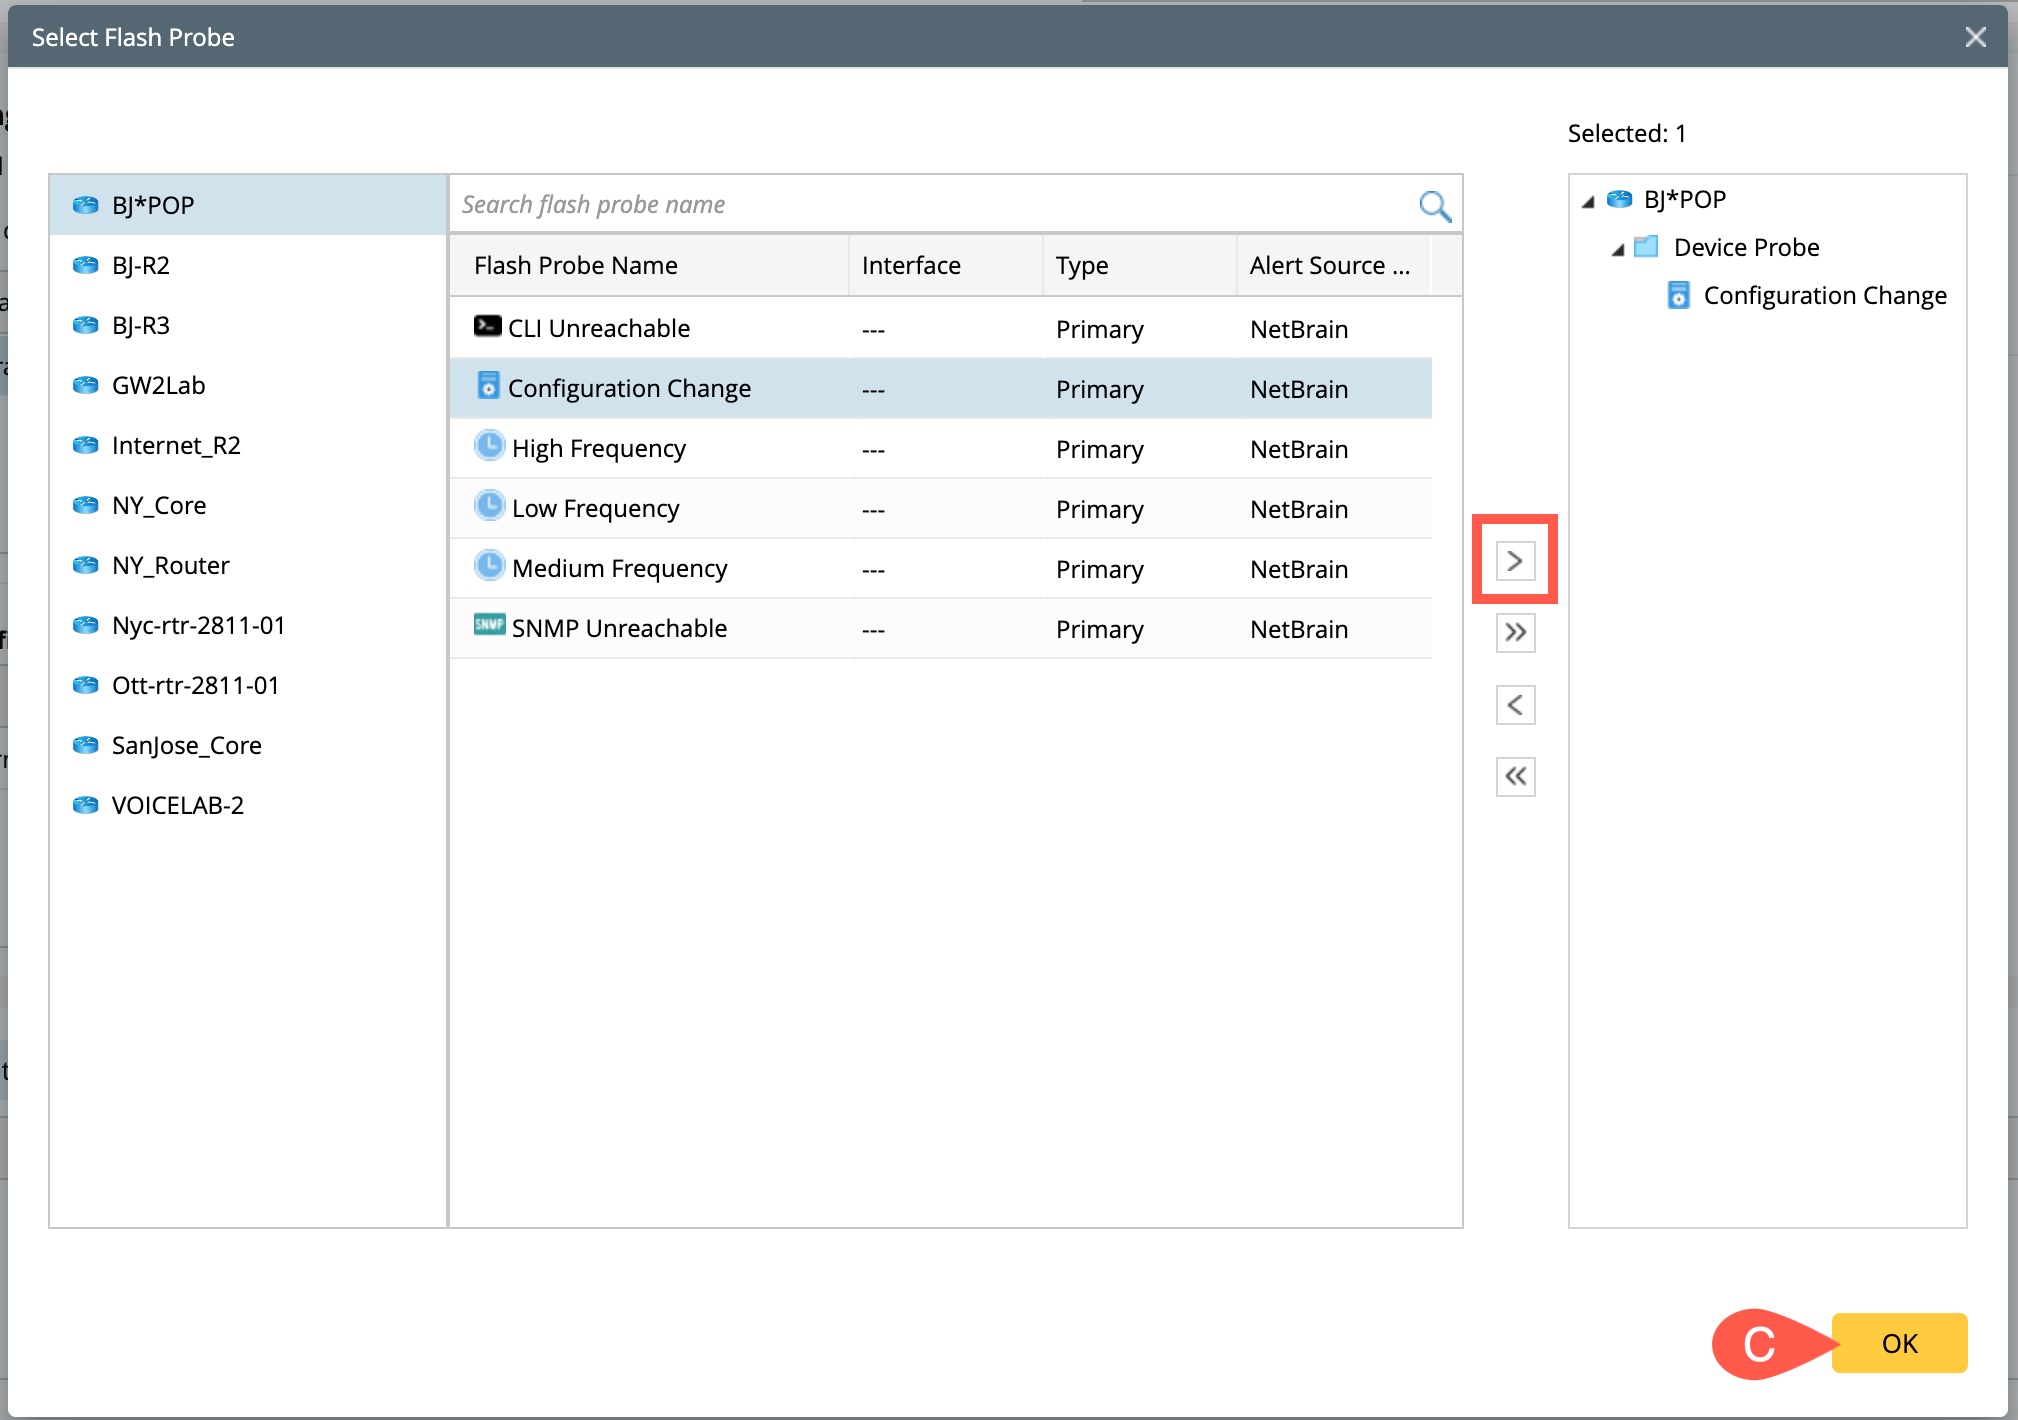
- Click on +Add available next to Add Specific Probe to open the pop-up window Select Flash Probe.
-
Select the specific device Bj*POP and flash probe Configuration Change and click on to add them to the list.
- Click OK to save and close the pop-up window Select Flash Probe.
|
|
NOTE: Probes excluded in the batch can be added to the final probe list using Add Specific Probe. |

The final probe list is a collection obtained from both sections Add Probes by Name and Add Specific Probe.
Clone Seed Intent
This section will generate the corresponding Cloned NI for the current NIT cmd-show environment [Cisco IOS] to install in the selected probe devices. There are several ways to generate the corresponding Cloned NI:
Open the drop-down window under Define input device to clone seed intent and select one of the following options:
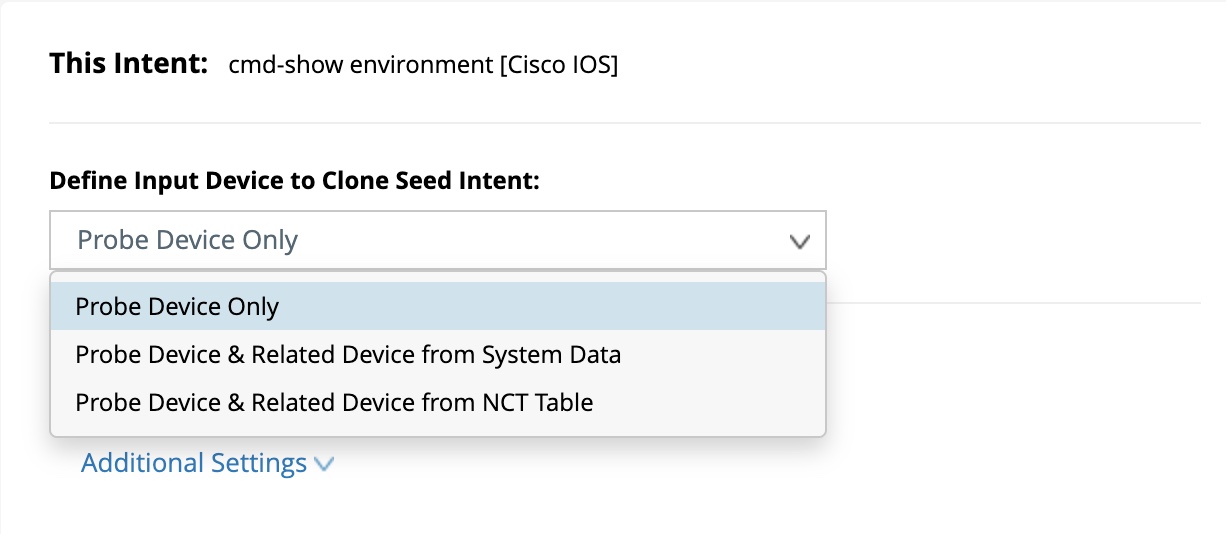
- Probe Device Only: Choose this input device if only a specific probe device is required.
-
Probe Device & Related Device from System Data: If this is selected, you need to further select one of the following neighbors from the drop-down menu:
- Same VLAN Group
- Same Subnet
- Its L3 Neighbors
- Its L2 Neighbors
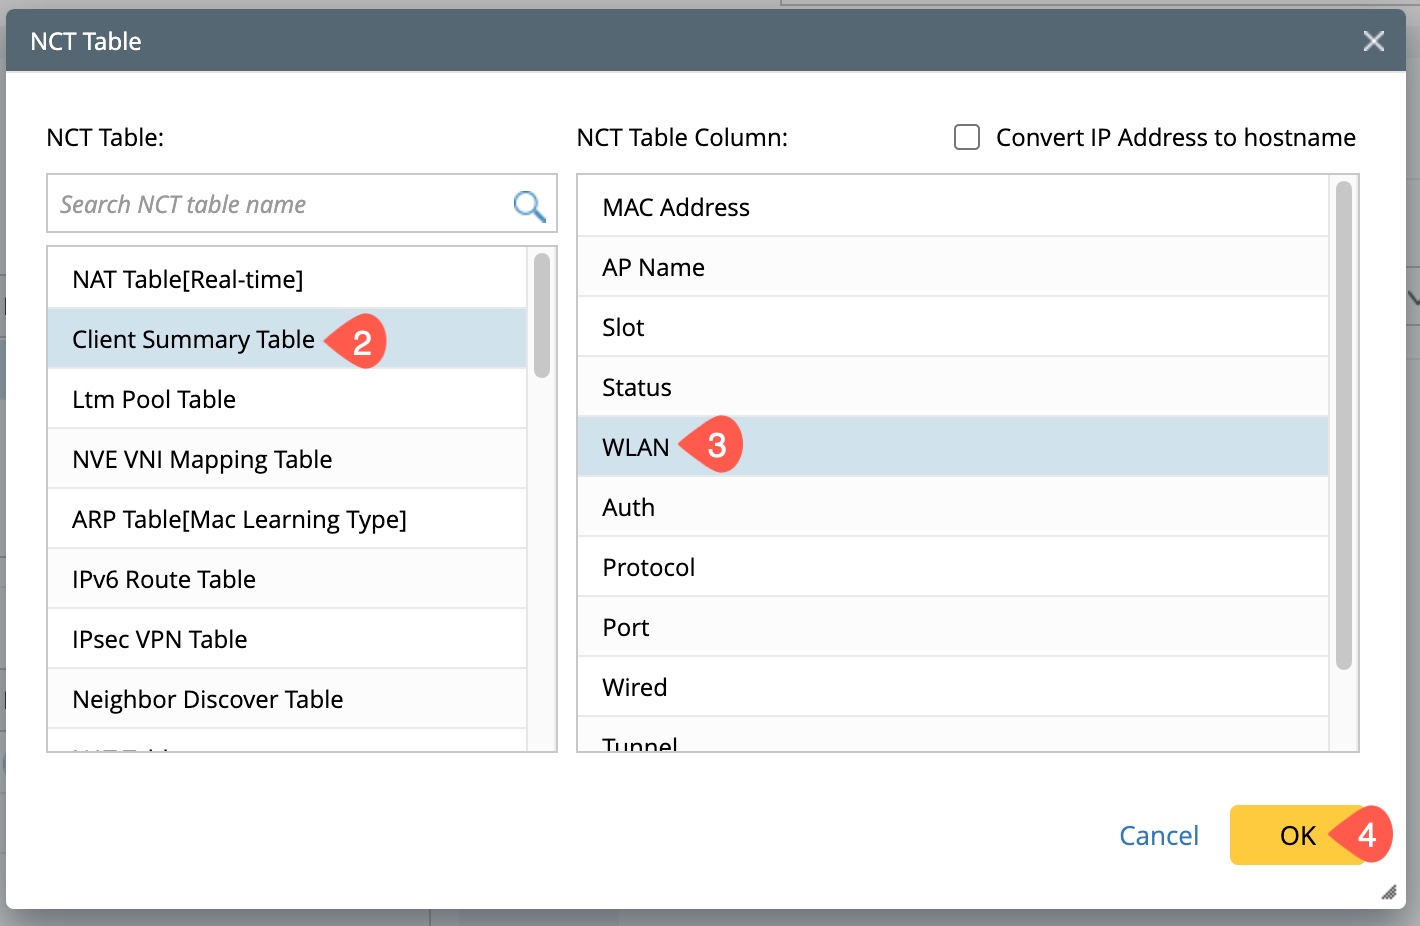
- Probe Device & Related Device from NCT table:
- Click on Select NCT Table to open a pop-up window NCT Table.
- Select an NCT Table, and its corresponding columns are listed on the right side of the window.
- Select one NCT Table Column from the right-side section. The devices of this column will be added as the member devices of the clone intent.
- Click OK to save and close the window.
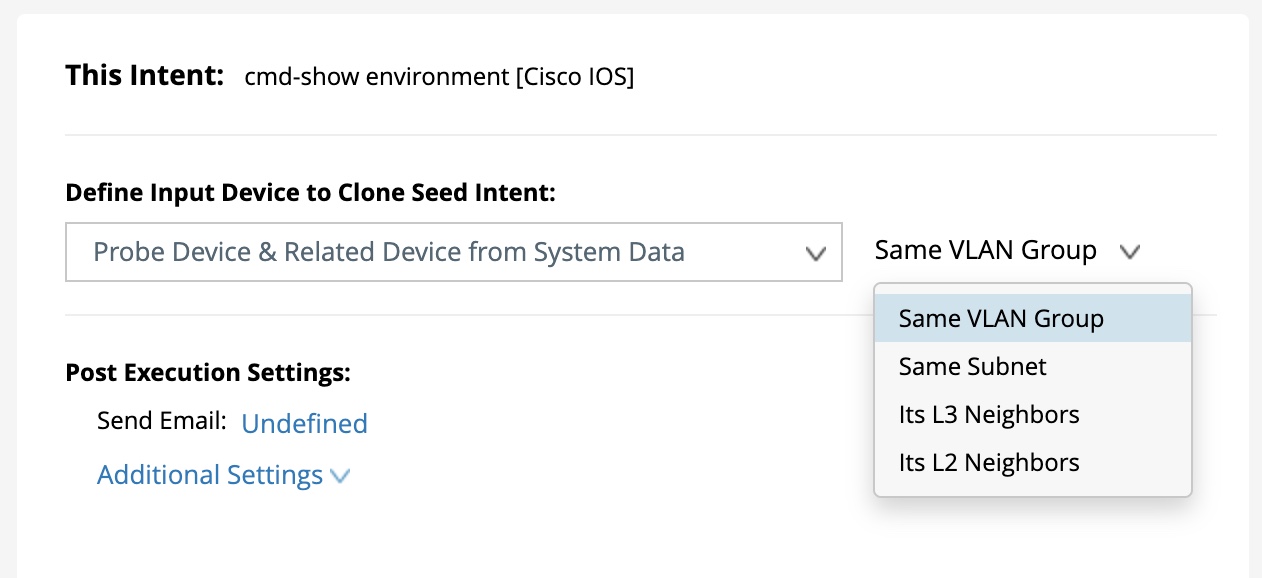

Post Execution settings
You can set up an email alert with a predefined Trigger Event Template whenever the NI has alerts and suppress the triggers to avoid occurring twice within the specified time.
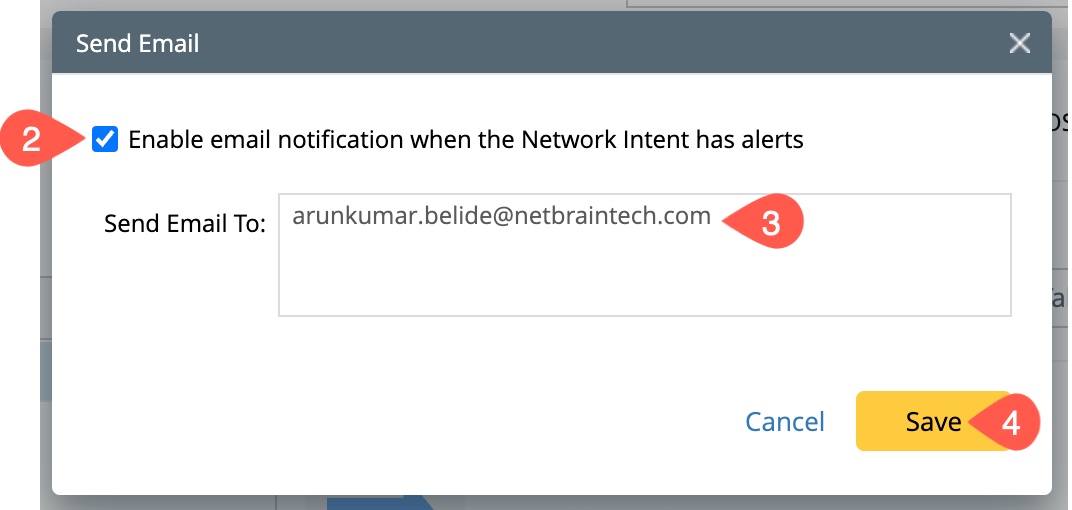
Setting the Email Alert:
-
Click on Undefined next to Send Email.

- Check the box to Enable email notification when the Network Intent has alerts.
-
Type in all the email addresses separated with a semicolon (;) in the field Send Email To.
- Click on Save to save and close the Send Email pop-up window.
|
|
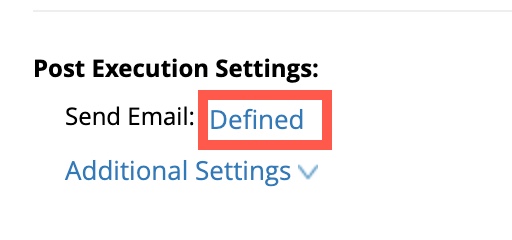
NOTE: Upon enabling the email notification and providing the email address, the status of Send Email will change to Defined. |
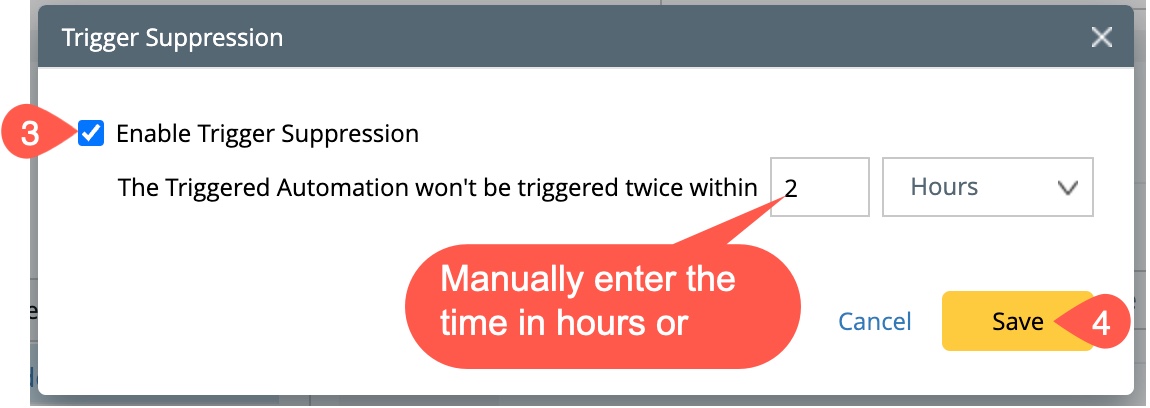
Trigger Suppression:
- Click on Additional Settings to open the drop-down menu.
- Select Trigger Suppression, and a window Trigger Suppression will pop up.
- Check the check box to Enable Trigger Suppression and manually enter the time.
- Click Save to save and close the Trigger Suppression window.

Trigger Event Template:
- Click on Additional settings once again to choose Trigger Event Template.
- Check in the box to trigger the event Template whenever the NI has alerts.
- Click on Save to save and close the window.
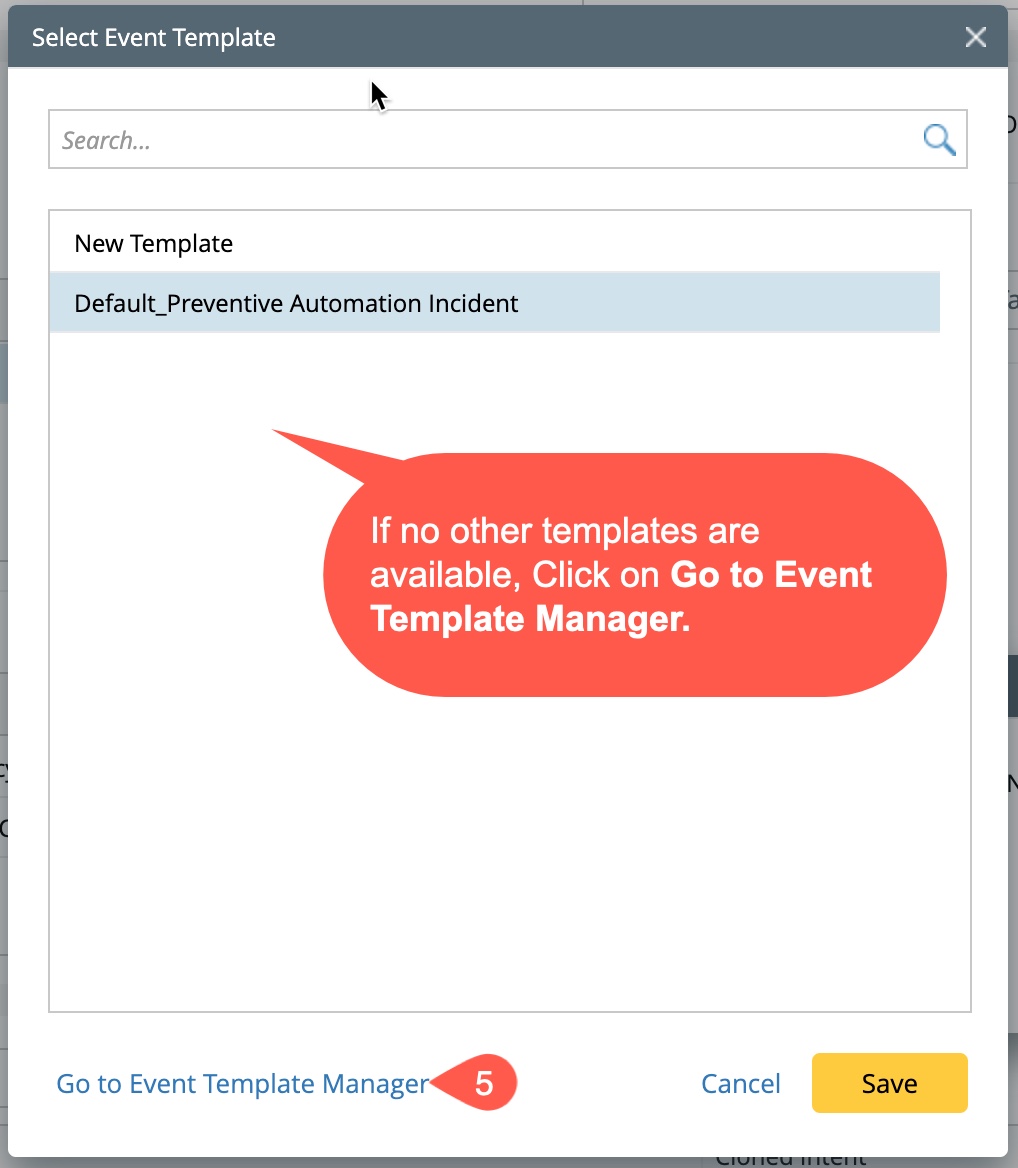
- Click on the event template Default_Preventive Automation Incident to open the window Select Event Template with a list of event templates.
- If no other templates are available in the list, add the event template from the Go to Event Template Manager to choose a new event template.
- Click Save to close the window.
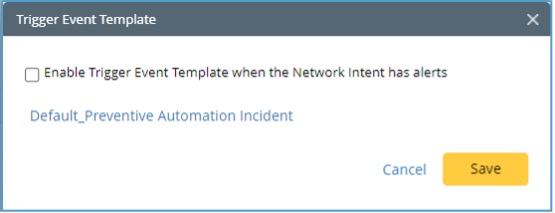
By default, an event template Default_Preventive Automation Incident is activated. If you want to choose a different template: