Patch Your System via Auto-Update
After the deployment, minor or major releases will be published and become available for users to enhance the system. Patches and minor releases can be applied via auto-update, for example, updated from v10.1 to v10.1.1. However, for major releases, the system cannot be upgraded automatically. For instance, v10.0 cannot be automatically upgraded to v10.1, and the system admin needs to perform the upgrade manually following the respective upgrade guides.
A patch or minor release may contain updates to platform resources and/or framework components. Knowledge Cloud (KC) manages both the framework components and the platform resources in terms of defining and publishing the patch release.
The patching process may:
- replace/delete/add files
- change the config file
- upgrade database data
- upgrade rpm packages on the Linux server
- restart services
- execute the database upgrading
- check the system's health
- check disc space
- backup files
- roll back the release if the update fails
Platform resources can be downloaded and installed automatically if your NetBrain system is connected to the Internet. And for Framework resources, the software update package must be downloaded from NetBrain Customer Portal, manually uploaded into the system and then system updates need to be scheduled accordingly.
Differences between framework resources and platform resources:
|
|
Platform Resource |
Framework Resource
|
| Resource Definition | Resources that are created by the script languages such as Python | The framework components are often created by the compiled programming languages such as C++, C# and Java |
| Examples | System Driver, Qapp, Network Intent (NI), etc. | DLLs |
| Require systems or services to restart? | NO | YES |
| Can it be silently updated? | YES | NO. Requires the system admin to set up the schedule |
NetBrain system Auto Upgrade flow consists of the following steps:

|
Tip: You can refer to the List of Resources to view which types of platform resources can be downloaded and applied automatically . |
|
|
Note: Only users with System Management permissions can perform the following actions. |
- Check the Latest Version
- Download Package from NetBrain Customer Portal
- Upload Package to NetBrain System
- Schedule Update
- View Update Status
- View Update History
Desired Outcome: The version of system resources is the latest.
Check the Latest Version
Follow the steps below to check the available releases from NetBrain:
|
|
Note: The following steps only apply to the NetBrain system (Web API Server) with an Internet connection to a public License Server. |
|
|
Note: If the Web API Server has no Internet access, please skip checking the latest version and proceed directly to download the package from the NetBrain customer portal. |
- Log in to the System Management page.
-
On the System Management page, click the
 start menu > System Update.
- Enable the Automatically check the latest version checkbox. You can click Check Update Now to see if there is a new version available.
Note: After the check box Automatically check the latest version is enabled, users with the 'system management' privilege will receive a notification via email when a new version becomes available.
Note: The Web API Server must have Internet access with NetBrain public License Server to perform the Automatically check the latest version and Check Update Now.
Note: In order to download and install platform resources automatically, you need to enable the Automatically check the latest version check box, as well as the Download and Install Platform Resources Automatically check box.
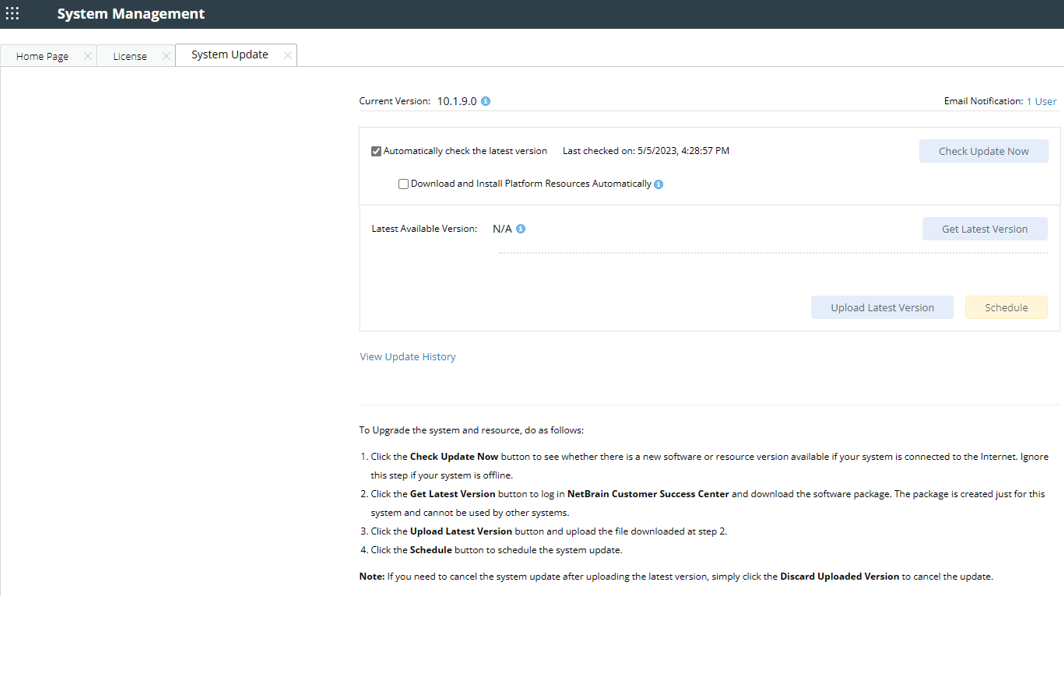
- When this check is enabled, the NetBrain system will check whether a minor release, a patch, a customized built-in, a customized resource or common platform resource updates have been published since the last time check (either auto or manual check). The latest available version will be displayed with the release note.
- If a release or patch is available, click Get Latest Version to Download Package from NetBrain Customer Portal after reviewing the Release Note.
Download Package from NetBrain Customer Portal
Follow the steps below to download the system upgrade package from NetBrain Customer Portal:
- Click Get Latest Version on the NetBrain System Management page, you will be redirected to the NetBrain Customer Portal.
- Log into the NetBrain Customer Portal with your username and password.
-
Confirm the required info and click Generate Package.
Tip: Required info includes the License ID, Framework Version, Common Repo Version, Customized Built-in Resource Repo, and Customized Resource Repo.
Tip: If you don't want to download the update package for framework components, enable the Exclude Framework Patch check box. 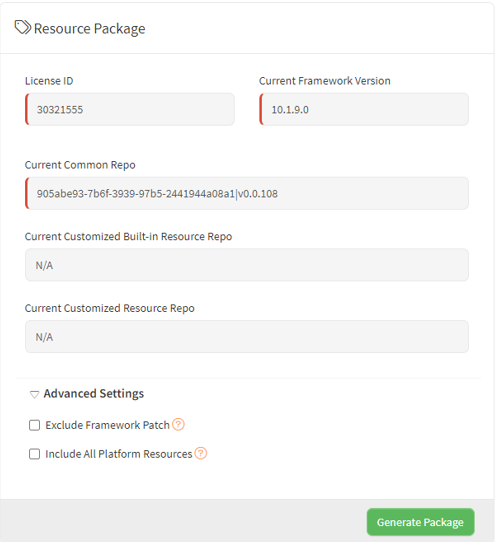
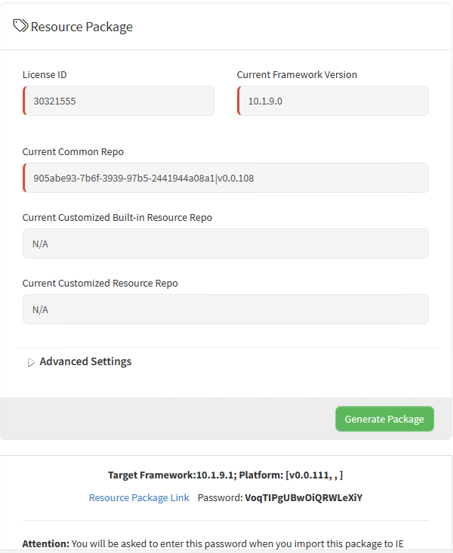
- Click Resource Package Link to download the package to your local drive.
-
Keep note of the password for the next step- Upload Package to NetBrain Workstation.
Upload Package to NetBrain System
Follow the steps below to upload the system upgrade package to NetBrain system:
- Log in to the System Management page.
-
On the System Management page, click the
 start menu> System Update.
- Click Upload Latest Version.
- Click Browse and select the system upgrade package (.zip file).
-
Enter the password and click Upload.

Tip: With the Discard Uploaded Version button, you can discard the previously uploaded update package and delete the system update task before the scheduled task is executed.
Schedule Update
Follow the steps below to schedule the system update:
- Log in to the System Management page.
-
On the System Management page, click the
 start menu> System Update.
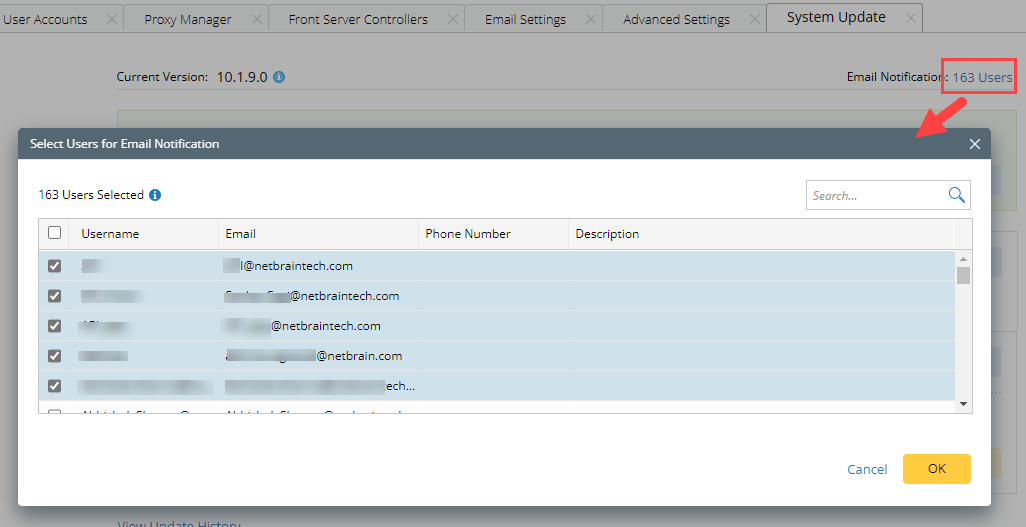
- (Optional) Select which system admin(s) will receive the email notifications when the update succeeds/fails.
Note: By default, all admin users will receive the notifications.
Note: The system admin refers to users with system administrator or system management privilege. 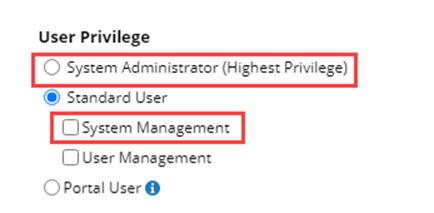
- Click Schedule.
- After reading the information in the Notification window, click OK.
Note: Ensure to run the system update pre-check tool to verify the environment readiness for the auto-update. 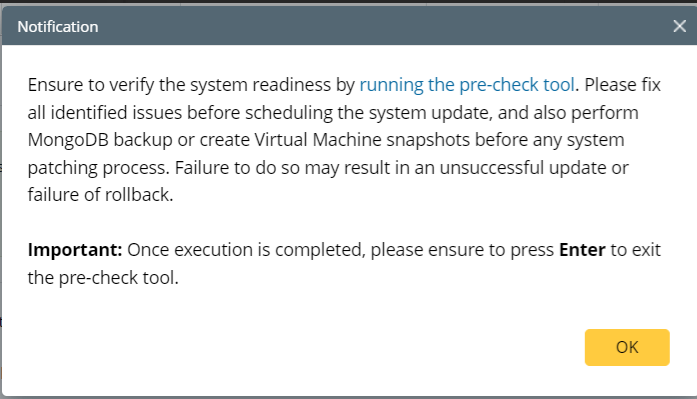
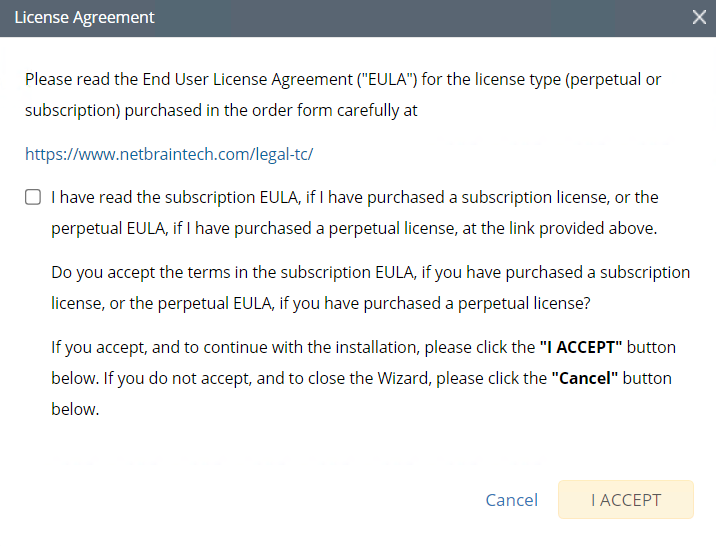
-
Review the license agreement, select the I have read the subscription EULA check box and click I ACCEPT.
-
(Optional) Check the Enable Test Plan checkbox.
Tip: You can leave the Enable Test Plan checkbox unchecked to skip the test plan.
Note: Only users with domain and tenant access will be granted permission to run the test plan. 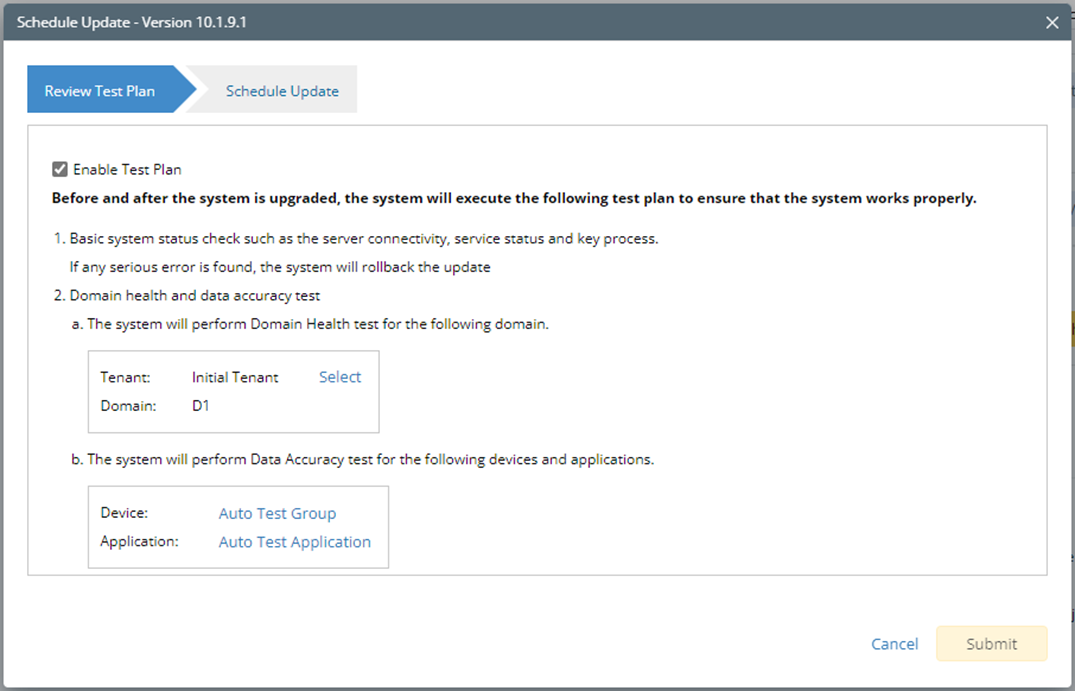
-
Click Select and specify the desired Tenant/Domain to perform Domain Health Check.
Note: If there is more than one tenant or domain, step a must be completed before proceeding to step b.
Note: If only one tenant and domain exists, the only Tenant or Domain will be automatically selected, and you can directly proceed to step b. -
Click Auto Test Group to specify the devices for the Device Live Access Test.

Tip: The devices in the Auto Test Group are automatically selected according to the device type discovered by the system. You can also manually edit or delete any devices to suit your specific needs. -
Click Auto Test Application Folder to specify the application for Path Calculation Test.
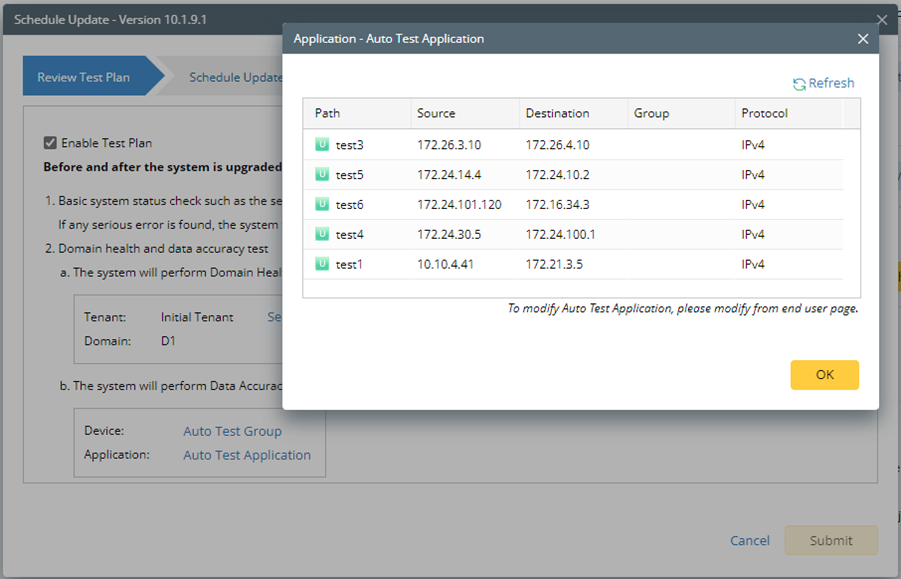
Note: For the first-time definition or usage, the last used Application Paths (up to 5 paths) will be automatically copied to the Auto Test Application Folder. You can also manually change the auto-selected path in Application Manager.
-
Click Select and specify the desired Tenant/Domain to perform Domain Health Check.
-
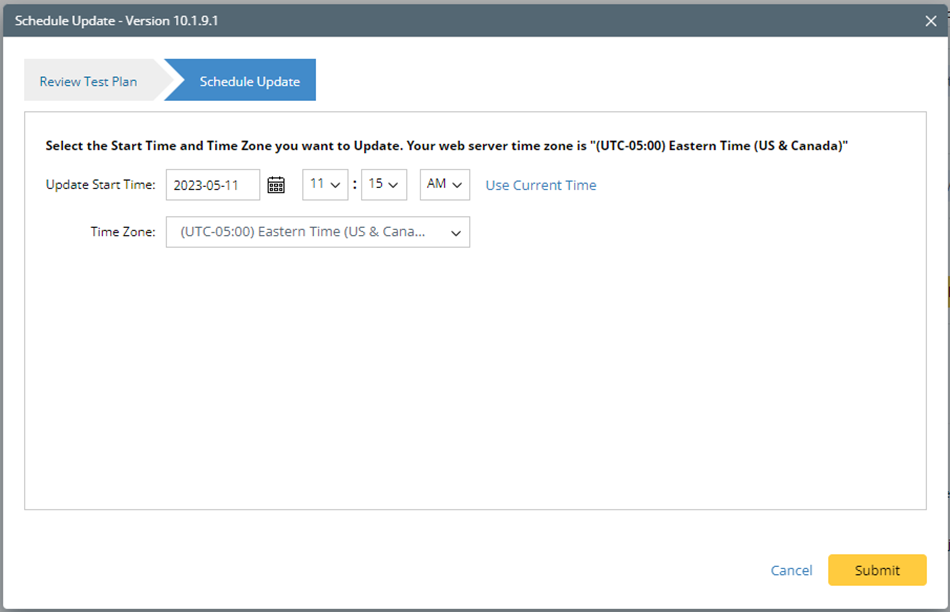
Set up the schedule to start the system update.
-
Click Submit to apply the above settings.
Note: For the first-time definition or usage, a confirmation message will prompt if the selected tenant/domain does not have the application path. You can click Yes to dismiss the message and continue the update process.
|
|
Tip: You can edit or remove the system update task once it is scheduled. |
View Update Status
The possible status of the auto-update is as follows:
| Stage of the Auto Update | Possible Status | ||
| Before the execution of Auto Update |
|
||
| During the execution of Auto Update |
|
||
| After the execution of Auto Update |
|
View Update History
Follow the steps below to view the update history:
- Log in to the System Management page.
-
In the System Management page, click the
 start menu> System Update.
- Click View Update History.
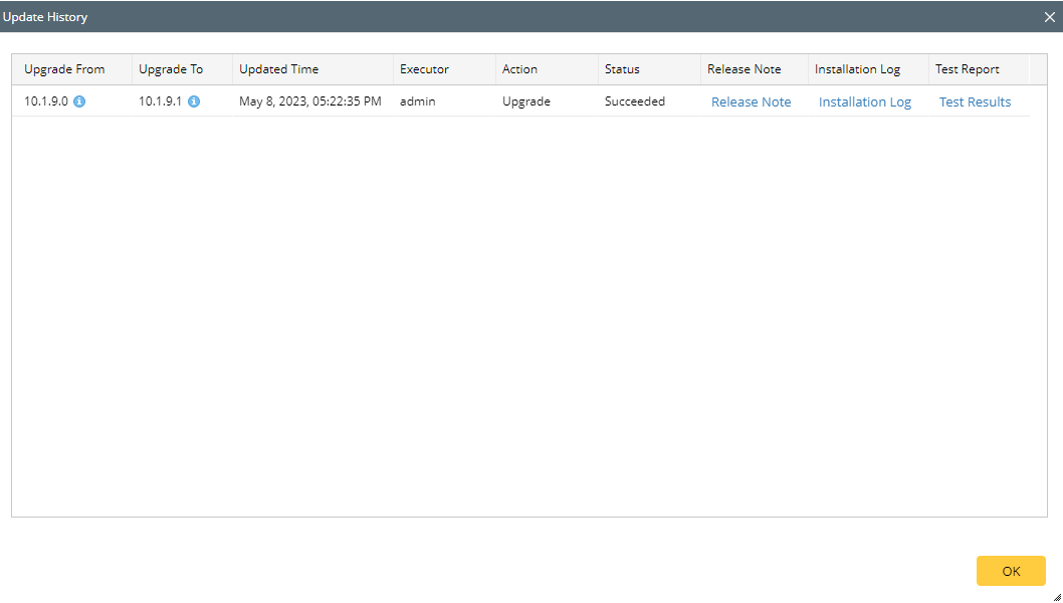
The update history only records the releases the system is scheduled to update with. The update history table provides the following information:
- Update From: the release number from which the system is updated.
- Update To: the release number to which the system is updated.
-
Updated Time: (It could be one of the following.)
- when the system finished/started the update
- when the last available version was checked
- when the rollback started/ended
- when the scheduled auto-update was cancelled
- when the package was uploaded successfully, but the update was not yet scheduled
- when the update was scheduled successfully and the update is ready to run
- Executor: the person to schedule the update
- Action: upgrade, user rollback, or automatic rollback.
- Status: one of the statuses in View Update Status.
- Release Note: the link to the release note.
- Installation Log: the link to the installation log.
-
Test Report: the link to the test results.
Click the  icon in the Upgrade From column and Upgrade To column, you can check the Framework Version and Repo Versions.
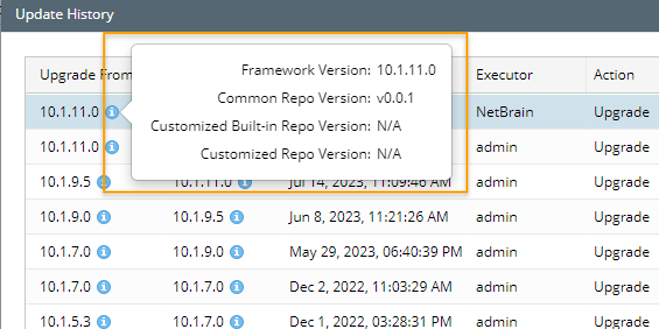
The List of resources
The platform resources that can be downloaded and applied automatically:
| Resource Name | ||
| Qapp | GDR Properties | Golden Baseline Dynamic Analysis Logic |
| Gapp | Tech Spec | Interface Type (Interface Name Translation) |
| Runbook Template | Media Type | Default Date View Template |
| Data View Template | API Plugin | Object Tree Template |
| Parser Library | SPOG URL | NGSystem. Technology License Definition |
| Driver | Visual Space | Multi Source Mapping |
| Device Type | Vendor Model Table | Domain system settings |
| Device Icon & Picture | Global Python Scripts (Built-in) | Cloud type |
| Topology Link Type (IPv4, IPv6 etc.) | Variable Mapping & Global Variable | FIT (Feature Intent Template) |
| Generic Schema (Including Generic SSchema Icon) | Platform Plugin | Full CLI Command |
| CLI Command Template | Beta Driver | PV File |
| Open Driver | / | / |