2023-Nov-03-R11.1a
Integration with Webhook
Users can use a Webhook, a general technology, in Splunk Alert Action to push Splunk data to NetBrain.
Enable Webhook URL
The Webhook URL can be created and enabled in NetBrain System to build a connection between Splunk and NetBrain System. To enable Webhook URL, complete the following steps:
- Log in to the System Management page.
- On the System Management page, select Webhook URL from the
 start menu.
 - Under the Webhook URL tab, click +Add
- Complete the required fields (Name/Authentication Type/API KEY) and check the Enabled checkbox.
- Click Save.

Field Meaning Name The name saved in the NetBrain IE for the URL.
Note: The name cannot exceed 128 characters.
Authentication Type How NetBrain IE authenticates the Webhook. API KEY The API Key must be more than 6 and less than 12 digits. Allowed IP Address To define which IP address NetBrain IE accepts webhook data from
- Any
- Specified IP
Enabled (check box) To enable or disable
Define Webhook Alert Action
Webhook alert action is used to define the Webhook URL to create NetBrain map and execute Runbook Template when Splunk alert is generated. The following screenshot exemplifies the Save As Alert interface in Splunk App. 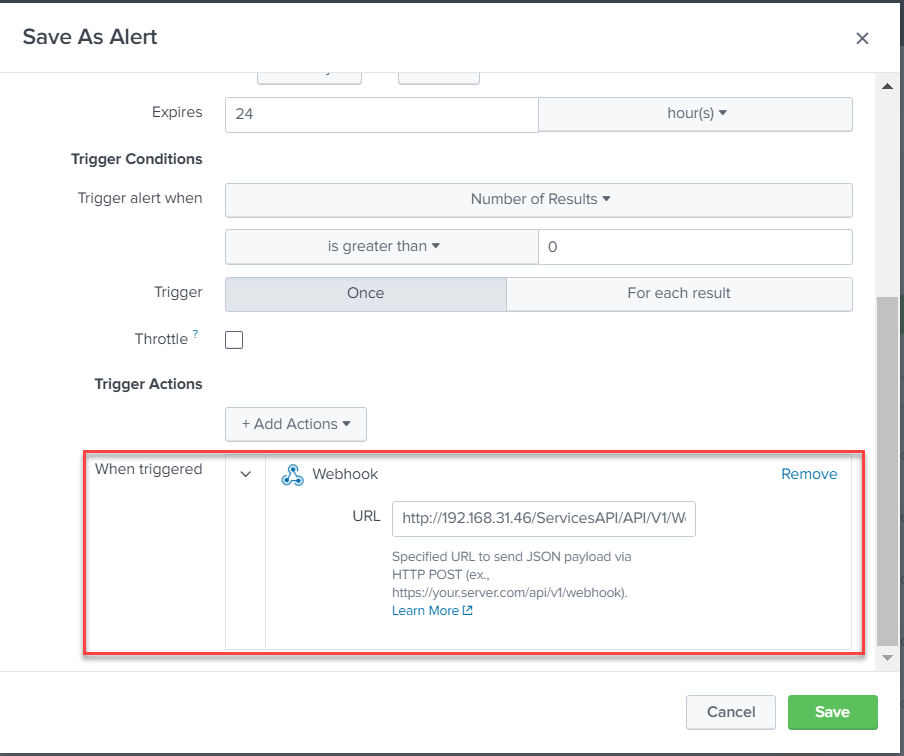
Manage Webhook URL
Webhook management allows users to manage the webhook ULRs in a central place.
- Log in to the System Management page.
- On the System Management page, select Webhook URL from the start menu.
- Hover over the entry and click
 . From the drop-down list, you can:
- Copy the URL
- Disable/Enable the Webhook URL
- Edit the URL
- Delete the URL