R12 Publication-2025July16
Manage ADT in TAF Lite
Users determine which ADT View can be accessed by TAF Lite, limiting data retrieval or intent trigger to these ADT Views only.
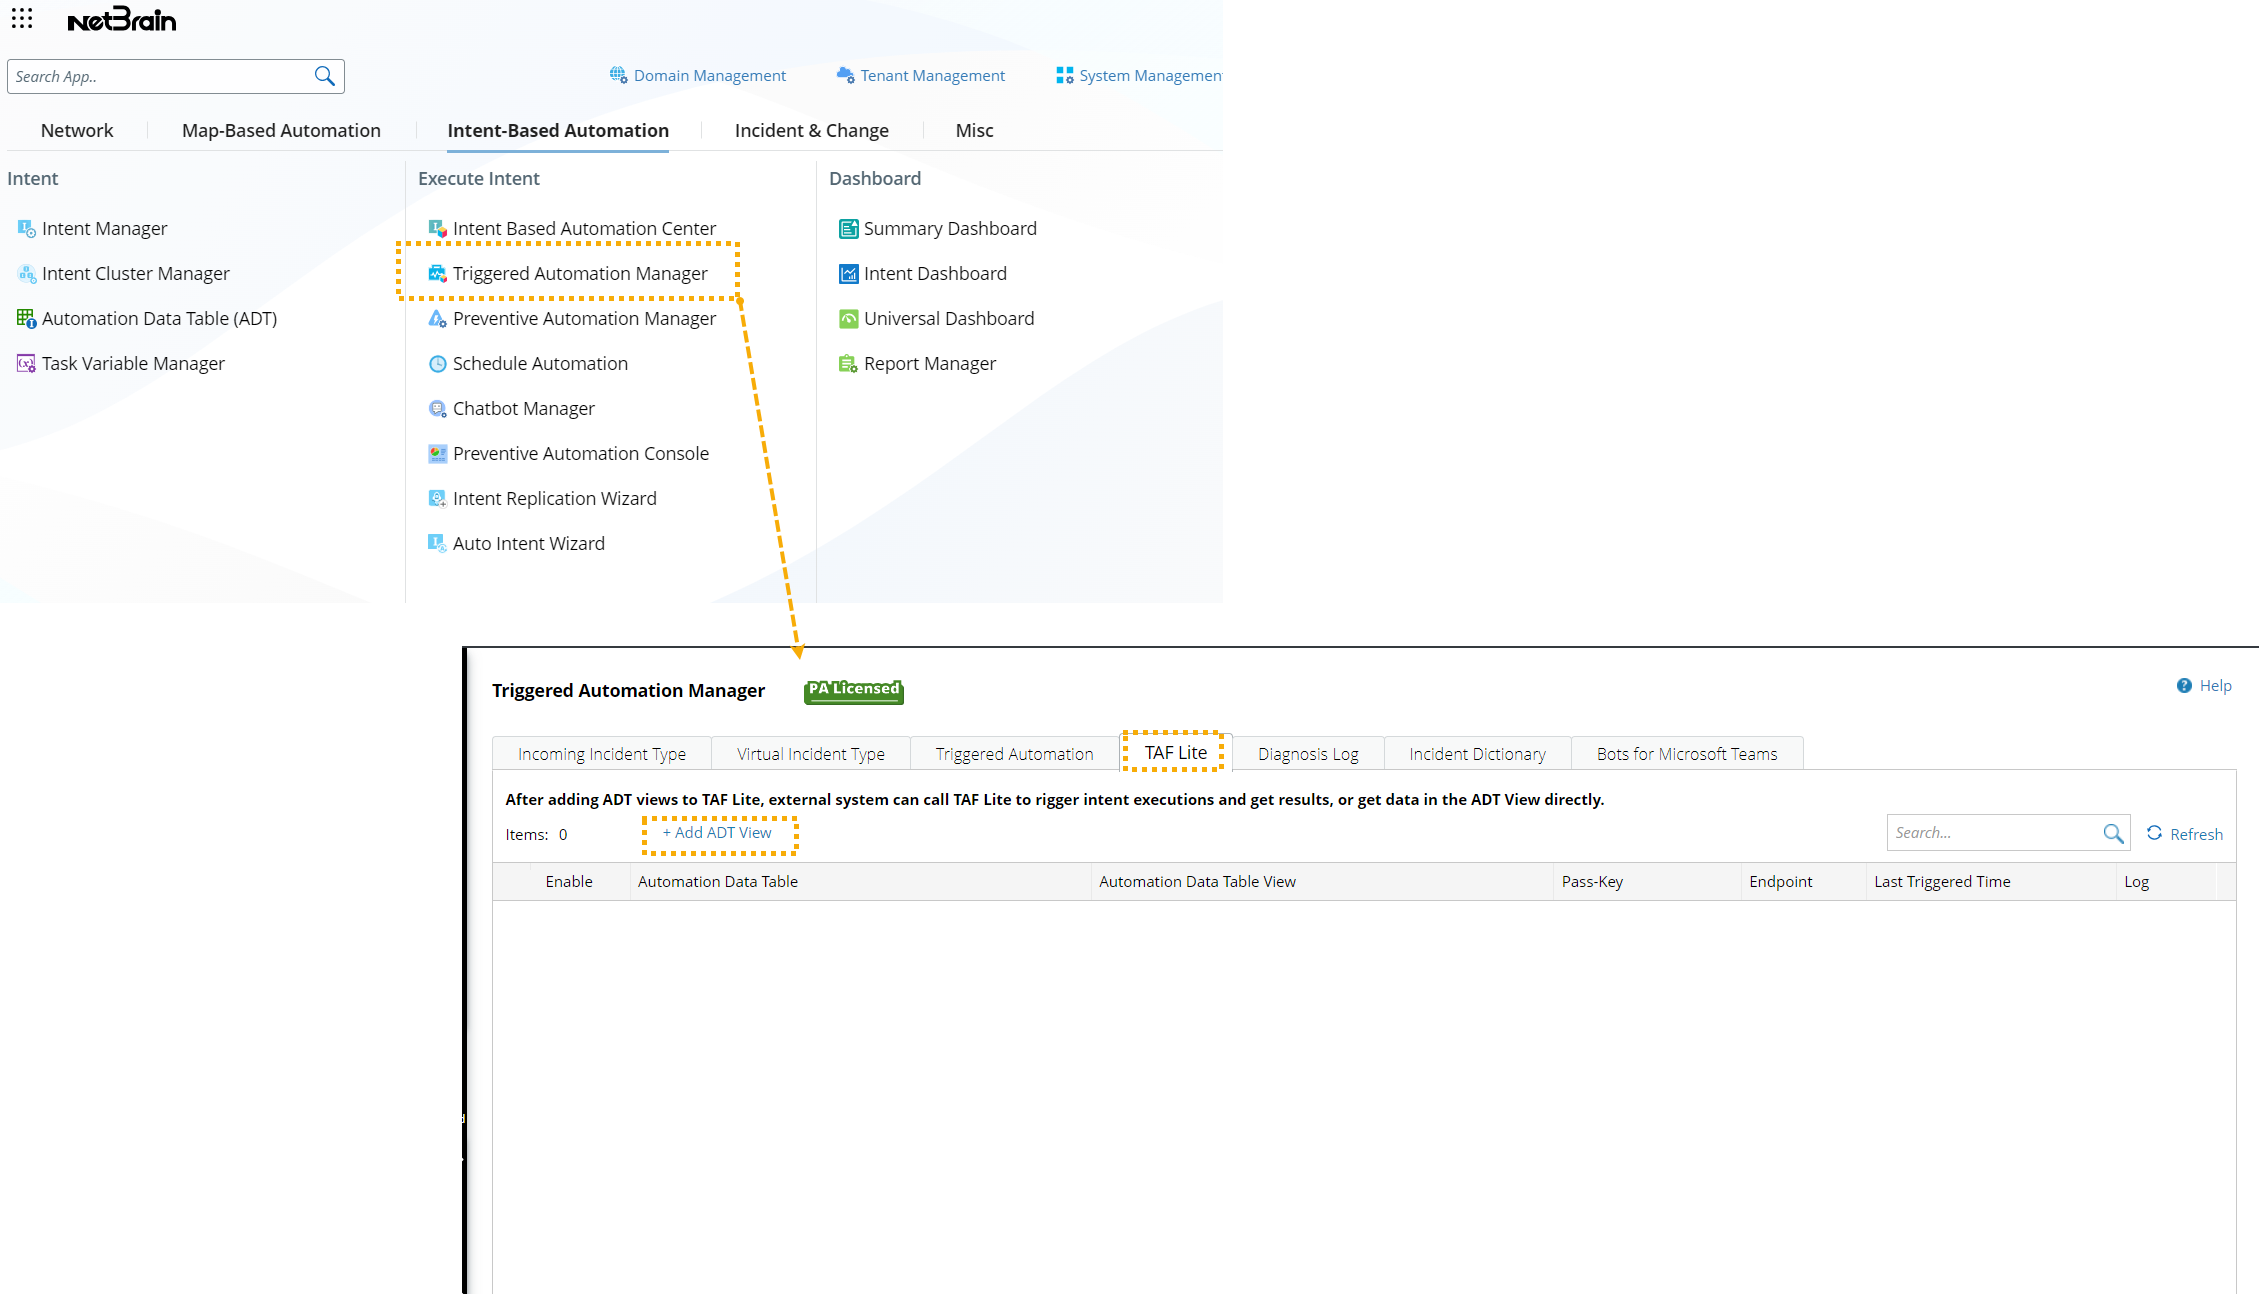
Add ADT View to TAF Lite
Users can add ADT View in Triggered Automation Manager.
-
Navigate to the Triggered Automation Manager > TAF Lite tab and click +Add ADT.
-
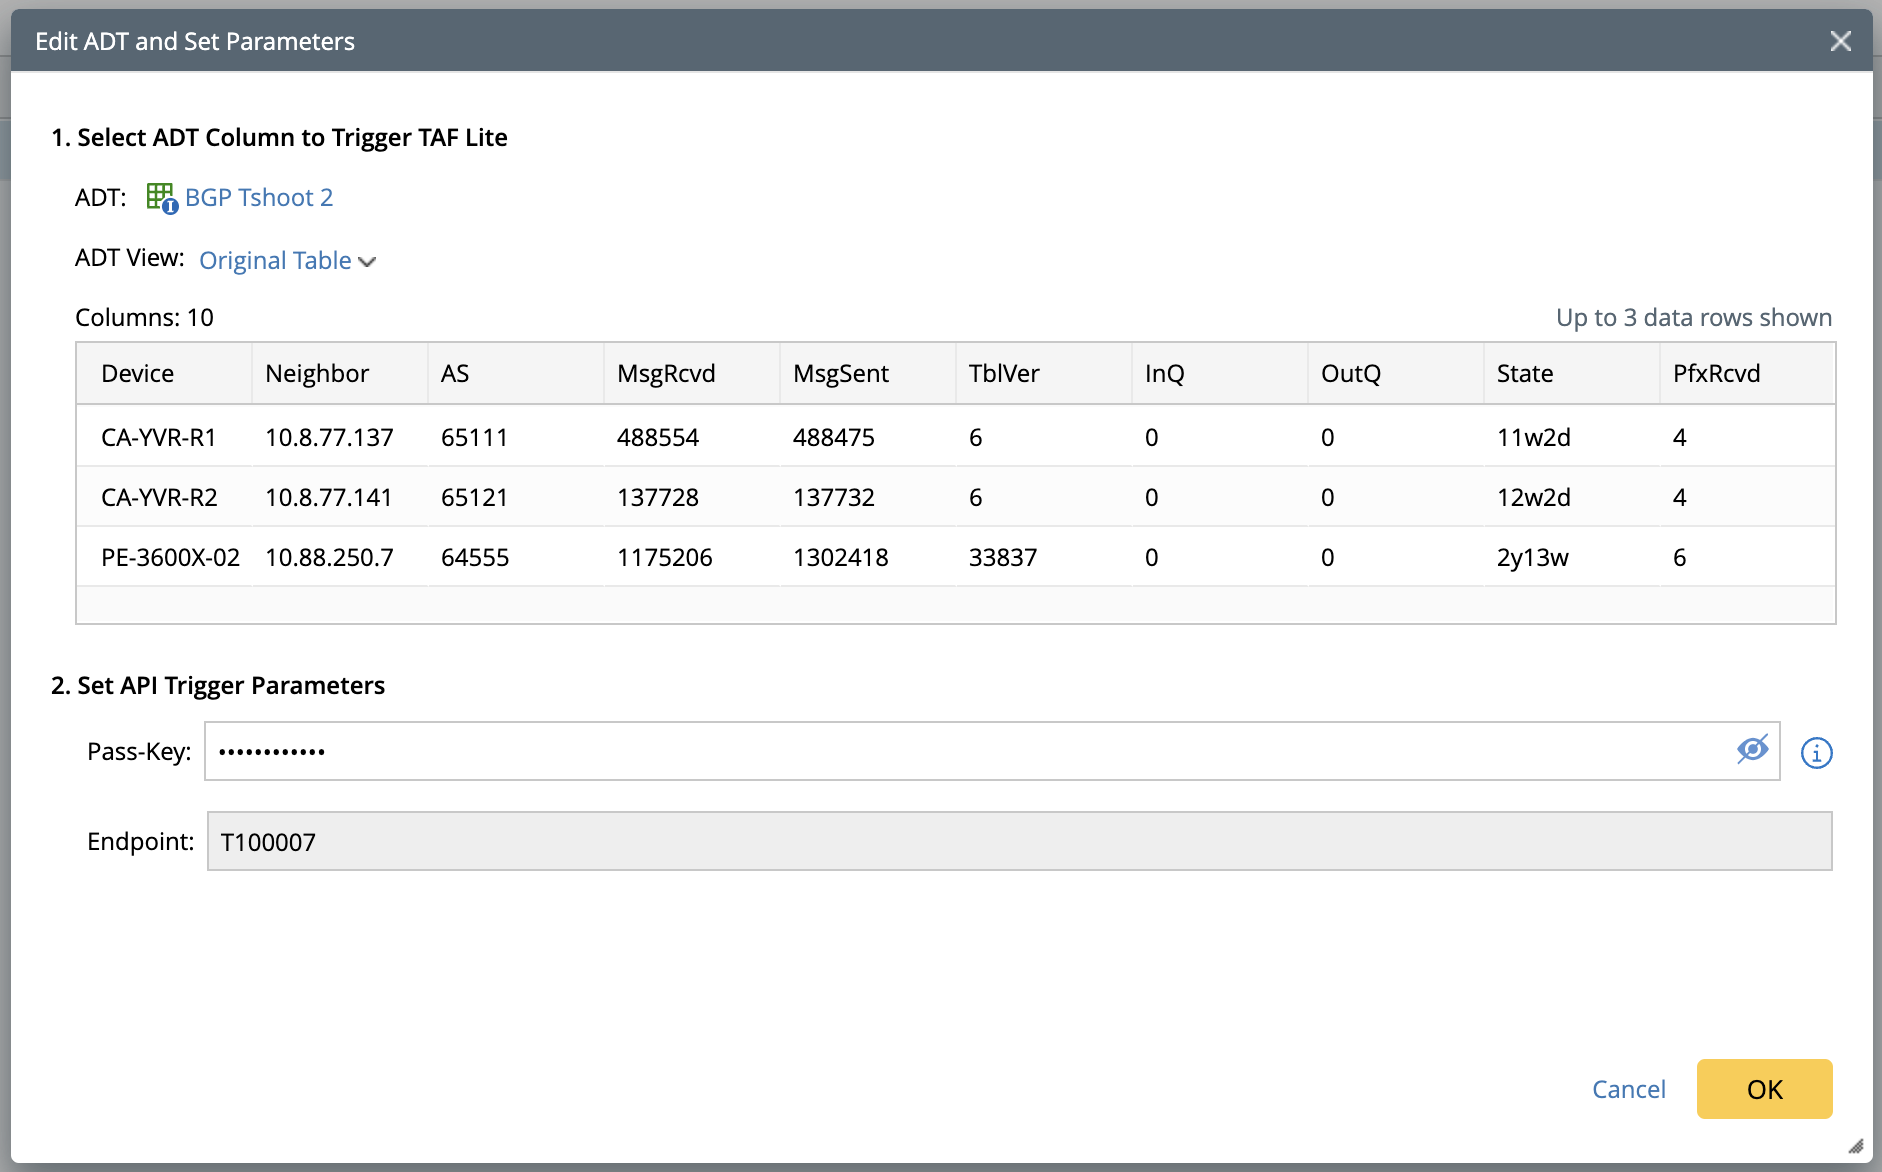
In the Add ADT and Set Parameters window, define the following:
-
Select ADT Column to Trigger TAF Lite: Select an ADT View. All columns from the ADT view can be called by API.
- ADT: Select an ADT.
- ADT View: Select an ADT view; the default is the original table. Upon selection, the first 3 rows of the ADT view will be displayed.
-
Set API Trigger Parameters:
- Pass-key: An authentication key to authenticate an external 3rd-party system for accessing data in ADT view.
- Endpoints: It is uniquely assigned by the system to locate and access the selected ADT view. Users are no longer required to specify Tenant, Domain, or ADT path for locating the ADT view.
-
Select ADT Column to Trigger TAF Lite: Select an ADT View. All columns from the ADT view can be called by API.
Manage Added ADT View
Users can manage the added ADT views in Triggered Automation Manager > TAF Lite tab.
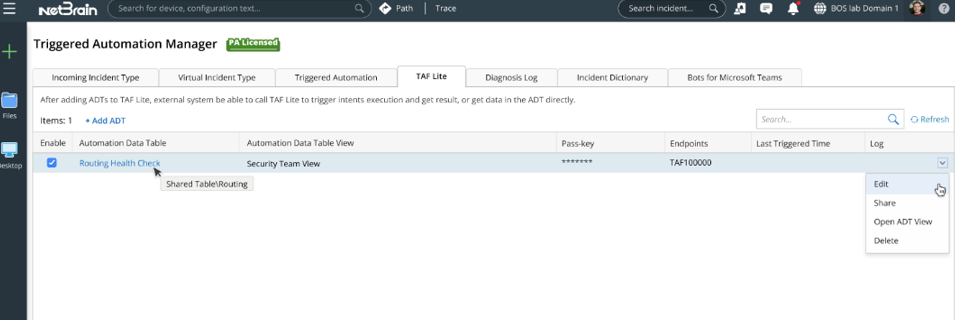
To understand each column in the TAF Lite table:
- Enable: Enable or disable TAF Lite for the ADT view.
- Automation Data Table: The ADT name
- Automation Data Table View: A clickable name for the ADT view. Users can click it and view the ADT view on a new web page.
- Pass-key: The pass-key will be masked with asterisks "******" for security purpose.
- Endpoints: The unique endpoint is system-generated and not editable.
- Last Triggered Time: The most recent API-triggered time.
-
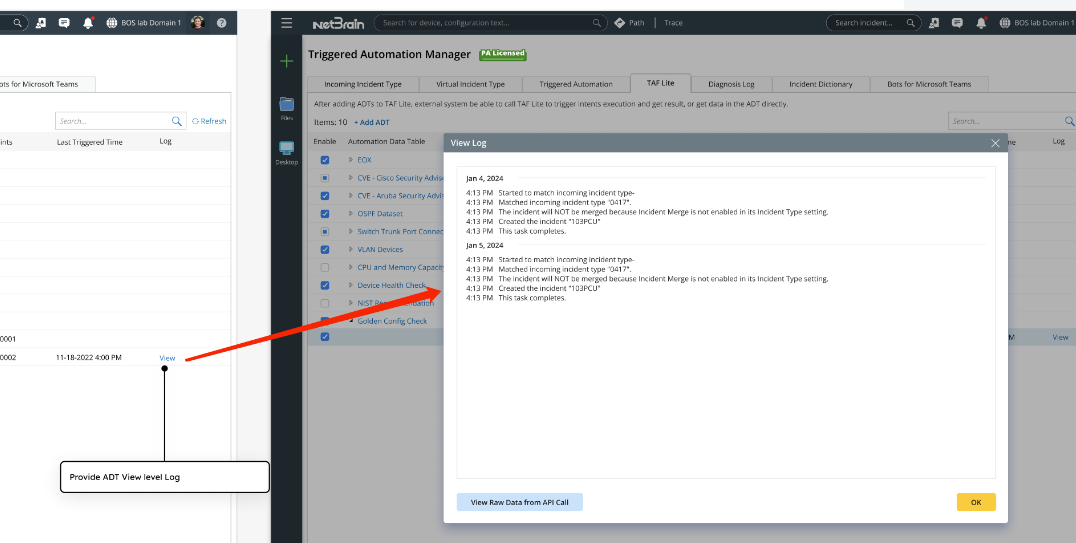
Log: Click View to view the execution log of the last API call.
Users can right-click each entry, and choose from the drop-down menu to further manage the ADT view:
- Edit: Modify the settings for the entry.
-
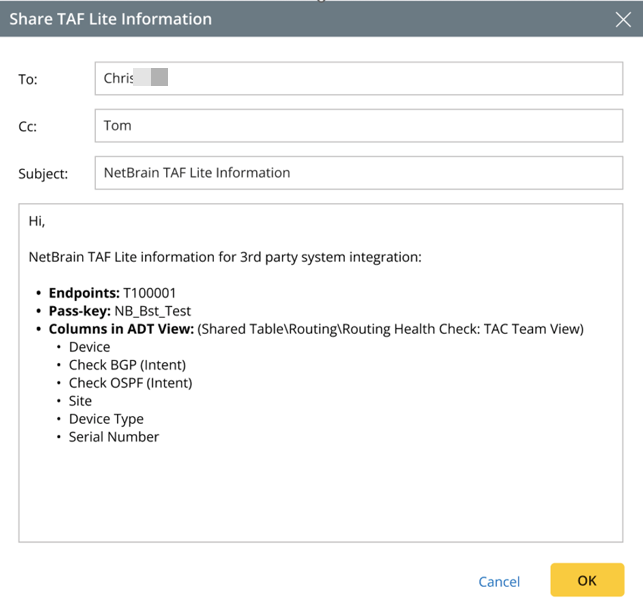
Share: Share TAF Lite information with others via NetBrain email system.
- Open ADT View: Open the selected ADT View.
- Delete: Delete the entry.
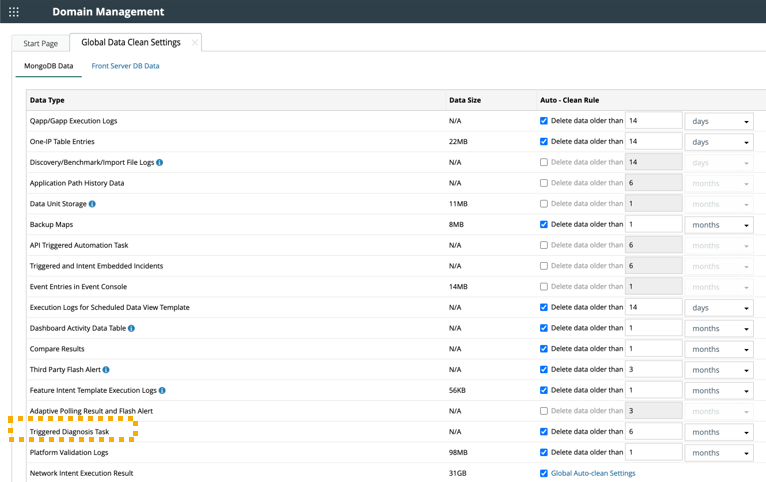
Define Data Clean Settings
Users can define the data clean settings by navigating to the Domain Management Page > Global Data Clean Settings.
On the Global Data Clean Settings > MongoDB tab, define the auto-clean rule for Triggered Diagnosis Task.