R12.1 JA-2025July15
View Zone and Subnet
- Log in to the Domain Management page.
- On the Domain Management page, click the start menu
 and select Data Accuracy Resolution.
 - On the Data Accuracy Resolution tab, select Duplicated IP and Subnet Manager on the left pane.

- View the zones.
- You can search for a zone with its zone name.
- Description of the zones
Default Zone System Zone Manually Zone Qapp Zone TechSpec Zone Description A zone created by the system. Initially, all device IP interfaces are in this zone. Generated for each VLAN Group by the system. Each VLAN Group has its system zone. The zone name is started with VG or non-VG. The zone manually created or renamed by users. Created by Qapp. Divided by SDN and public cloud. Operations Note: Default Zone cannot be renamed and deleted. Delete
- Rename
- Delete
- Rename
- Delete
Note: After being renamed, it will be moved to the Manually Zone
- Rename
- Delete
Note: After being renamed, it will be moved to the Manually Zone
- View and export the subnet.
- You can view subnets with conflicted IPs by checking Only show subnets with conflicted IPs.

Tip: If an IP address has been duplicated in a different zone, it will not be marked as conflicted. - You can search for the subnet by the subnet name, device name, interface name, IP address, VRF or interface description.
- Select the search scope in the drop-down menu.
- Input the keyword and press Enter.

Note: The tip “There are 1 out of 1 subnets containing conflicted IP address” is dynamic and changes based on the search result.
- You can export the zone table to a CSV file.
-To export the table for all zones: Select All Zones> Click Export.
Note: The exported content is the backend data and will contain more than what is displayed on the current table. 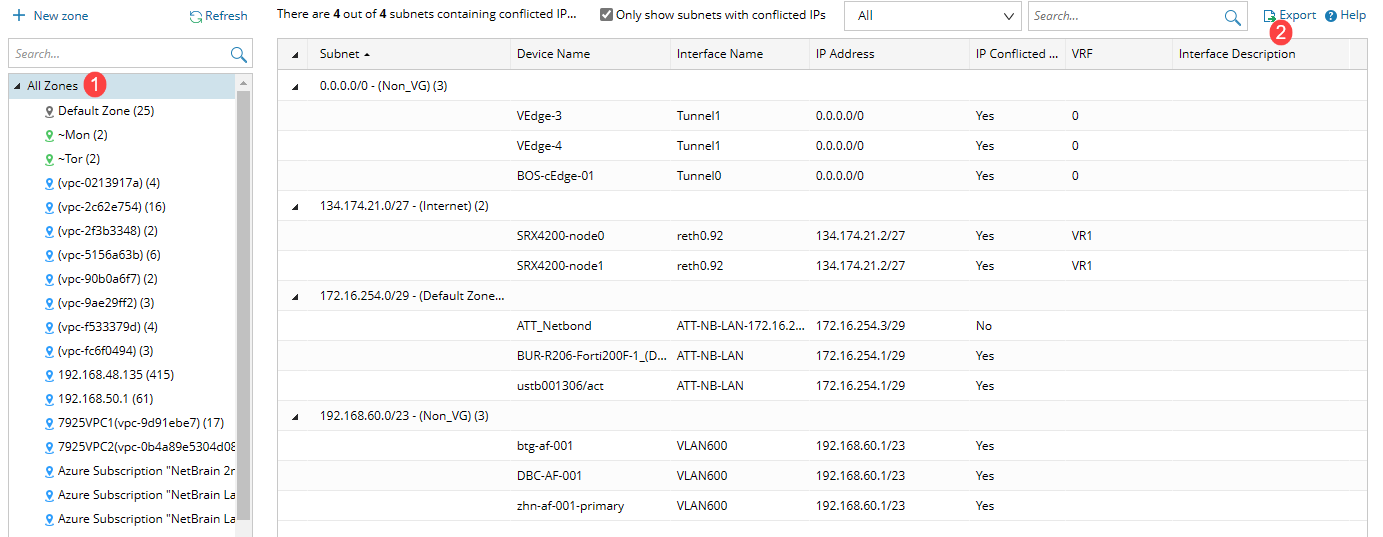
-To export the table for an individual zone: Select the zone> Click Export.
- You can view subnets with conflicted IPs by checking Only show subnets with conflicted IPs.
- View the zones.