R12.1-JA-2025June05
Delete Network Change
A new Privilege, Delete Network Change, has been added since R11 to allow users to delete their network change tasks and tasks created by others. Before deleting a task, the user must have this privilege in his role. This section covers the following features:
- Adding the privilege to Delete Network Change.
- Deleting a single Network Change from Runbook.
- Deleting a Single Network Change from the Task bar.
- Deleting a Network Change tasks as a batch.
Adding the privilege to Delete Network Change:
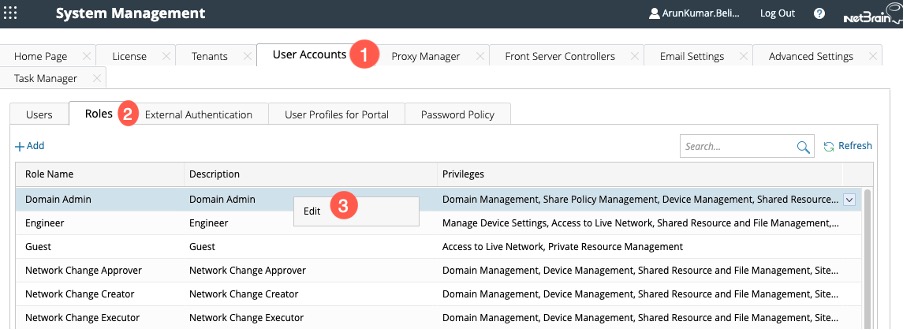
- Log in to System Management and go to the User Accounts tab.
- Go to the subtab Roles.
- Right-click on the required Role Name to open and choose the option Edit.
-
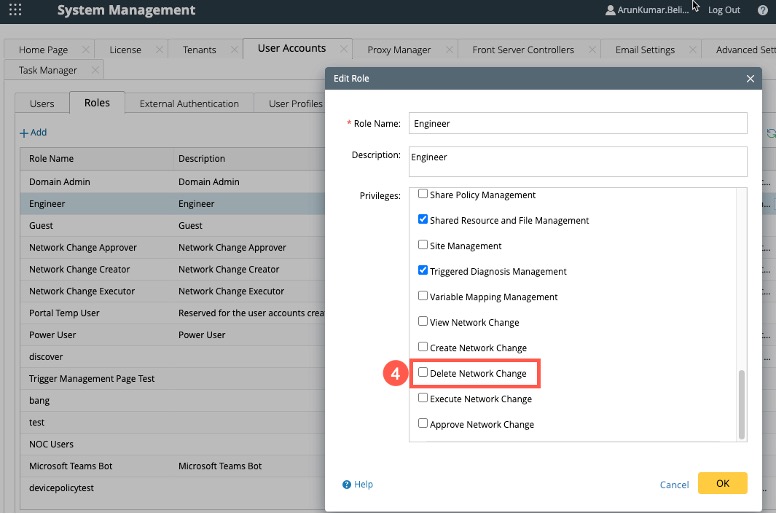
A window “Add Role” will pop up. Check the Delete Network change check box to enable the privilege.

NOTE: If ‘Delete Network Change’ is checked, ‘View Network Change’ will be checked automatically.
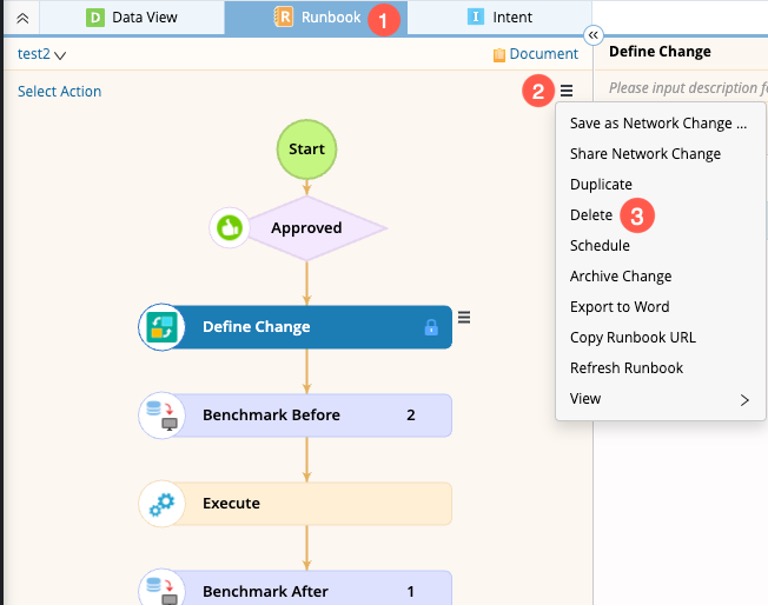
Deleting a single Network Change from Runbook:
-
Open the network change Runbook.
-
Click on the
 in the Select Action pane to open a drop-down menu.
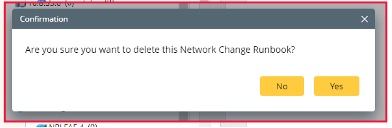
- Select Delete, and a confirmation pop-up window will appear.
- Click Yes to confirm the deletion.
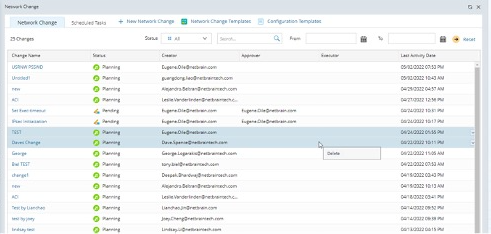
Deleting a Network Change from the Task bar
A network change can be deleted as a single task or batch. Users can select multiple tasks and can delete them with one click.
Deleting a Single Network Change:
-
Click the start menu
 , and select Incident & Change > Network Change.
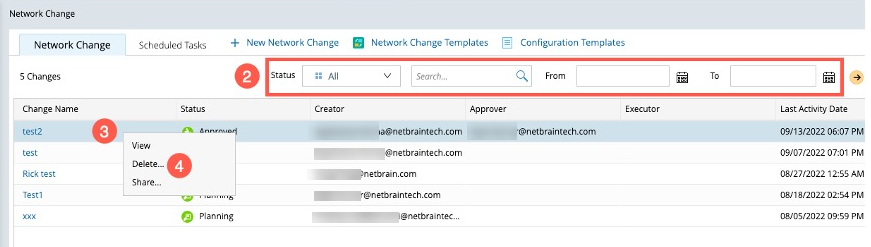
- Filter out the task using status and timeline.
- Click on the task to open a drop-down menu.
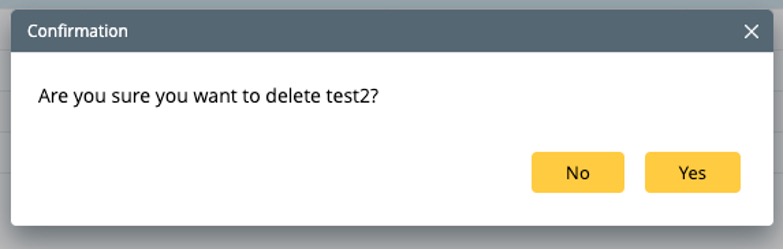
- Select Delete, and a confirmation pop-up window will appear.
- Select Yes.
Deleting Network Change Tasks as a batch:
-
Click the start menu , and select Incident & Change > Network Change.
- To select multiple tasks for deletion
- Press and hold the Shift key to select a set of items (or)
- Hold down the Ctrl key and click on the desired items to select
- Right-click the selected tasks, and a drop-down menu with only one option, Delete, will appear.
- Select Delete, and a confirmation pop-up window will appear.
- Select Yes.