R12.1-JA-2025June05
Define Report Filter
Report Filters can filter the report data by certain criteria when viewing a report. Purposes for using Report Filters:
- Helps users quickly sort through a large amount of data and focus on the important information.
- Displays data from different perspectives or scopes to help identify the trends or patterns that may not be obvious when viewing the whole report.
On the View Report page, click  beside Report Filters and select one of the options from the list to start filtering the data.

beside Report Filters and select one of the options from the list to start filtering the data. On the Edit Report page, click the Report Filter hyperlink to define the Report Filters in the pop-out window.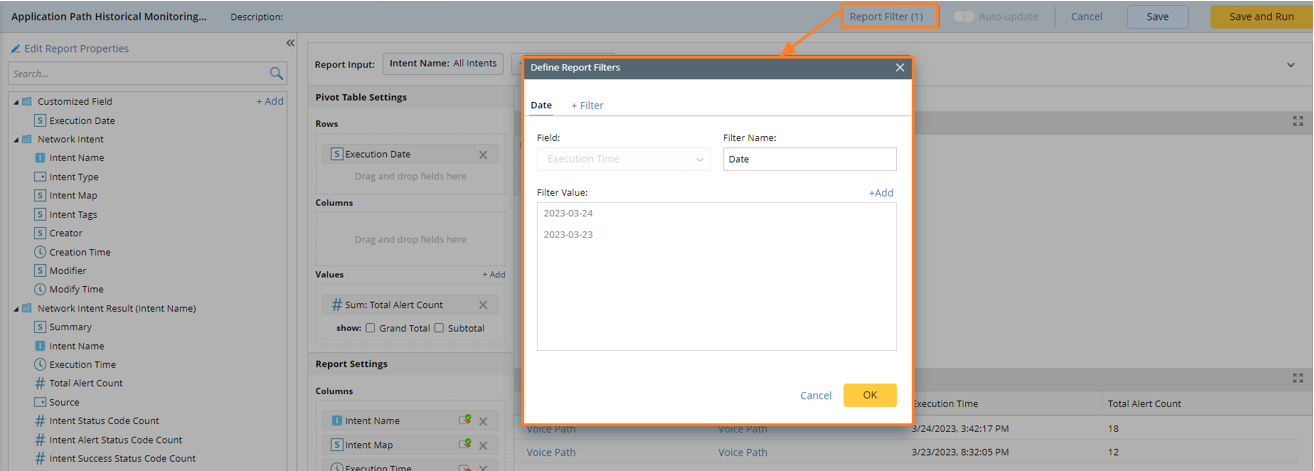
Define Report Filters
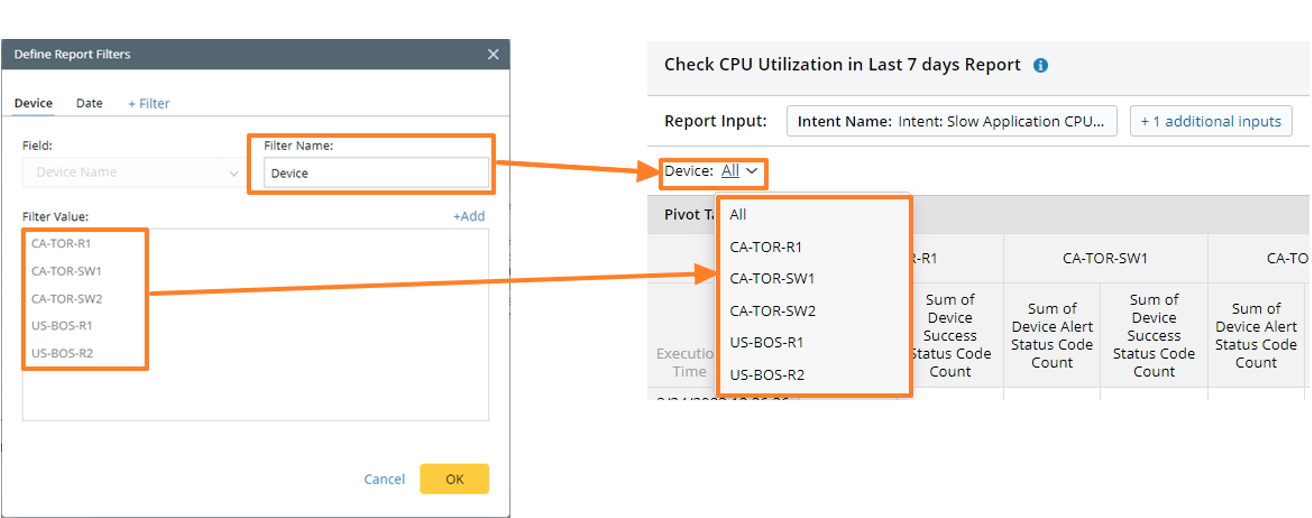
You can define up to three Report Filters for each Report on the Edit Report Page. The key elements are:
- Field – Select one of the Report Columns as Field from the drop-down list. This defines which Report Column the filtering criteria is applied to.
- Filter Name – This defines the name of the Report Filter displayed on the View Report page.
- Filter Value – This defines the options in the drop-down list for Report Filters. Click on +Add to add Filter Values. You can add up to ten Filter Values for each filter.
Example: Define the Report Filters to View Results by Week
The customer wants to define a Report Filter for Report Critical Application Report that filters the verified time by week.
Follow the steps below to define the Report Filters:
- Click the Report Filter to open the Define Report Filters window.

- Click + Filter to add a new filter.

- Follow the steps below to define the filter:
- Field: Select Last Verified Time
- Filter Name: Enter Last Verified Time.

- Follow the steps below to define the filter value:
- Click +Add, select This Week from the drop-down list
- Click +Add again, select Last Week from the drop-down list.

- Click OK to save the Filters.

- Use the filter on the View Report page.
