R12.1 JA-2025July15
Configuring SNMP Read-Only Community String
- Click the SNMP String tab.
- Click Add to open the SNMP Setting dialog box.
- Select the version of SNMP and enter the required credentials, and click OK.
Repeat steps 2 and step 3 to add more entries.
Example: If your system has two SNMP proxy servers, and you want to configure one community string for these two servers:
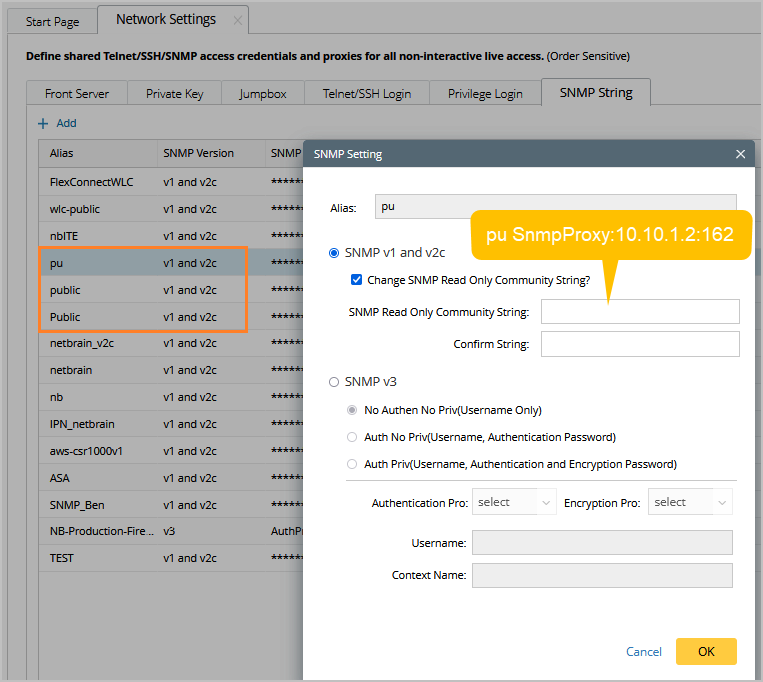
Configure 3NMP Items in NetworkBrain
- Navigate to the SNMP String tab in Network Setting.
- Click Add to open the SNMP Setting dialog box.
- Enter the Alias.
- Select SNMP v1 and v2c
- Enter the community string: We use pu as the community here.
- For the first item, enter pu.
- For the 2nd and 3rd items(repeat step1-4), the community string will be: $community SnmpProxy:$snmpProxyAddress
- For the second item: pu SnmpProxy:10.10.1.3:162
- For the third item: pu SnmpProxy:10.10.1.2:161
Modify the proxysetting.ini file in the Front Server
- Log in to the front server as an admin.
- Go to the Conf folder under the installation directory in the Front Server
- Modify the proxysetting.ini file as follows:

Tip: If the proxysetting.ini file doesn’t exist:
- You can copy the fix_proxysetting.ini file
- Rename the new copy file as proxysetting.ini
- Only keep the info below.
Code |
[SnmpProxy] |
See also: