Defining a Ping Command in Canvas

Contents
1.Click the ![]() icon from the taskbar and select New Qapp from the drop-down menu to open the Qapp Editor.
icon from the taskbar and select New Qapp from the drop-down menu to open the Qapp Editor.
2.At the Start node, use the default option Map in the Define Qapp Device Input field. It means that the Qapp takes all devices visible on the map as the input device.
3.Extend a Canvas node from the Start node and double-click the Canvas node to enter the Canvas editor.
4.At the Device Queue node, keep the default settings.
5.Extend a Device(this) node from the Device Queue node and keep the default options.
6.Extend a Ping command node from the this node.

7.At the Ping node, define the source (the device to ping from) and the destination (the IP to ping to).
1)In the From field, set the source to ping from. There are two options: Device and Front Server. For example, select Device and then select $this. It means to ping from the devices in the Device Queue.
2)In the To field, set the destination to ping to. There are two options: IP Host (IP address to ping) and Device. For example, select IP Host and then enter an IP address.
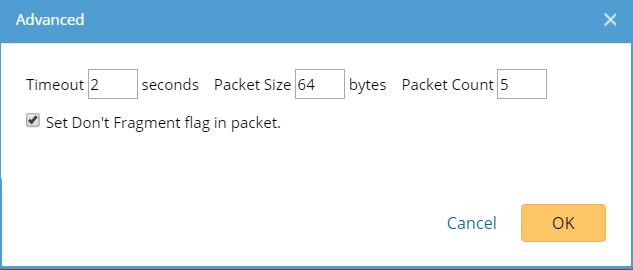
3)To set ping parameters, click Advanced. You can leave these options as their defaults.
▪Set Don’t Fragment flag in packet — decide whether a packet will be fragmented when the packet is larger than MTU.
▪Packet Count — specify the number of the ping packets to be sent.
▪Packet Size — specify the size of a packet to be sent. You can change the packet size to find out MTU.
4)Click Retrieve and select a device to retrieve sample data. The system has a built-in default sample for the ping output, which contains three variables: $lost_rate (integer), $average_time (integer) and $ping_result (Boolean indicating whether the ping succeeded).
8.Extend a Table node from the Ping. Click the  icon, select the variable $ping_result and click Attribute>> to add it.
Tip: NetBrain parsers show the parsed data in two forms: Single Value and Table. For variables in the Single Value form, you can export them to a Table node as row data by clicking Table>> or as table attributes by clicking Attribute>>. However, for variables (mostly interface-level variables) in the Table form, you can only add them to a Table node as row data by clicking Table>>.