Using OVA File to Install NetBrain Database Server

Contents
The following sections describe how to deploy and configure the virtual appliance of NetBrain Database Server on VMware ESXi by either of the following ways:
Note: The default CPU and memory configured for NetBrain Database Server through the virtual appliance are 8 vCPUs and 32GB. You can increase the values through the virtual machine settings if they are insufficient. And besides, make sure the time on the machine is synchronous with the Internet time server.
Note: The Service Monitor Agent has been pre-installed on NetBrain Database Server to monitor its server status and related service metrics. You can decide whether to enable it by configuring the corresponding parameter.
Note: On VMware ESXi 6.5 and higher versions, only the installation through the vSphere Web Interface is available.
Using vSphere Web Interface
1.Complete the following steps to deploy NetBrain Database Server onto VMware ESXi 6.0/6.5 through the vSphere Web Interface.
1)Click Host in the Navigator pane and then click Create/Register VM.
2)Select Deploy a virtual machine from an OVF or OVA file as the way to create a virtual machine, and then click Next.

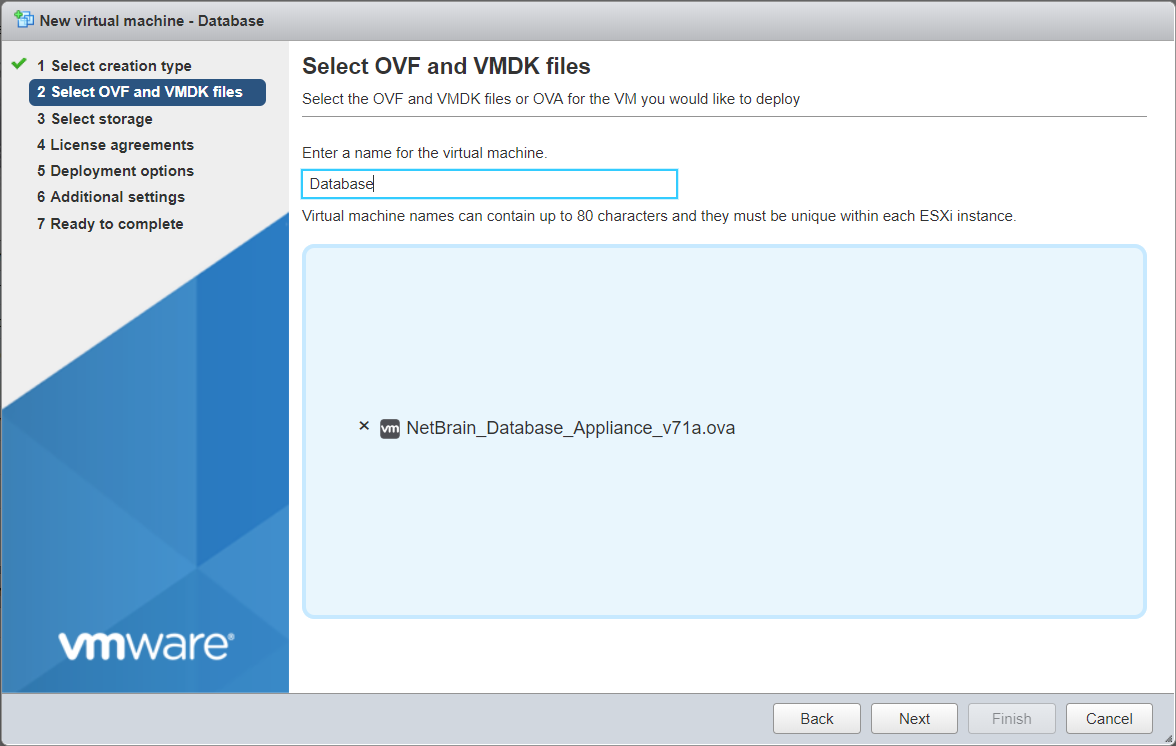
3)Enter a name for the virtual machine, drag the database server installation file to the blank area, and then click Next.
4)Select a datastore to save the configuration files and all virtual disks of the virtual machine, and then click Next.
5)Configure the deployment options, and then click Next.
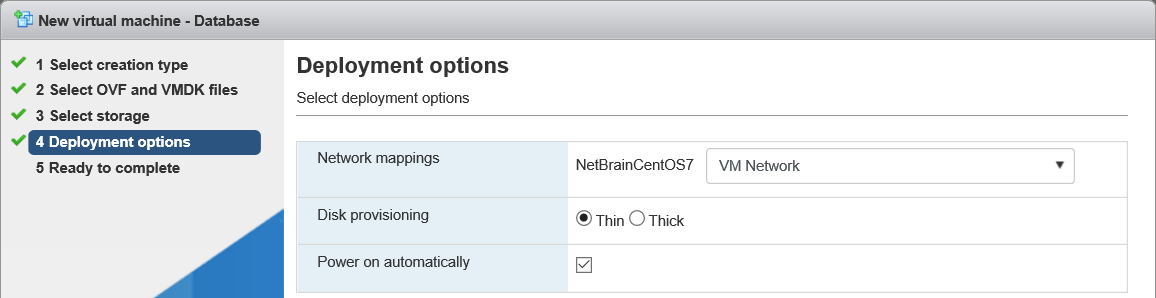
▪Network mapping — specify the network connectivity between the virtual machine and physical machine.
▪Disk provisioning — specify the provisioning format for a virtual machine.
oThin — only a certain amount of storage space on a datastore is provisioned to virtual disk files when the virtual machine is created.
oThick — all the space designated for the virtual disk files on a datastore is reserved when the VM is created.
▪Power on automatically — select the check box to make the virtual machine powered on automatically after the deployment.
6)Review the deployment settings and click Finish. A new task for creating the virtual machine appears in the Recent tasks pane.

2.On the Virtual Machines tab, click the virtual machine you created, and then click Console > Open browser console to open a console window.
3.Enter the username root and password admin at the VMware console to log into NetBrain Database Server.
CentOS Linux 7 (Core)
Kernel 3.10.0-514.e17.x86_64 on an X86_64
netbrain_data_server login: root
Password:
Last Login: Sat Sep 16 12:33:05 on tty1
[root@netbrain_data_server ~]#
4.Configure a static IP address for NetBrain Database Server as follows:
Note: You can skip this step if NetBrain Database Server is managed in a domain, and you want to use its fully qualified domain name (FQDN) to connect to NetBrain Application Server.
1)Run the ifconfig command to find your network interface name. In the following example, the network interface name is ens160.
Example:
[root@netbrain_data_server ~]# ifconfig
ens160: flags=4163<UP,BROADCAST,RUNNING,MULTICAST> mtu 1500
inet6 fe80::e80:8f64:655c:4c32 prefixlen 64 scopeid 0x20<link>
ether 00:0c:29:6e:55:29 txqueuelen 1000 (Ethernet)
RX packets 124 bytes 8200 (0.0 KiB)
RX errors 0 dropped 0 overruns 0 frame 0
TX packets 13 bytes 2334 (2.2 KiB)
TX errors 0 dropped 0 overruns 0 carrier 0 collisions 0
lo: flags=73<UP,LOOPBACK,RUNNING> mtu 65536
inet 127.0.0.1 netmask 255.0.0.0
inet6 ::1 prefixlen 128 scopeid 0x10<host>
loop txqueuelen 1 (Local Loopback)
RX packets 0 bytes 0 (0.0 B)
RX errors 0 dropped 0 overruns 0 frame 0
TX packets 0 bytes 0 (0.0 B)
TX errors 0 dropped 0 overruns 0 carrier 0 collisions 0
2)Run the vi /etc/sysconfig/network-scripts/ifcfg-<interfacename> command to edit the configuration file of the network interface and save the changes. The <interfacename> is the network interface name you find in step 1). For how to modify the configuration file, see Appendix: Editing a File with VI Editor for more details.
Example: vi /etc/sysconfig/network-scripts/ifcfg-ens160
TYPE="Ethernet"
BOOTPROTO="static"
DEFROUTE="yes"
PEERDNS="no"
PEERROUTES="yes"
IPV4_FAILURE_FATAL="no"
IPV6INIT="yes"
IPV6_AUTOCONF="yes"
IPV6_DEFROUTE="yes"
IPV6_PEERDNS="yes"
IPV6_PEERROUTES="yes"
IPV6_FAILURE_FATAL="no"
IPV6_ADDR_GEN_MODE="stable-privacy"
NAME="ens160"
UUID="8c9772d4-99cd-4fb6-bf8a-c6d808ada124"
DEVICE="ens160"
ONBOOT="yes"
IPADDR="10.10.3.142"
PREFIX="22"
GATEWAY="10.10.7.254"
DNS1="10.10.10.7"
3)Run the systemctl restart network command to restart the network service.
4)Run the ifconfig command to check whether the IP configuration takes effect. If it does not take effect, restart the server, and then run the ifconfig command to check the IP configuration again.
5.Run the ./configure_netbrain script under the /root directory to configure the following parameters of NetBrain Database Server one by one with an interactive command line.
Note: The value in the brackets is the default value of the parameter. You can press the Enter key to keep the default value and move to the next parameter configuration.
Note: The values of the username and password of the MongoDB Server and Index Server cannot contain any of the following special characters, and their length cannot exceed 64 characters.
{ } [ ] : " , ' | < > @ & ^ % \ and spaces
Note: If you didn't configure a static IP for NetBrain Database Server, you must enter 0.0.0.0 and specify its FQDN as below.
[root@netbrain_data_server ~]# ./configure_netbrain
NOTE: If you want to change the CPU or Memory of this machine, please complete those tasks before running this tool at the first time. Please also make sure the machine time is correct.
Continue the configuration [no]: yes
Please enter the expected database username [mongodb]:
Please enter the expected database password:
Please enter the expected database password again:
The data path for the database [/home/mongodb/data]:
The IP address of this machine (enter 0.0.0.0 to use FQDN) []: 0.0.0.0
Please enter the fully qualified domain name of this machine: netbrain_data_server.test.com
The bind port of this database [27017]:
Please enter the expected Elasticsearch username [admin]:
Please enter the expected Elasticsearch password:
Please enter the expected Elasticsearch password again:
Require SSL [no]:
Configure Service Monitor [no]: yes
Please enter the future NetBrain Web API Server URL [http://localhost/ServicesAPI]: http://10.10.3.141/ServicesAPI
After the configuration, the script starts to initialize the services of the MongoDB Server, License Agent Server, Index Server, and Service Monitor.
Database username: mongodb
Database password: ******
Database path: /home/mongodb/data
Bind IP: 0.0.0.0
Bind FQDN: netbrain_data_server.test.com
Database port: 27017
Elasticsearch username: admin
Elasticsearch password: ******
Require SSL: no
Configure Service Monitor: yes
Web API Server URL: http://10.10.3.141/ServicesAPI
Restarting MongoDB service, please wait.
MongoDB shell version: 3.6.4
connecting to: mongodb://netbrain_data_server.test.com:27017/test
MongoDB server version: 3.6.4
bye
Successfully connected to MongoDB node: netbrain_data_server.test.com:27017
Successfully configured replica set of MongoDB.
Please wait.....
MongoDB shell version: 3.6.4
connecting to: 127.0.0.1:27017/admin
MongoDB server version: 3.6.4
Successfully added user: {
"user" : "mongodb",
"roles" : [
{
"role" : "root" ,
"db" : "admin"
}
]
}
Successfully added user “mongodb” to MongoDB.
MongoDB shell version: 3.6.4
connecting to: mongodb://netbrain_data_server.test.com:27017/
MongoDB server version: 3.6.4
bye
Successfully logged into MongoDB with username "mongodb".
Restarting License Agent service. Please wait...
Configuring Service Monitor.
Configuring Elasticsearch.
Successfully updated NetBrain Elasticsearch user: admin
Restarting elasticsearch service. Please wait...
Re-initializing the Elasticsearch data.
Restarting elasticsearch service again. Please wait...
Configuration completed.
6.Run the following commands to look into the status of the MongoDB Server, Index Server, License Agent Server, and Service Monitor individually.
▪service mongod status
[root@netbrain_data_server ~]# service mongod status
mongod.service - SYSV: Mongo is a scalable, document-oriented database.
Loaded: loaded (/etc/rc.d/init.d/mongodnetbrain; bad; vendor preset: disabled)
Drop-In: /etc/systemd/system/mongodnetbrain.service.d
50-CPUQuota.conf, 50-MemoryLimit.conf
Active: active (running) since Wed 2018-10-24 03:26:04 EDT; 20min ago
Docs: man:systemd-sysv-generator(8)
Main PID: 2332 (mongod)
CGroup: /system.slice/mongodnetbrain.service
3840 /bin/mongod -f /home/mongodb/mongod.conf
▪service elasticsearch status
[root@netbrain_data_server ~]# service elasticsearch status
elasticsearch.service - LSB: This service manages the elasticsearch daemon
Loaded: loaded (/etc/rc.d/init.d/elasticsearch; bad; vendor preset: disabled)
Drop-In: /etc/systemd/system/elasticsearch.service.d
50-CPUQuota.conf
Active: active (running) since Wed 2018-10-24 03:27:10 EDT; 16min ago
Docs: man:systemd-sysv-generator(8)
CGroup: /system.slice/elasticsearch.service
3999 /bin/java -Xms4g -Xmx4g -XX:+UseConcMarkSweepGC -XX:CMSInit...
4338 /bin/java -Xms4g -Xmx4g -XX:+UseConcMarkSweepGC -XX:CMSInit...
▪service netbrainlicense status
[root@netbrain_data_server ~]# service netbrainlicense status
netbrainlicense.service - SYSV: This shell script takes care of starting and stopping NetBrain license agent service.
Loaded: loaded (/etc/rc.d/init.d/netbrainlicense; bad; vendor preset: disabled)
Active: active (running) service netbrainlicense status
Docs: man:systemd-sysv-generator(8)
CGroup: /system.slice/netbrainlicense.service
711 /usr/bin/netbrainlicense/licensed -f /etc/licensed/licensed.conf
▪service netbrainagent status
[root@netbrain_data_server ~]# service netbrainagent status
Redirecting to /bin/systemctl status netbrainagent.service
netbrainagent.service - NetBrain Service Monitor Agent Daemon
Loaded: loaded (/usr/lib/systemd/system/netbrainagent.service; enabled; vendor preset: disabled)
Active: active (running) since Wed 2018-10-24 03:26:45 EDT; 9min ago
Main PID: 13994 (python3)
CGroup: /system.slice/netbrainagent.service
13994 /home/nbagent/python/bin/python3 NBAgent.py start
14096 /home/nbagent/python/bin/python3 forwarder.py
14097 /home/nbagent/python/bin/python3 collector.py start
14098 /home/nbagent/python/bin/python3 receiver.py start
Using vSphere Client
1.Complete the following steps to deploy NetBrain Database Server onto VMware ESXi by using vSphere Client.
1)Click File > Deploy OVF Template from the ribbon toolbar.
2)Click Browse to specify the location of the NetBrain_Database_Appliance_v71a.ova file, and then click Next.
3)Review the details of the OVF template and click Next.
4)Enter the name of the virtual machine, and then click Next.
5)Specify the format to store the virtual disk, and then click Next.
▪Thick Provision Lazy Zeroed (default option) — all the storage space on a datastore is provisioned to the virtual disk files when the virtual machine is created. When the virtual machine writes new data to the disk for the first time, the blocks containing older data on the storage device are cleared.
▪Thick Provision Eager Zeroed — all the storage space on a datastore is provisioned to the virtual disk files when the VM is created. Blocks on the physical storage device are formatted with zeros to overwrite any older data.
▪Thin Provision — only a certain amount of storage space on a datastore is provisioned to the virtual disk files when the VM is created.
6)Review the deployment settings and click Finish.
7)A dialog box prompts after the deployment is completed successfully. Click Close.
Tip: To make the virtual machine automatically powered on after the deployment, you can select the Power on after deployment check box and skip step 2.
2.Click the ![]() icon from the toolbar to start the virtual machine manually if it is not powered on automatically.
icon from the toolbar to start the virtual machine manually if it is not powered on automatically.
3.Enter the username root and password admin at the VMware console to log into NetBrain Database Server.
CentOS Linux 7 (Core)
Kernel 3.10.0-514.e17.x86_64 on an X86_64
netbrain_data_server login: root
Password:
Last Login: Sat Sep 16 12:33:05 on tty1
[root@netbrain_data_server ~]#
4.Configure a static IP address for NetBrain Database Server as follows:
Note: You can skip this step if NetBrain Database Server is managed in a domain, and you want to use its fully qualified domain name (FQDN) to connect to NetBrain Application Server.
1)Run the ifconfig command to find your network interface name. In the following example, the network interface name is ens160.
Example:
[root@netbrain_data_server ~]# ifconfig
ens160: flags=4163<UP,BROADCAST,RUNNING,MULTICAST> mtu 1500
inet6 fe80::e80:8f64:655c:4c32 prefixlen 64 scopeid 0x20<link>
ether 00:0c:29:6e:55:29 txqueuelen 1000 (Ethernet)
RX packets 124 bytes 8200 (0.0 KiB)
RX errors 0 dropped 0 overruns 0 frame 0
TX packets 13 bytes 2334 (2.2 KiB)
TX errors 0 dropped 0 overruns 0 carrier 0 collisions 0
lo: flags=73<UP,LOOPBACK,RUNNING> mtu 65536
inet 127.0.0.1 netmask 255.0.0.0
inet6 ::1 prefixlen 128 scopeid 0x10<host>
loop txqueuelen 1 (Local Loopback)
RX packets 0 bytes 0 (0.0 B)
RX errors 0 dropped 0 overruns 0 frame 0
TX packets 0 bytes 0 (0.0 B)
TX errors 0 dropped 0 overruns 0 carrier 0 collisions 0
2)Run the vi /etc/sysconfig/network-scripts/ifcfg-<interfacename> command to edit the configuration file of the network interface and save the changes. The <interfacename> is the network interface name you find in step 1). For how to modify the configuration file, see Appendix: Editing a File with VI Editor for more details.
Example: vi /etc/sysconfig/network-scripts/ifcfg-ens160
TYPE="Ethernet"
BOOTPROTO="static"
DEFROUTE="yes"
PEERDNS="no"
PEERROUTES="yes"
IPV4_FAILURE_FATAL="no"
IPV6INIT="yes"
IPV6_AUTOCONF="yes"
IPV6_DEFROUTE="yes"
IPV6_PEERDNS="yes"
IPV6_PEERROUTES="yes"
IPV6_FAILURE_FATAL="no"
IPV6_ADDR_GEN_MODE="stable-privacy"
NAME="ens160"
UUID="8c9772d4-99cd-4fb6-bf8a-c6d808ada124"
DEVICE="ens160"
ONBOOT="yes"
IPADDR="10.10.3.142"
PREFIX="22"
GATEWAY="10.10.7.254"
DNS1="10.10.10.7"
3)Run the systemctl restart network command to restart the network service.
4)Run the ifconfig command to check whether the IP configuration takes effect. If it does not take effect, restart the server, and then run the ifconfig command to check the IP configuration again.
5.Run the ./configure_netbrain script to configure the following parameters of NetBrain Database Server one by one with an interactive command line.
Note: The value in the brackets is the default value of the parameter. You can press the Enter key to keep the default value and move to the next parameter configuration.
Note: The values of the username and password of the MongoDB Server and Index Server cannot contain any of the following special characters, and their length cannot exceed 64 characters.
{ } [ ] : " , ' | < > @ & ^ % \ and spaces
Note: If you didn't configure a static IP for NetBrain Database Server, you must enter 0.0.0.0 and specify its FQDN as below.
[root@netbrain_data_server ~]# ./configure_netbrain
NOTE: If you want to change the CPU or Memory of this machine, please complete those tasks before running this tool at the first time. Please also make sure the machine time is correct.
Continue the configuration [no]: yes
Please enter the expected database username [mongodb]:
Please enter the expected database password:
Please enter the expected database password again:
The data path for the database [/home/mongodb/data]:
The IP address of this machine (enter 0.0.0.0 to use FQDN) []: 0.0.0.0
Please enter the fully qualified domain name of this machine: netbrain_data_server.test.com
The bind port of this database [27017]:
Please enter the expected Elasticsearch username [admin]:
Please enter the expected Elasticsearch password:
Please enter the expected Elasticsearch password again:
Require SSL [no]:
Configure Service Monitor [no]: yes
Please enter the future NetBrain Web API Server URL [http://localhost/ServicesAPI]: http://10.10.3.141/ServicesAPI
After the configuration, the script starts to initialize the services of the MongoDB Server, License Agent Server, Index Server, and Service Monitor.
Database username: mongodb
Database password: ******
Database path: /home/mongodb/data
Bind IP: 0.0.0.0
Bind FQDN: netbrain_data_server.test.com
Database port: 27017
Elasticsearch username: admin
Elasticsearch password: ******
Require SSL: no
Configure Service Monitor: yes
Web API Server URL: http://10.10.3.141/ServicesAPI
Restarting MongoDB service, please wait.
MongoDB shell version: 3.6.4
connecting to: mongodb://netbrain_data_server.test.com:27017/test
MongoDB server version: 3.6.4
bye
Successfully connected to MongoDB node: netbrain_data_server.test.com:27017
Successfully configured replica set of MongoDB.
Please wait.....
MongoDB shell version: 3.6.4
connecting to: 127.0.0.1:27017/admin
MongoDB server version: 3.6.4
Successfully added user: {
"user" : "mongodb",
"roles" : [
{
"role" : "root" ,
"db" : "admin"
}
]
}
Successfully added user “mongodb” to MongoDB.
MongoDB shell version: 3.6.4
connecting to: mongodb://netbrain_data_server.test.com:27017/
MongoDB server version: 3.6.4
bye
Successfully logged into MongoDB with username "mongodb".
Restarting License Agent service. Please wait...
Configuring Service Monitor.
Configuring Elasticsearch.
Successfully updated NetBrain Elasticsearch user: admin
Restarting elasticsearch service. Please wait...
Re-initializing the Elasticsearch data.
Restarting elasticsearch service again. Please wait...
Configuration completed.
6.Run the following commands to look into the status of the MongoDB Server, Index Server, License Agent Server, and Service Monitor individually.
▪service mongod status
[root@netbrain_data_server ~]# service mongod status
mongod.service - SYSV: Mongo is a scalable, document-oriented database.
Loaded: loaded (/etc/rc.d/init.d/mongod)
Drop-In: /etc/systemd/system/mongod.service.d
50-CPUQuota.conf, 50-MemoryLimit.conf
Active: active (running) since Wed 2018-12-07 03:26:04 EDT; 20min ago
Docs: man:systemd-sysv-generator(8)
Main PID: 2332 (mongod)
CGroup: /system.slice/mongod.service
3840 /bin/mongod -f /home/mongodb/mongod.conf
▪service elasticsearch status
[root@netbrain_data_server ~]# service elasticsearch status
elasticsearch.service - LSB: This service manages the elasticsearch daemon
Loaded: loaded (/etc/rc.d/init.d/elasticsearch; bad; vendor preset: disabled)
Drop-In: /etc/systemd/system/elasticsearch.service.d
50-CPUQuota.conf
Active: active (running) since Wed 2018-12-07 03:27:10 EDT; 16min ago
Docs: man:systemd-sysv-generator(8)
CGroup: /system.slice/elasticsearch.service
3999 /bin/java -Xms4g -Xmx4g -XX:+UseConcMarkSweepGC -XX:CMSInit...
4338 /bin/java -Xms4g -Xmx4g -XX:+UseConcMarkSweepGC -XX:CMSInit...
▪service netbrainlicense status
[root@netbrain_data_server ~]# service netbrainlicense status
netbrainlicense.service - SYSV: This shell script takes care of starting and stopping NetBrain license agent service.
Loaded: loaded (/etc/rc.d/init.d/netbrainlicense; bad; vendor preset: disabled)
Active: active (running) service netbrainlicense status
Docs: man:systemd-sysv-generator(8)
CGroup: /system.slice/netbrainlicense.service
711 /usr/bin/netbrainlicense/licensed -f /etc/licensed/licensed.conf
▪service netbrainagent status
[root@netbrain_data_server ~]# service netbrainagent status
Redirecting to /bin/systemctl status netbrainagent.service
netbrainagent.service - NetBrain Service Monitor Agent Daemon
Loaded: loaded (/usr/lib/systemd/system/netbrainagent.service; enabled; vendor preset: disabled)
Active: active (running) 2018-12-07 03:26:45 EDT; 9min ago
Main PID: 13994 (python3)
CGroup: /system.slice/netbrainagent.service
13994 /home/nbagent/python/bin/python3 NBAgent.py start
14096 /home/nbagent/python/bin/python3 forwarder.py
14097 /home/nbagent/python/bin/python3 collector.py start
14098 /home/nbagent/python/bin/python3 receiver.py start
Parameters
Refer to the following table for the parameters of NetBrain Database Server.
Parameter |
Default Value |
Description |
|---|---|---|
Continue the Configuration |
no |
Whether to continue the configuration for NetBrain Database Server. Type yes to continue to run the configuration script. |
database username |
mongodb |
The admin username used to log into the MongoDB Server. You can press the Enter key to keep the default value or type a new username. |
database password |
|
Type the admin password used to log into the MongoDB Server. |
data path for the database |
/home/mongodb/data |
The storage path for all MongoDB data files. You can press the Enter key to keep the default value or type another directory path. To store the MongoDB data files under another directory, you must create it beforehand. Note: Make sure the destination directory has more than 50GB free space to save all the data files. The value cannot be modified anymore after it is specified. Note: Shared network directories through the mount command are not supported. Tip: By default, the /home directory is used to store all the data of the MongoDB Server and Index Server, which has 140GB space in total. |
IP address of this machine |
|
The IP address of NetBrain Database Server. It is empty if you did not configure a static IP for it. Tip: To use FQDN of NetBrain Database Server to connect to NetBrain Application Server, type 0.0.0.0. Note: If the IP address of NetBrain Database Server is used to connect to NetBrain Application Server, then the IP address cannot be modified after it is specified; If the FQDN of NetBrain Database Server is used to connect to NetBrain Application Server, then the FQDN cannot be modified after it is specified. |
fully qualified domain name of this machine |
|
The FQDN of NetBrain Database Server. Note: It is only required if 0.0.0.0.0 is typed in IP address of this machine. |
bind port of this database |
27017 |
The port number that the MongoDB service listens to. You can press the Enter key to keep the default value or type a new port. Note: The value cannot be modified anymore after it is specified. |
Elasticsearch username |
admin |
The admin username used to log into the Index Server. You can press the Enter key to keep the default value or type a new username. |
Elasticsearch password |
|
Type the admin password used to log into the Index Server. |
Require SSL |
no |
Whether to enable the encrypted connections to the MongoDB Server, License Server, and Elasticsearch. To enable SSL, type yes. Note: SSL cannot be enabled or disabled separately for MongoDB, License Agent, or Elasticsearch. |
Certificate path |
/etc/ssl/cert.pem |
The certificate file name and storage path. You must upload the certificate file under the specified path. Note: It is required only if Require SSL is enabled. |
Certificate key path |
etc/ssl/key.pem |
The key file name and storage path. You must upload the key file under the specified path. Note: It is required only if Require SSL is enabled. |
Certificate Authority path |
etc/ssl/ca.pem |
The file name and storage path of the root or class 2 CA file used to authenticate the CA that issues the SSL certificates for MongoDB, License Agent, and Elasticsearch. You must upload the CA file under the specified path. Note: It is required only if Require SSL is enabled. |
Configure Service Monitor |
no |
Whether to enable the Service Monitor. Type yes to configure and enable the Server Monitor. |
Future NetBrain Web API Server URL |
http://localhost/ServicesAPI |
The URL to call NetBrain Web API service. Type http(s)://<IP address or FQDN of NetBrain Application Server>/ServicesAPI. Note: If SSL is enabled with https binding created for the system website in IIS Manager, use https in the URL. Besides, hostname must be specified in URL if Conduct Certificate Authority verification is enabled in later configuration. |
Conduct Certificate Authority verification |
no |
Whether to authenticate the Certificate Authority (CA) of the SSL certificate used to encrypt NetBrain system website. To authenticate it, type yes. Note: It is required only if https is typed in the NetBrain Web API Server URL. |
File path for Certificate Authority |
/etc/ssl/smca.pem |
The file name and storage path of the root or class 2 CA file used to authenticate the CA that issues the SSL certificate of NetBrain system website. You must upload the CA file under the specified path. Note: It is required only if Conduct Certificate Authority verification is enabled. Only the CA file in the Base-64 encoded X.509 (.CER) format is supported. |