Adding a Proxy Server

Contents
1.Log in to the System Management Page.
2.In the System Management page, select the Proxy Manager tab.
3.Click +Add to edit the Proxy settings.
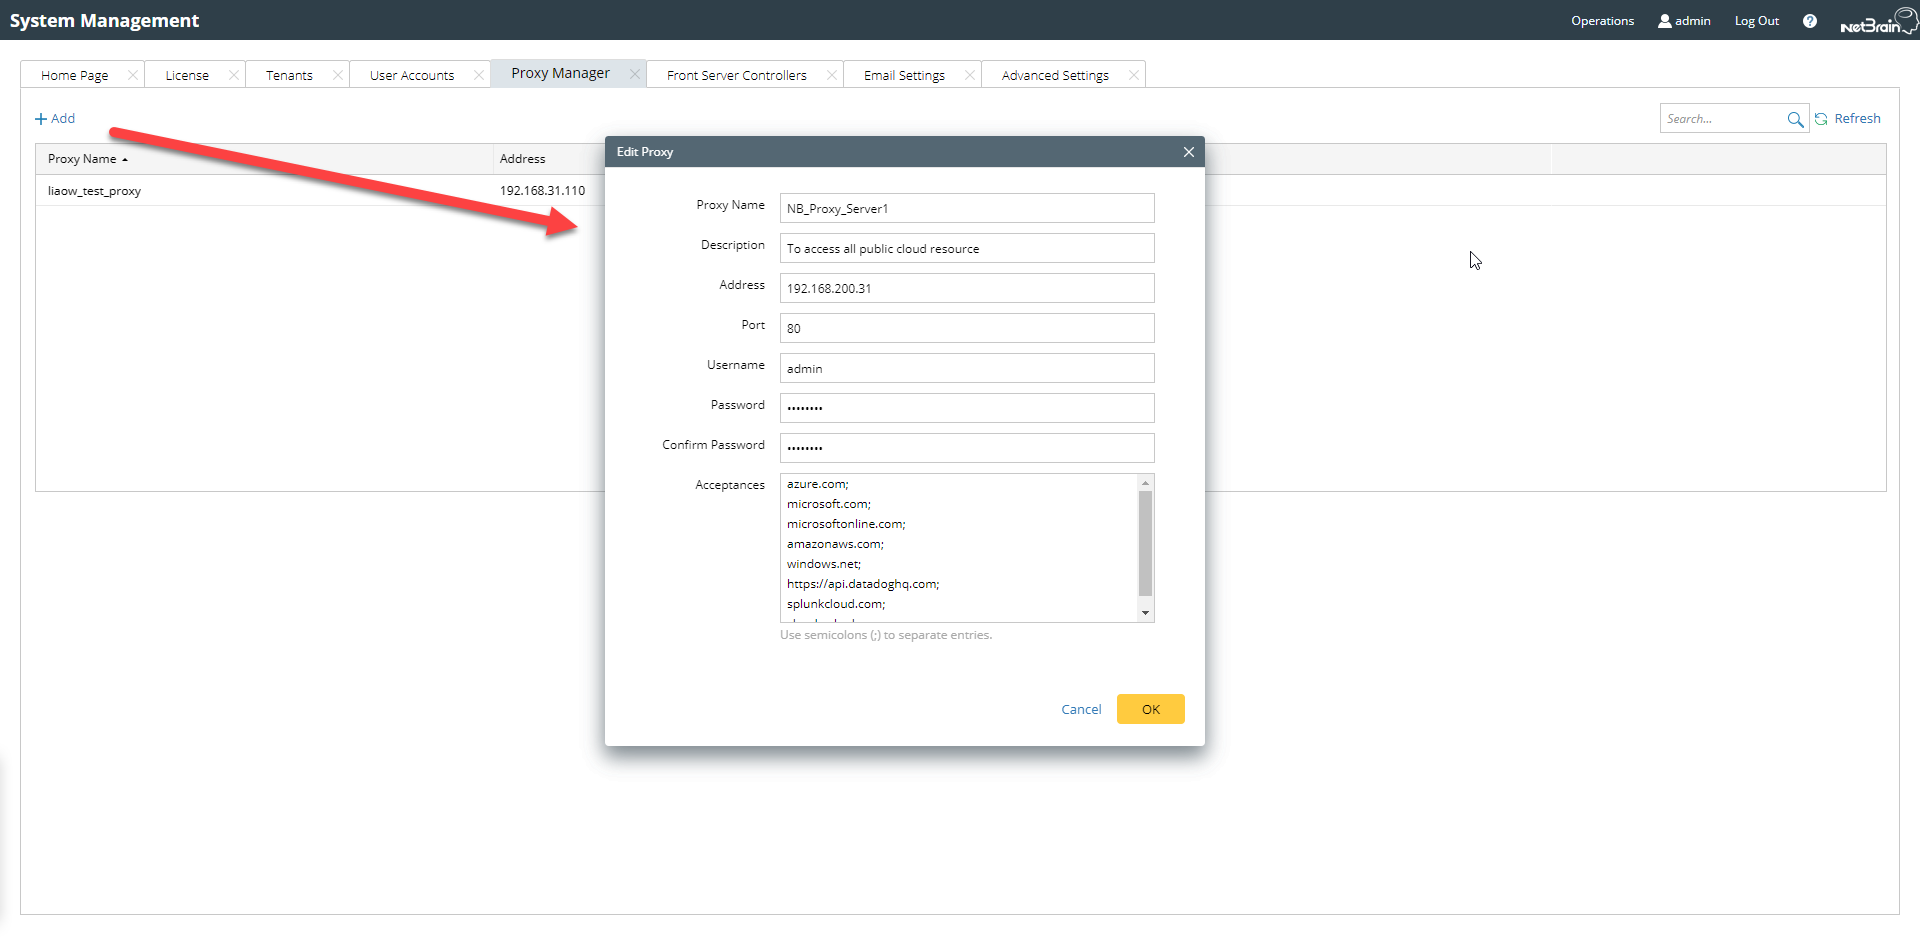
4.In the Proxy Settings page,
1)Specify the name of the Proxy Server.
2)Configure the IP address, port number and login credentials of the Proxy Server.
Note: Not all Proxy requires login.
Tip: There is no need to specify whether it is HTTP or HTTPs proxy, as the system will automatically determine the proxy type.
3)Define the acceptances field by entering the URLs that requires Proxy. This field is essentially a whitelist containing the respective IP addresses and URL suffixes.
Note: Use semicolon ";" to separate different URLs.
Tip: When adding Proxy Server, the system will automatically fill in a built-in list of well-known suffixes, including:
- azure.com
- microsoft.com
- microsoftonline.com
- amazonaws.com
- windows.net
- https://api.datadoghq.com
- splunkcloud.com
- cloud.splunk.com
4)Click OK to apply the above settings.