R11.0a-March2023
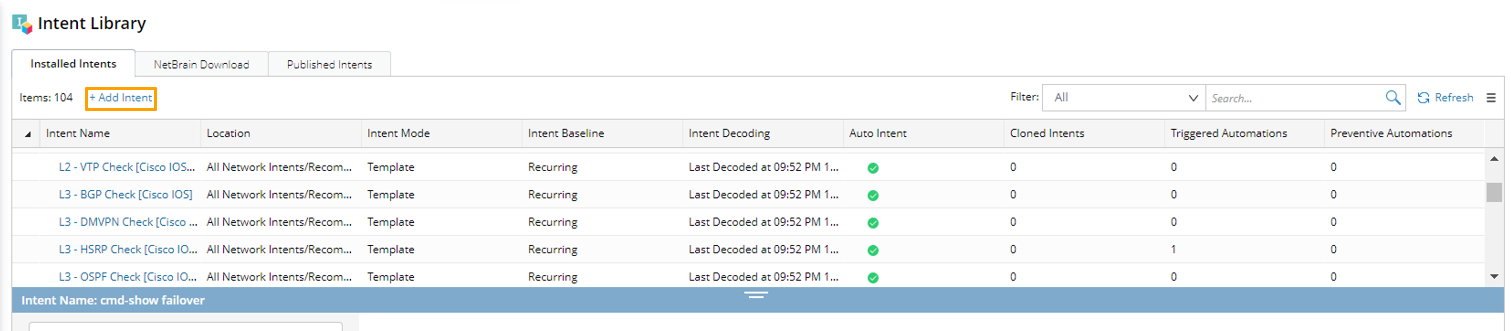
Install Intent
Follow the steps below to add an intent as the Standalone Mode or the Template Mode.
- Click + Add Intent to open the Add Intent dialog box.
- In the Add Intent dialog box, define the basic information for the added intent.

- In the Network Intent field, click Browse, then select the intent to be added in the Select Network Intents dialog box.


Note: Cloned intents and member intents of NIC cannot be selected. - In the Group field, select a group for organizing the intent to be added to the intent library. If you do not select a group, the intent will be placed in the built-in Default group.
- In the Intent Mode field, select a mode for the intent (Two options are available, Template/Standalone. Template is selected by default).
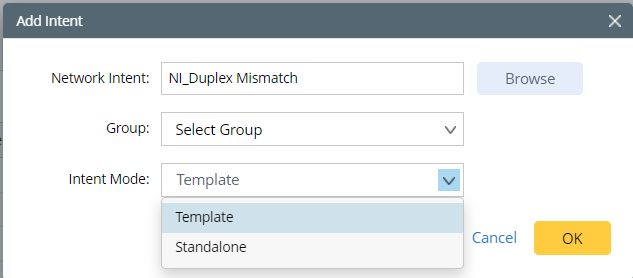
- In the Network Intent field, click Browse, then select the intent to be added in the Select Network Intents dialog box.
Alternatively, you can create a new group to organize this newly added intent.
- Click Edit Group > +Add Group.

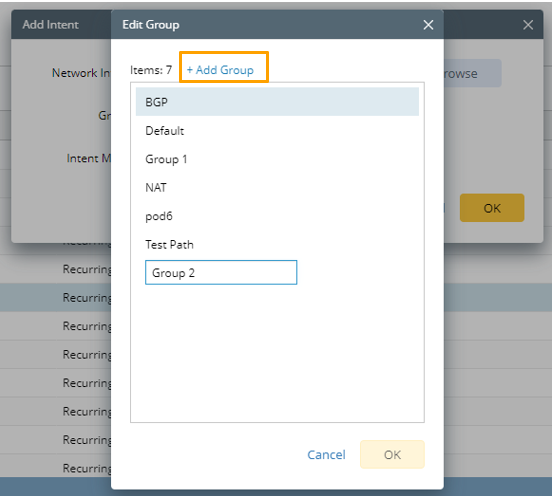
- Enter a group name, then click OK to add a new Group.
- Click OK to complete adding the intent.
Note: If the intent to be added already exists in the intent library, an error message will appear to notify you of the error. 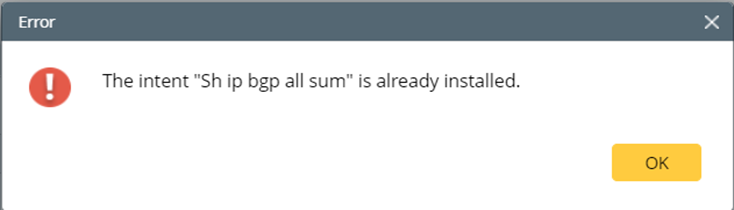
Note: If the intent to be added has been configured to have the cross-device diagnosis, and you select the Template mode for the intent, a message will pop up to notify you of the error.
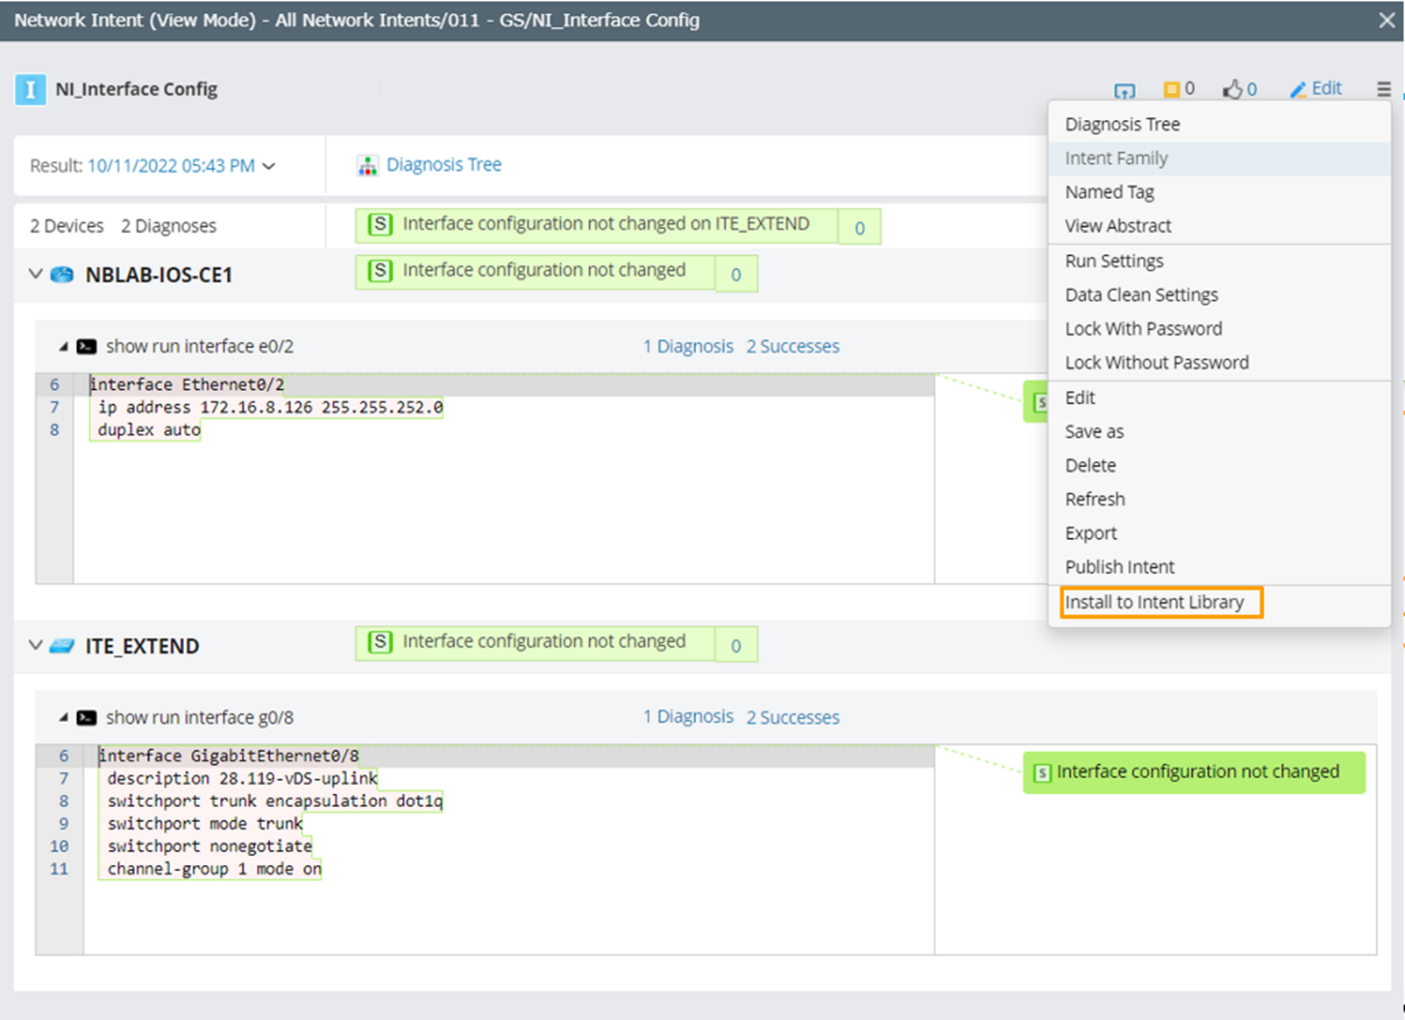
If an intent is already open in View Mode, and you want to install it to the intent library, you can complete the following steps to install the intent.
- Click Install to Intent Library from the Hamburger Menu of the Intent Details pane, and you will directly navigate to the Add Intent dialog box.
- Define basic information of the intent in the Add Intent dialog box (refer to the above steps a-c), then click OK.