10.1.9 JA Publication
Install and Reinstall Task
You can select task items from the left pane to install tasks in batch. Logs will be generated after task installation to determine the final status of task execution.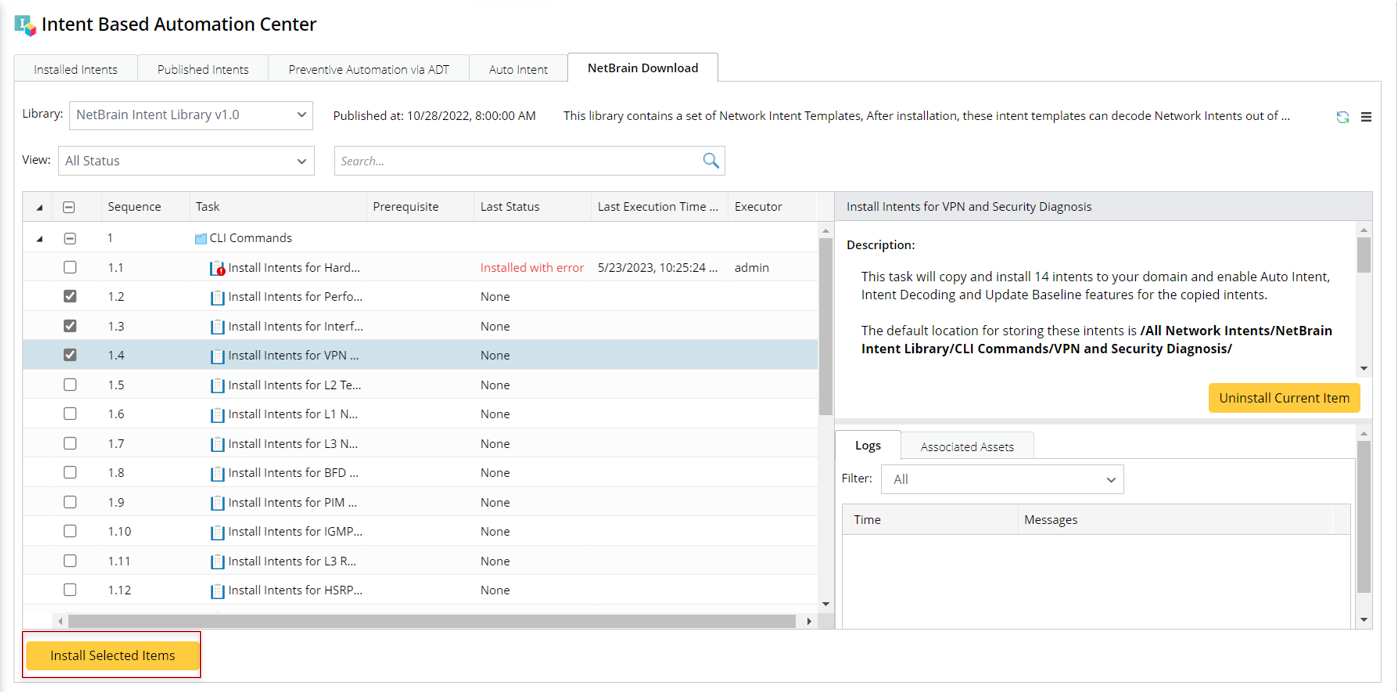

|
Note: Re-installation is supported to update any changes to the task. The existing assets in the task will be overwritten or skipped. |
Follow the steps below to install tasks: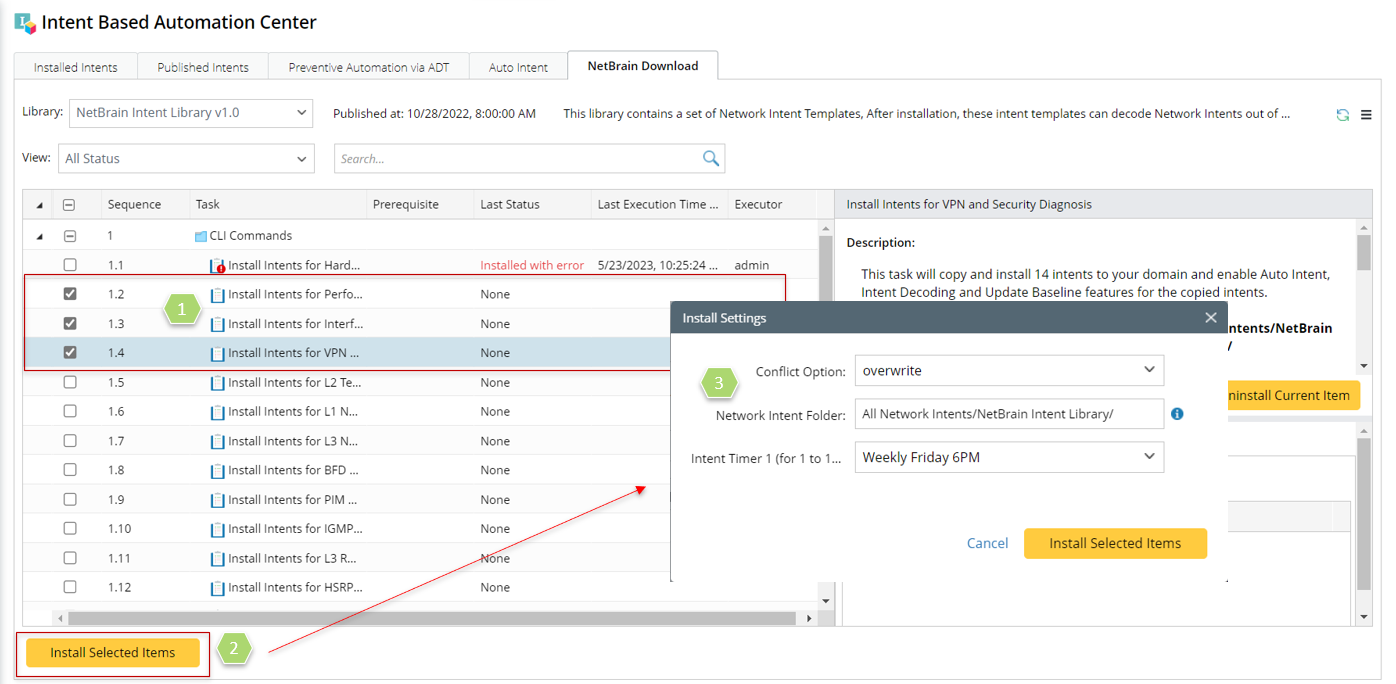
- Select one or more tasks from the tasks table in the left pane.
- Click Install Selected Items.
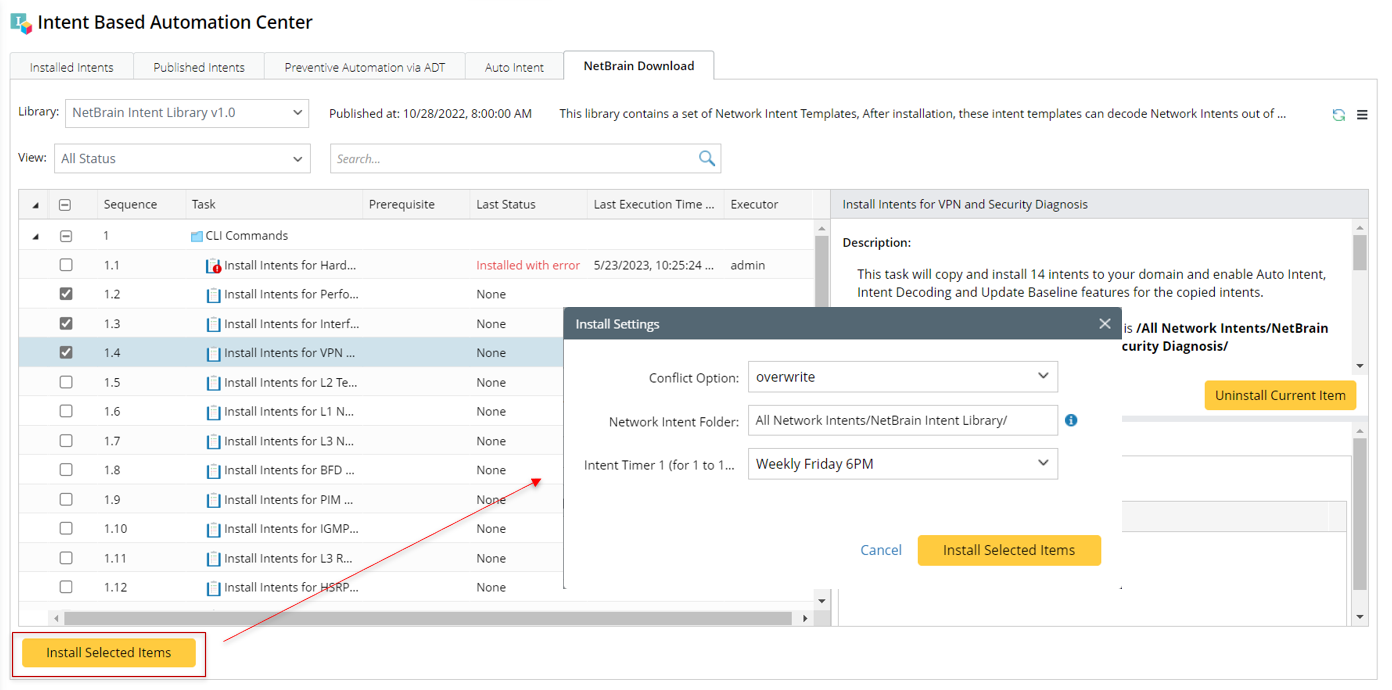
- Define the install settings in the pop-up Install Settings dialog box, then click Install Selected Items.
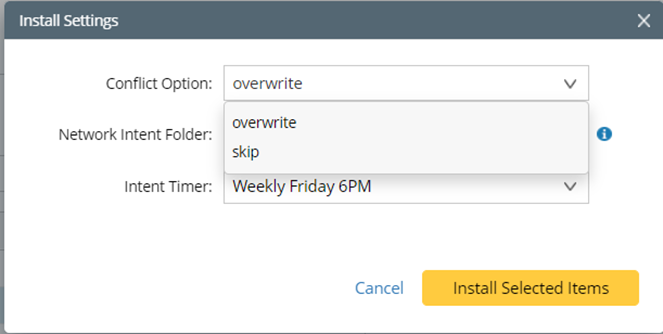
- Conflict Option: Define whether to overwrite the existing task or skip installation if the task to be installed already exists in the domain.
- Network Intent Folder: Define the folder for storing the intents to be installed.
- Intent Timer: Select the intent timer for executing the intents in this task.
The ![]() icon will appear at the bottom-left of NetworkBrain Download during task installation, and you can stop the installation process by clicking this icon.
icon will appear at the bottom-left of NetworkBrain Download during task installation, and you can stop the installation process by clicking this icon.
After successful installation, the task status will change to “Installed”.![]()
Here are some situations you may meet during installation:
- The Install Settings dialog will appear if any task requires further inputs to complete task installation so that you can refine the task to be installed.
Note: You can view the input variables stored in the library from the Hamburger menu. 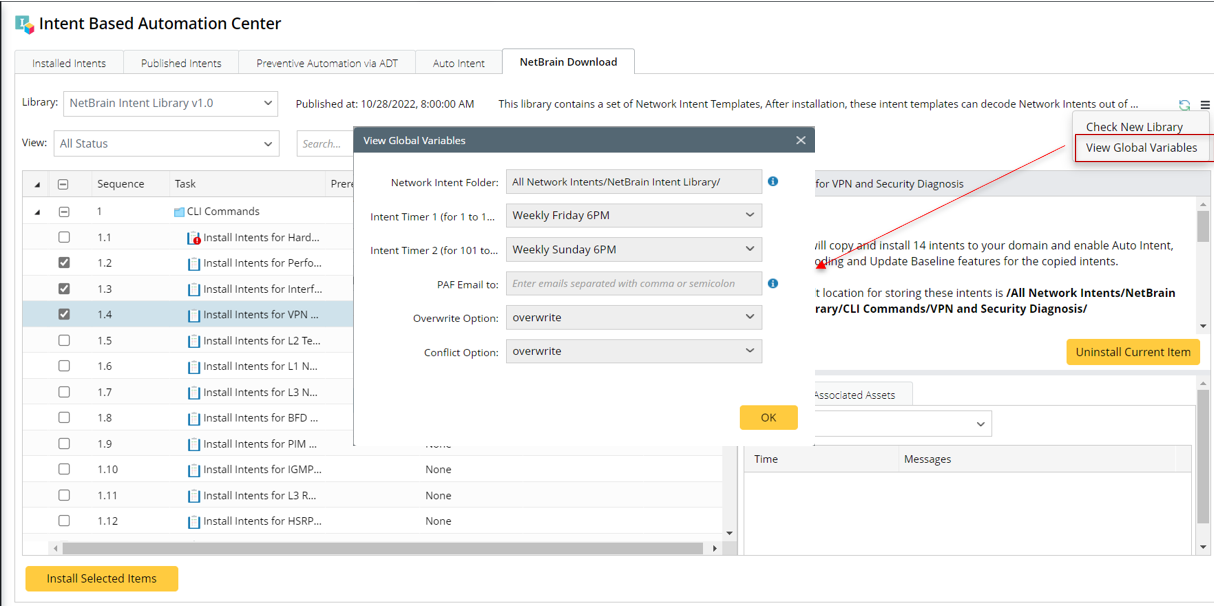
- If the task depends on other tasks, a message will remind you to execute the other tasks first. Click OK to close the message box, then you can choose to install the prerequisite tasks or cancel task installation.
