R12.1 Project Publication-2025Dec23
Create a User Account
To manually create a user account, complete the following steps:
- Log in to System Management Page.
- On the System Management page, select the User Accounts tab.
- Click Add at the upper-left corner, and then complete the settings. The following diagram presents an example:
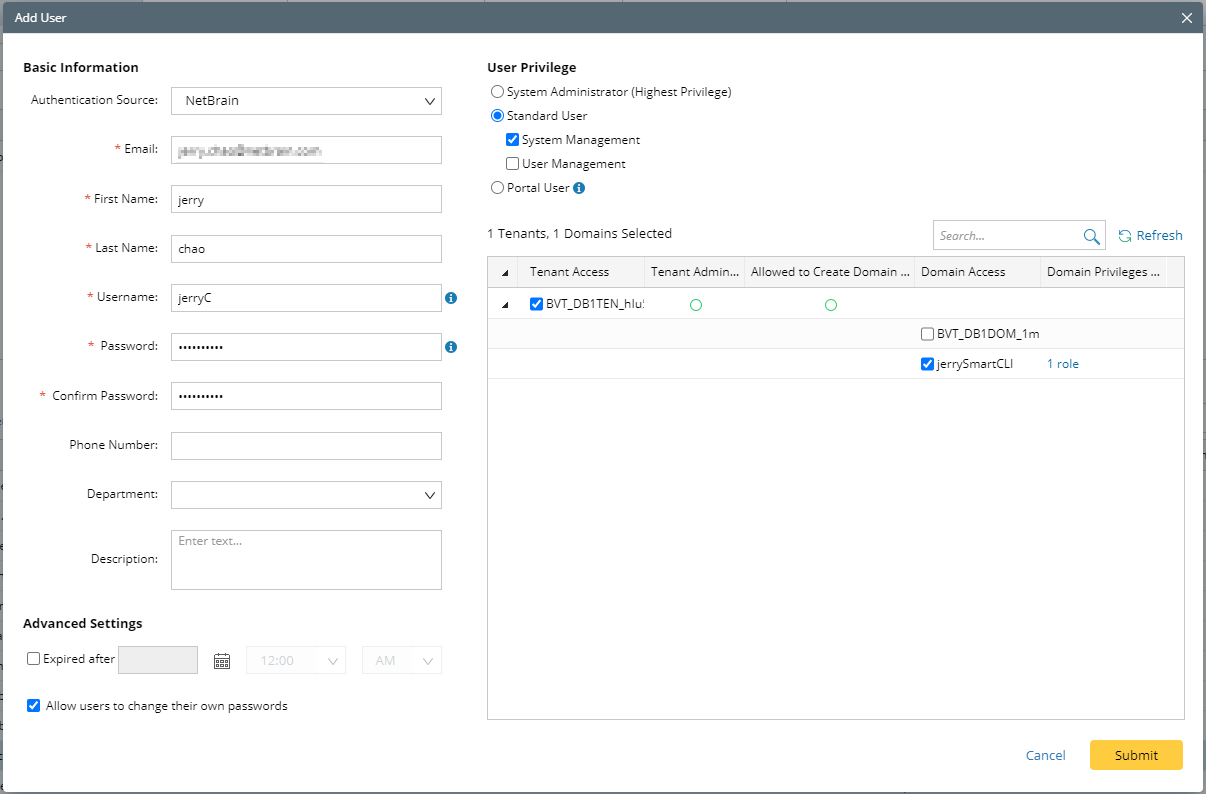
- Enter basic information. The fields marked with asterisks are mandatory.
- Email — enter a valid email address (case-insensitive).
- Username — enter a unique name in the system (case-insensitive). It cannot be modified once created.
- Password — enter a password for the username. See Configure Password Policy for more information.

Tip: You can enable users to change passwords by selecting the Allow users to change their own passwords check box. - Authentication Source — keep the default option NetBrain for manually added user accounts.
- Configure the advanced settings if necessary, including account expiration and privilege to modify/reset passwords.
- Expired after — select the check box and specify a time point after which the user account will expire.
Tip: When the validity time is reached, the user can no longer log in to the system and the status displays as Expired. If the field is not configured via external authentication, the status displays as Unavailable. See User Status for more reference. - Allowed to change individual password — select the check box to enable users to reset or change their password.
- Click Submit. The user account will be added to the Existing User List. A successful notification email will be sent to the mailbox of the newly created user if the email server is configured.